
Articles
Global scans
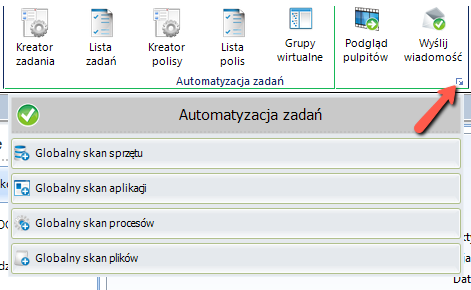
To carry out a global scan:
Hardware
Software
Processes
Files
Expand the arrow in section Remote operations->Task automation.
Resources
we start by installing an agent at the workstations Agent Installation
After installation of the agents, the user base must be filled, in this case it can be done:
Synchronization with the domain (Synchronization with AD), previously activating the module in Helix server settings.
Import of users using Importer
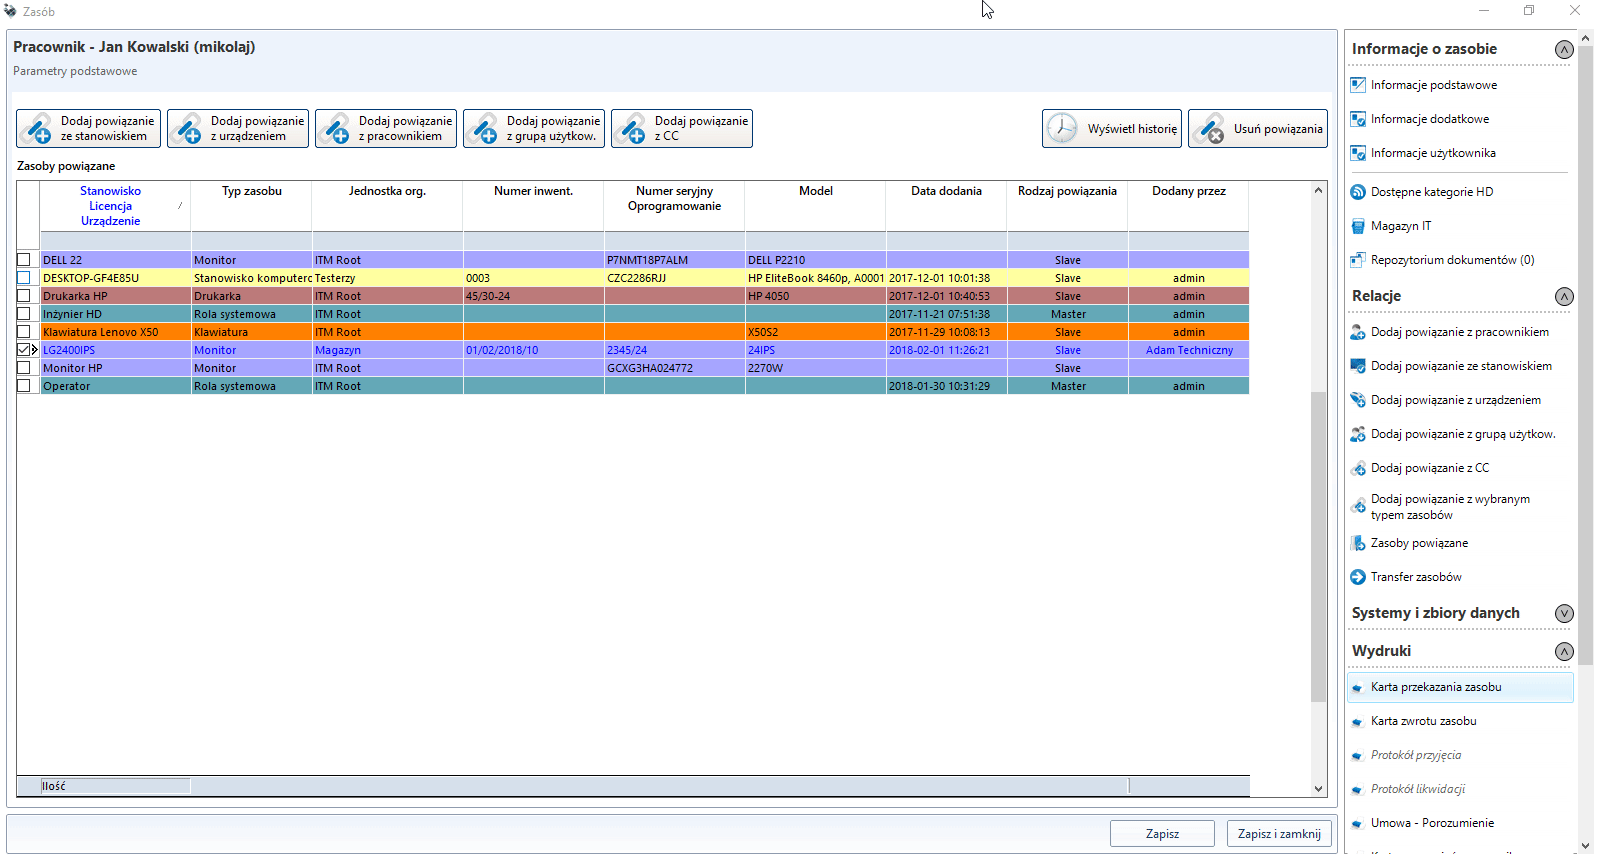
The next step will be to connect computer workstations with users -> Binding of resources
Similarly, other resources should be linked, which can also be created manually or imported using the Importer tool.
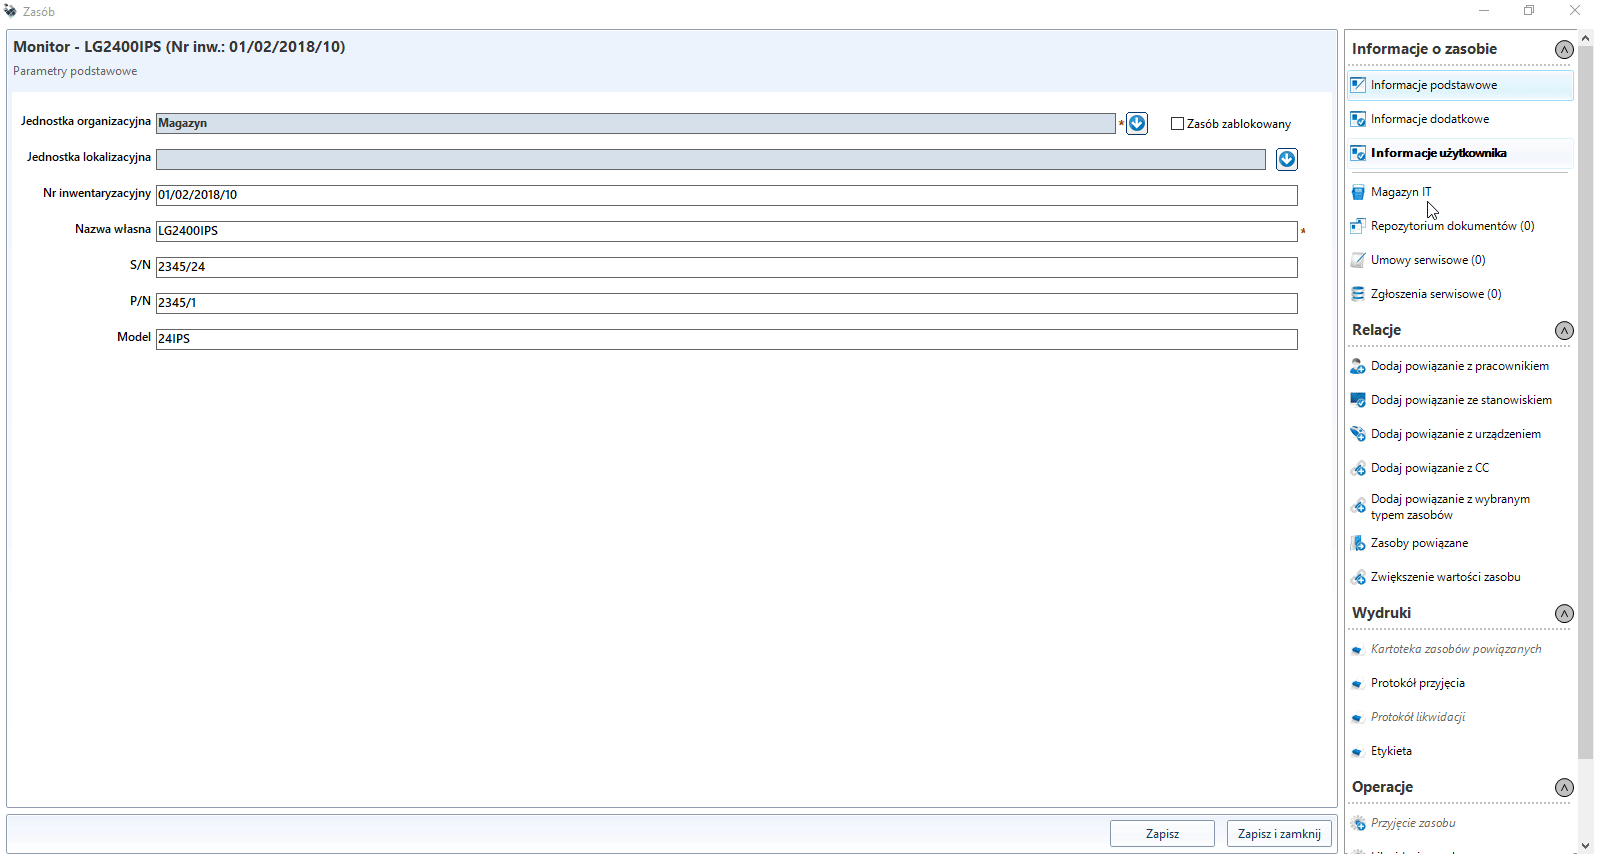
Monitor type resources can be added directly from the main job scan window, they will be automatically linked to the job to which the scan relates.
Adding resources in series
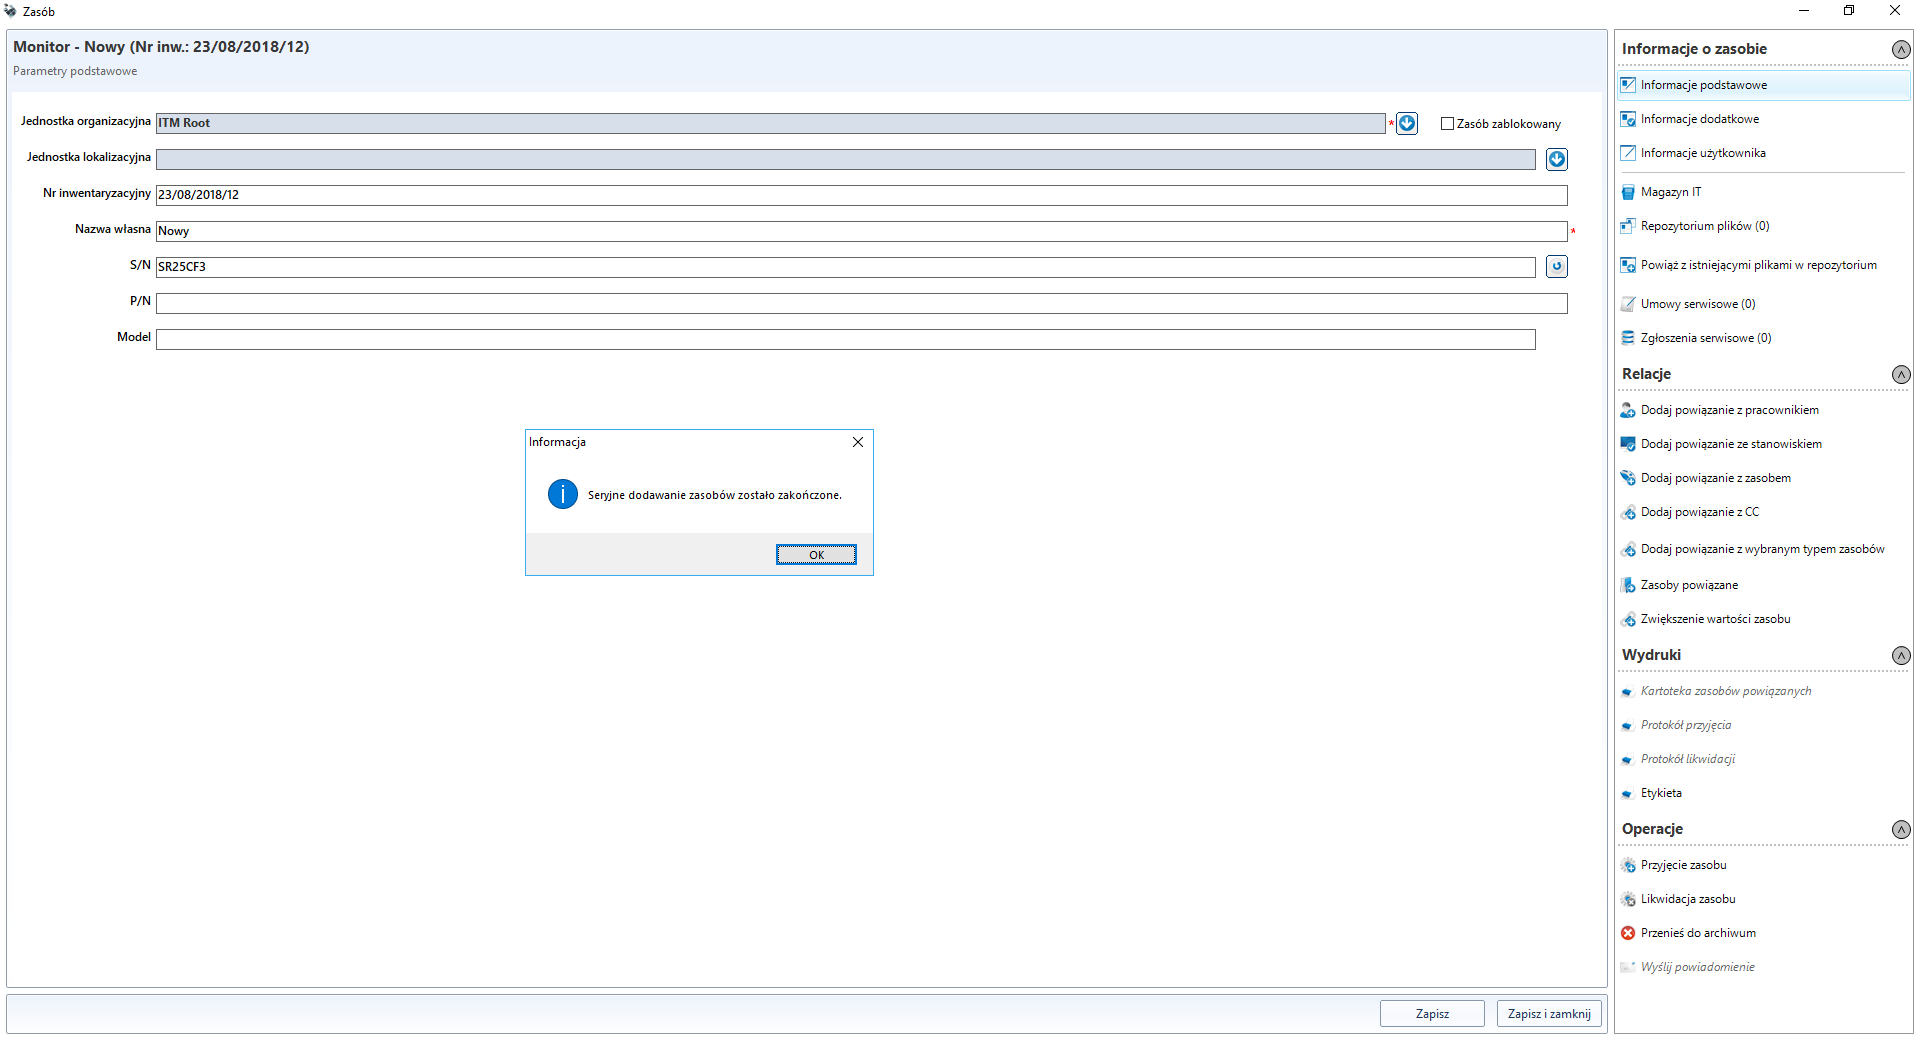
In the resource edit window next to the S/N field there is a button enabling serial adding of resources.
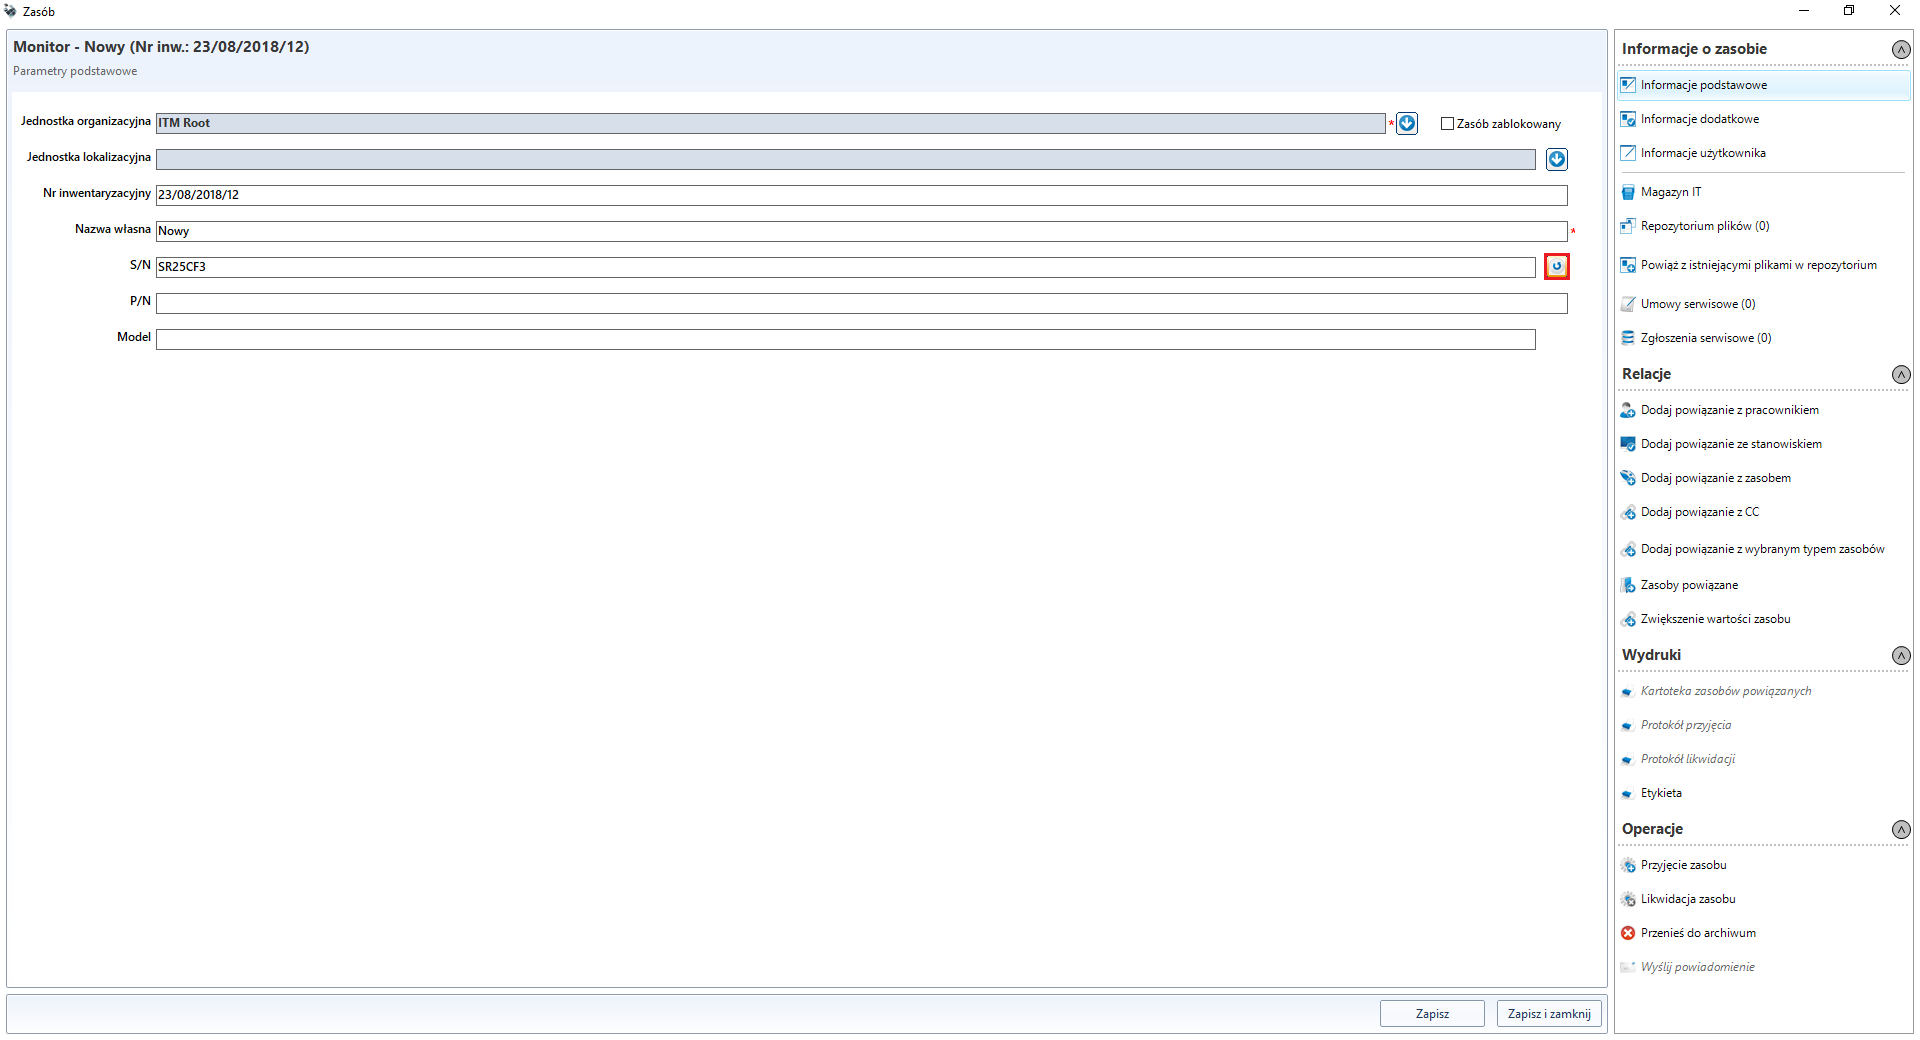
When you click on it, a window appears, allowing you to enter a list of serial numbers. In the event of a dublin entry, an appropriate balloon will be displayed on an ongoing basis. If the bubbles are not removed manually, they will be skipped during import anyway.
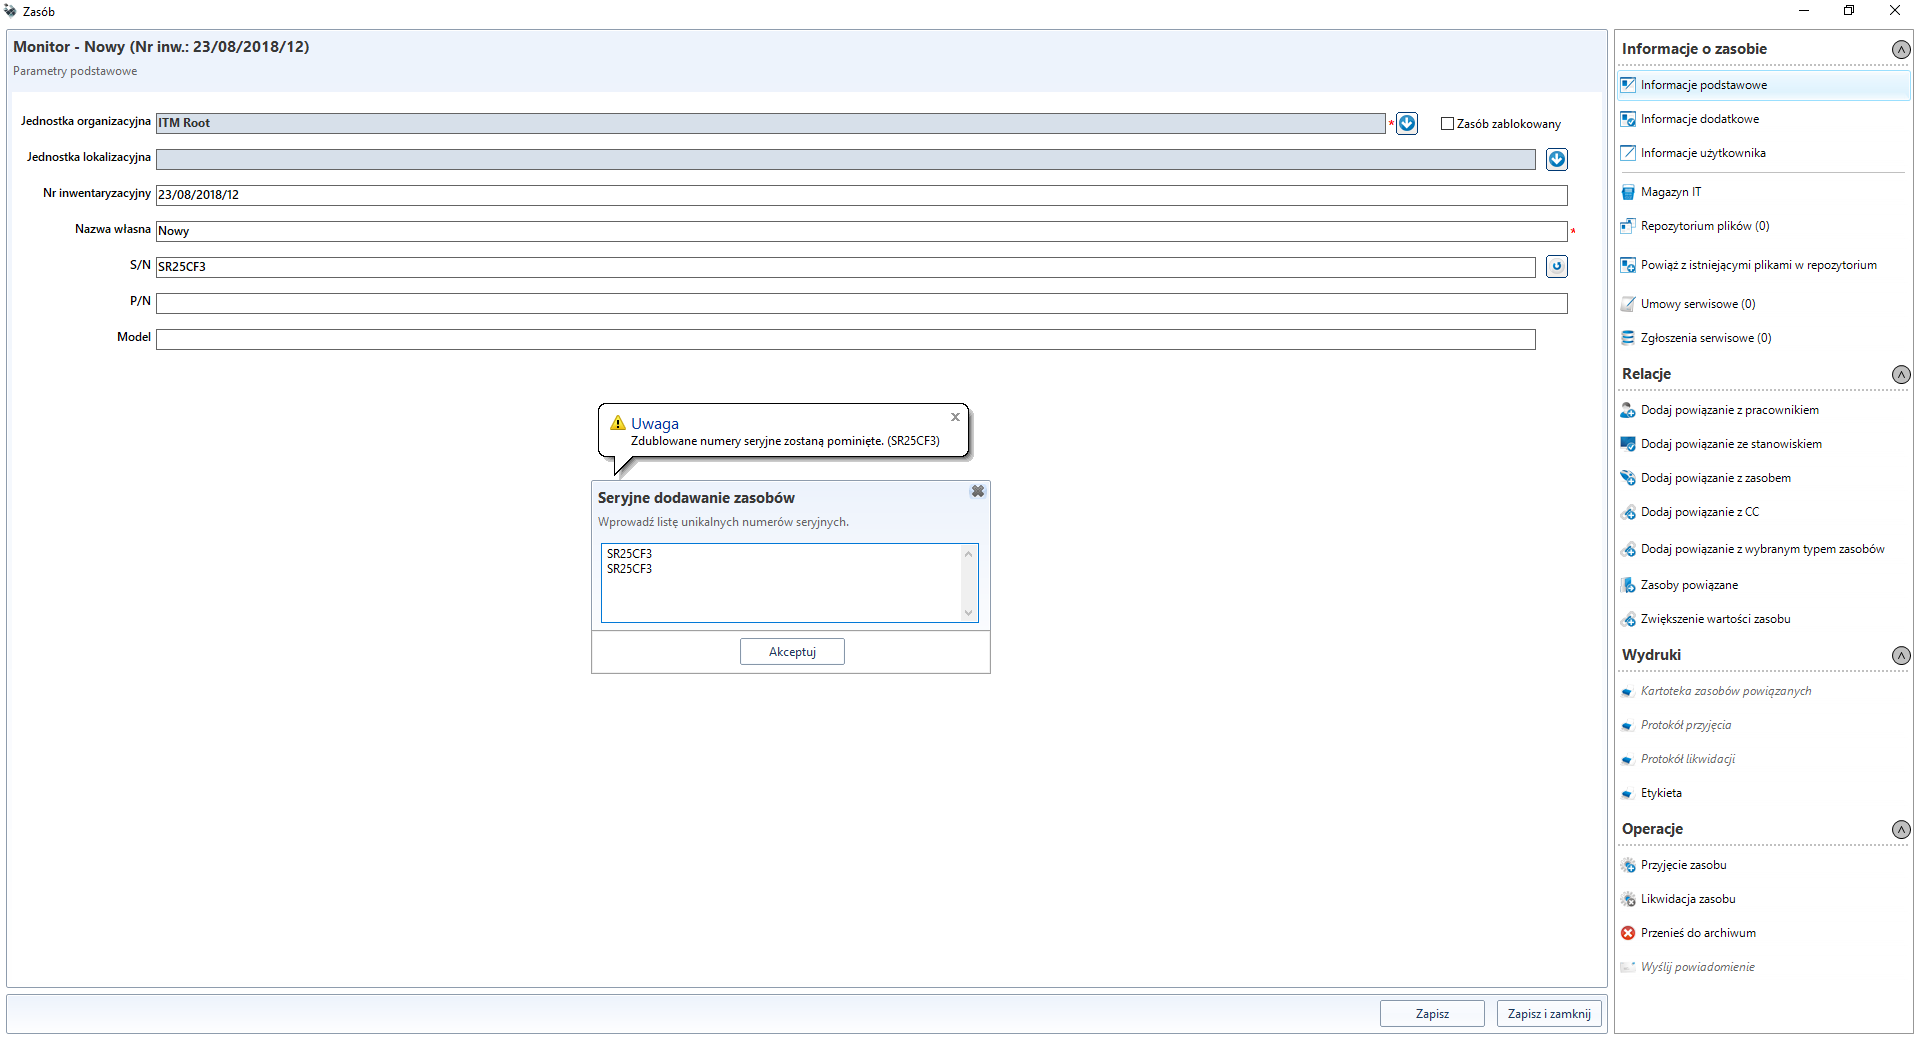
The list window automatically increases its size (height) as you enter data.
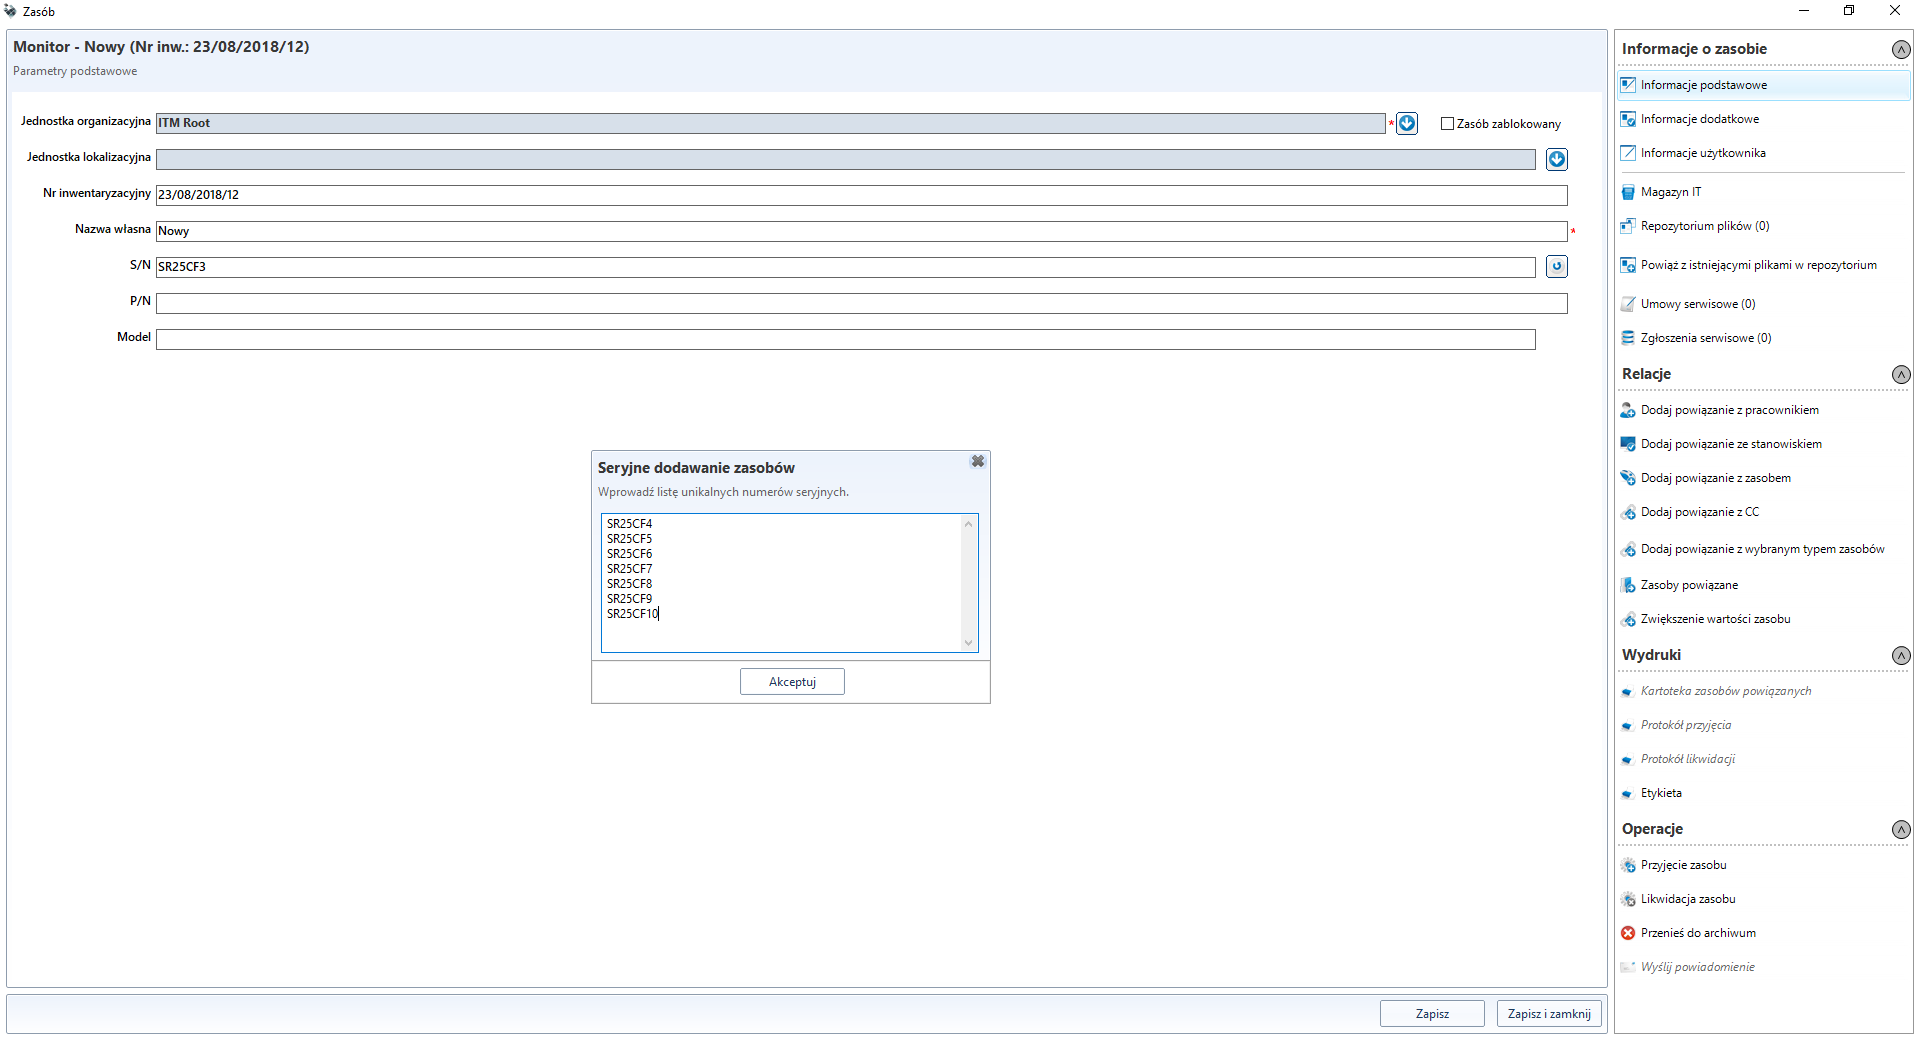
After accepting the entered list, information about the numbers to be added appears in the resource edition window. This list is sorted.
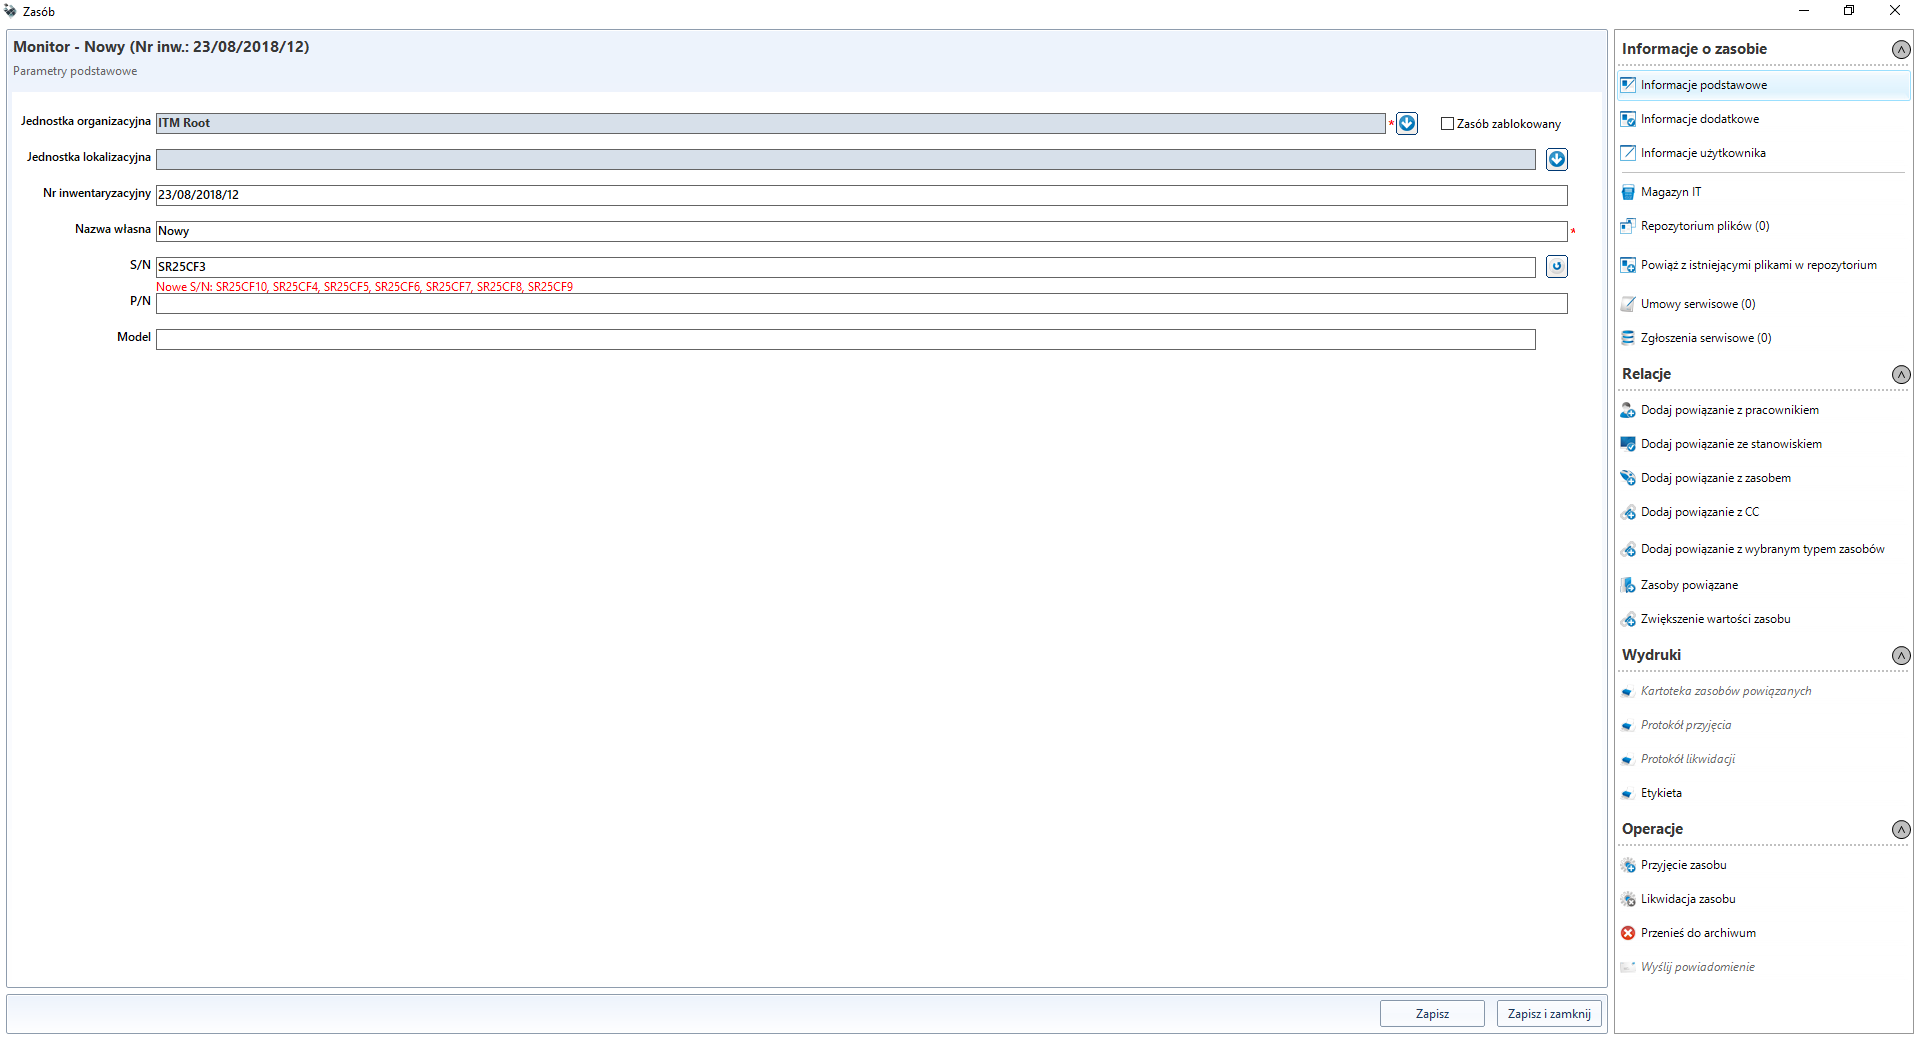
When you click Save , you can update the data for the currently edited resource (in case of a resource cloning) and then save the new resource in the loop. The progress of the process is shown in the progressbar.
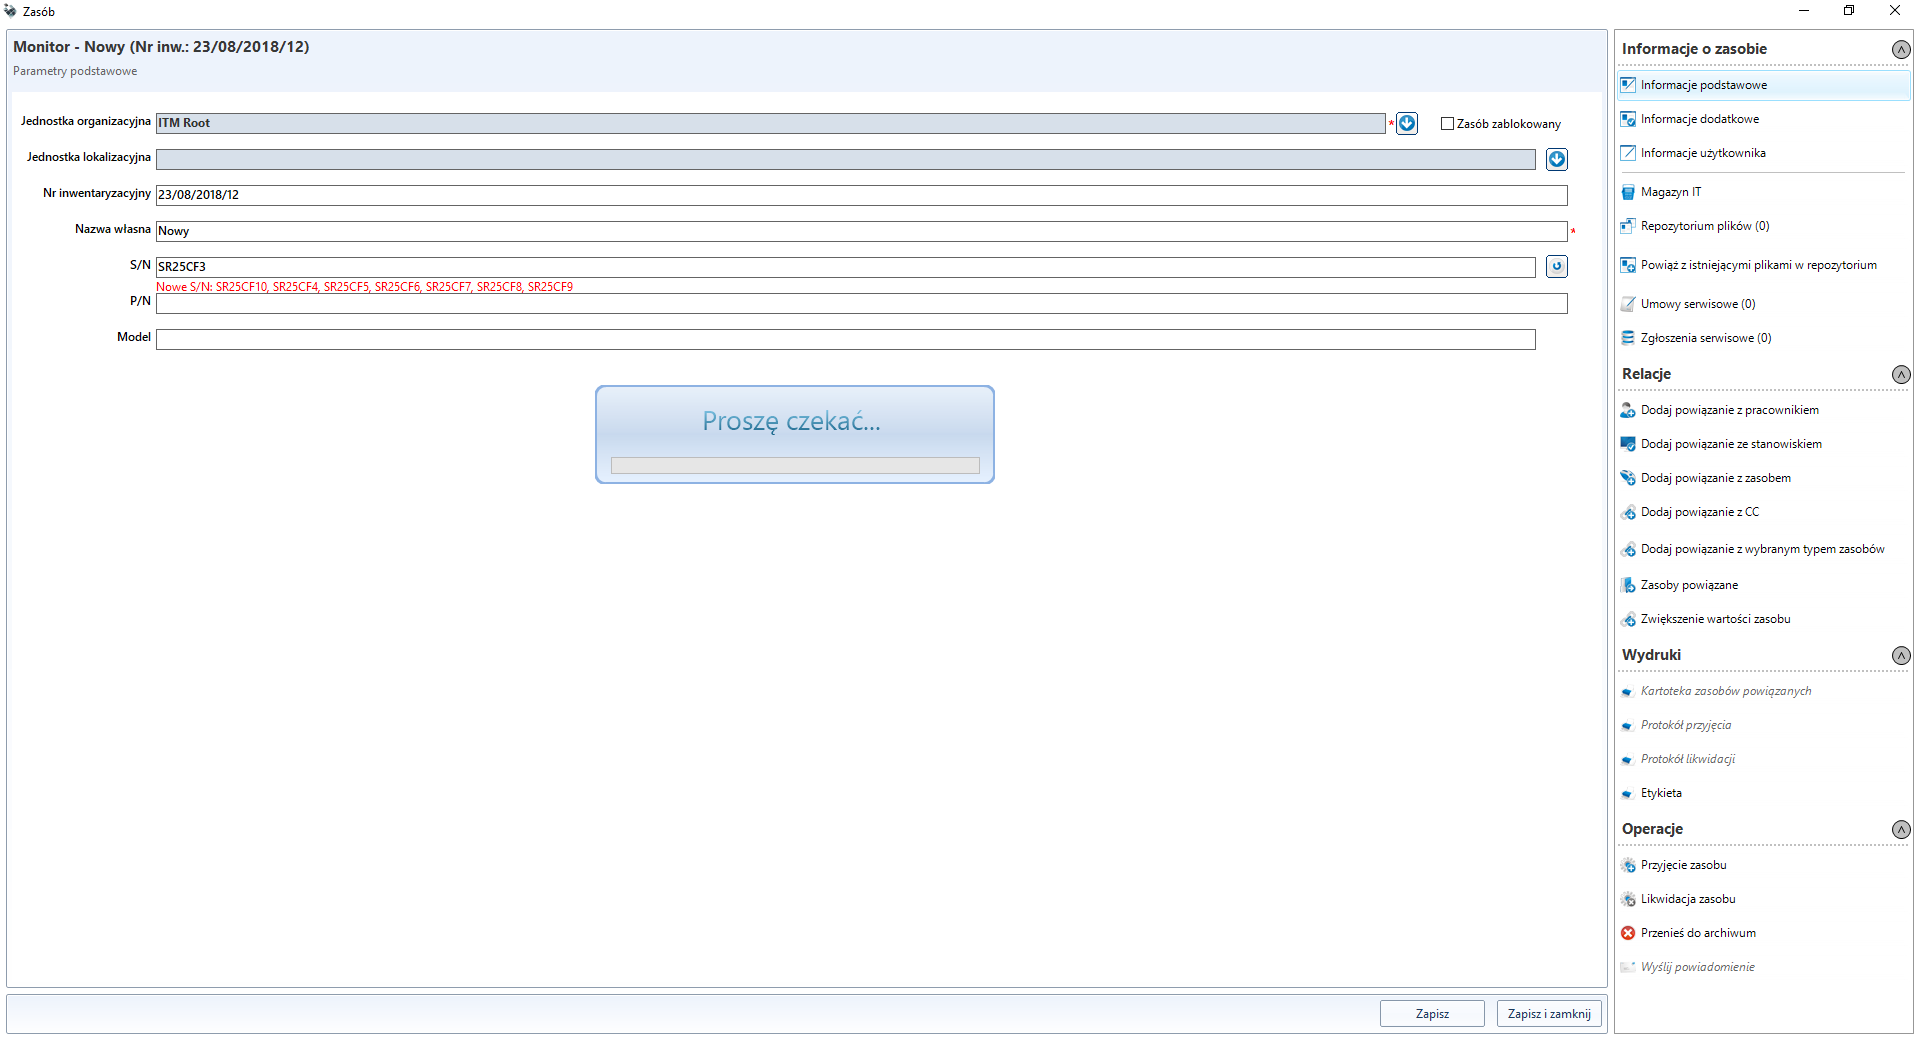
When finished, the appropriate message will appear on the screen and the last of the added resources will be displayed in the edit window. However, after closing the edition window, depending on its calling, the list of resources or the list of positions, etc. will be updated.
Creating templates
In order to create a new template, go to the tab IT infrastructure management -> Resource list, in the new window choose Add new template and name it.
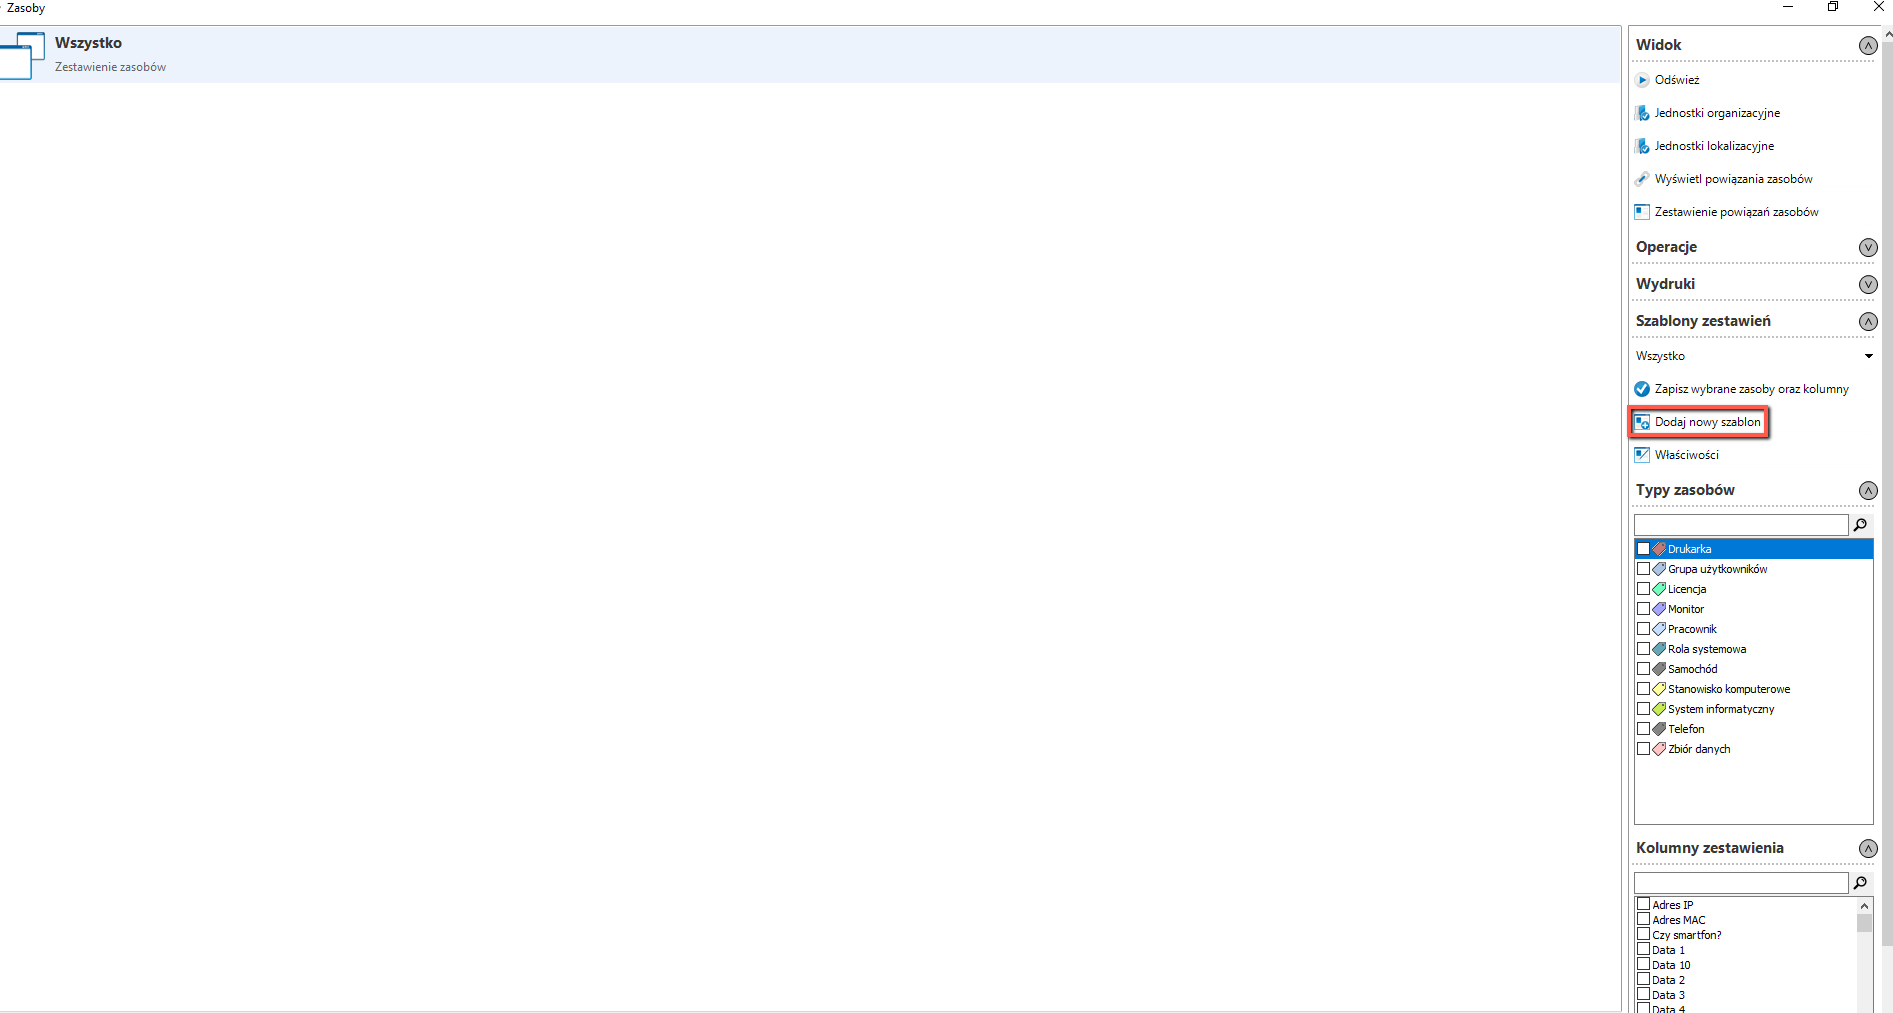
After creating the template, select the types to which the template applies and the names of the columns to be displayed, and finally select Save selected resources and columns.
After saving and clicking on the Refresh button, a list of resources according to the newly created template will be shown in the list.

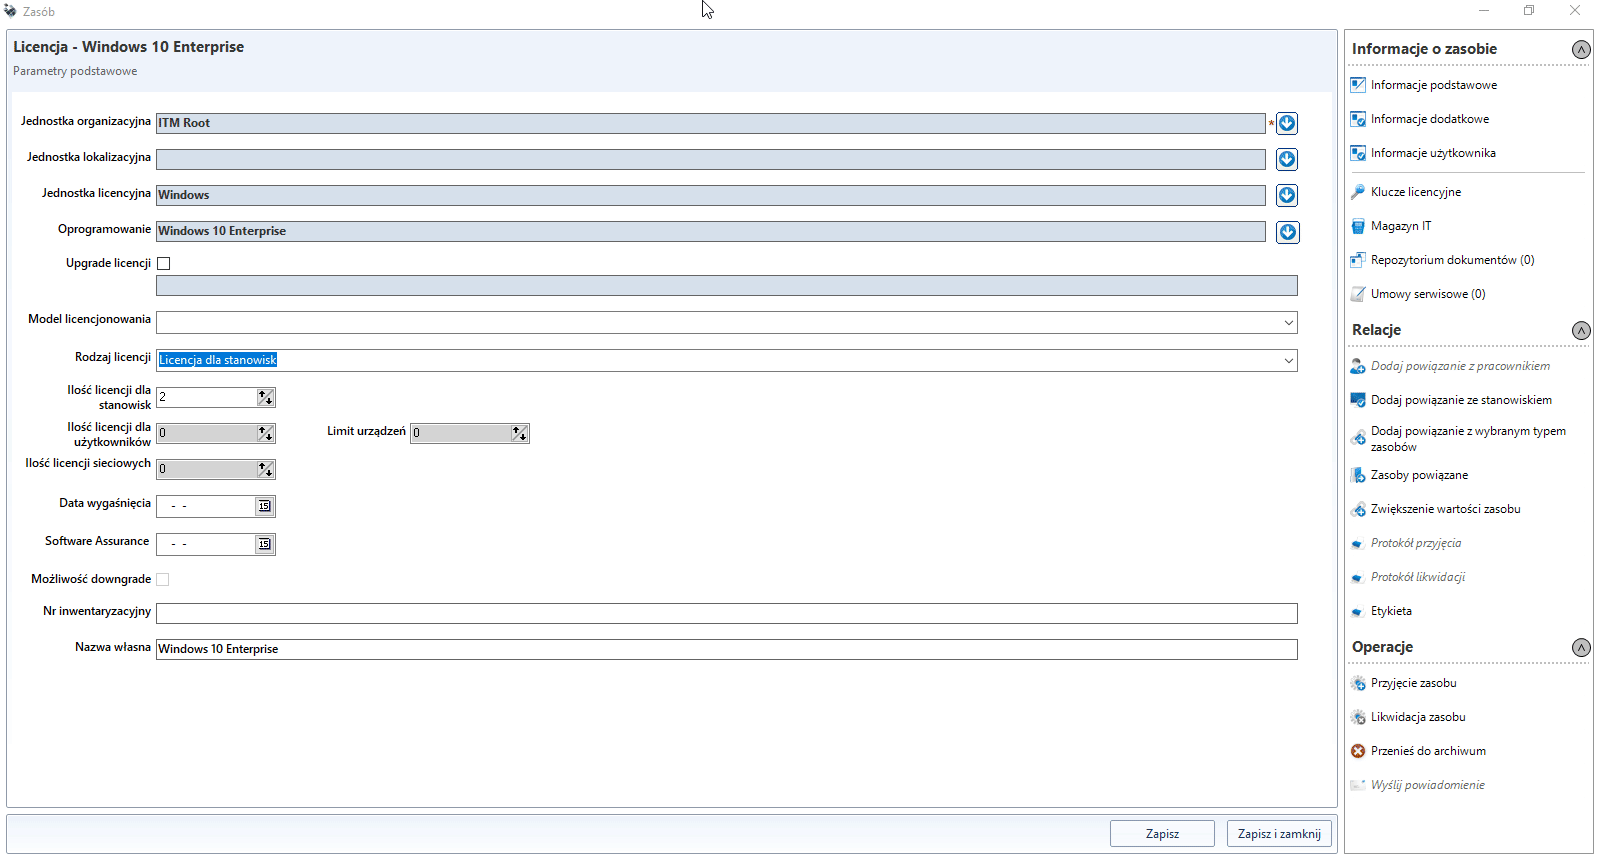
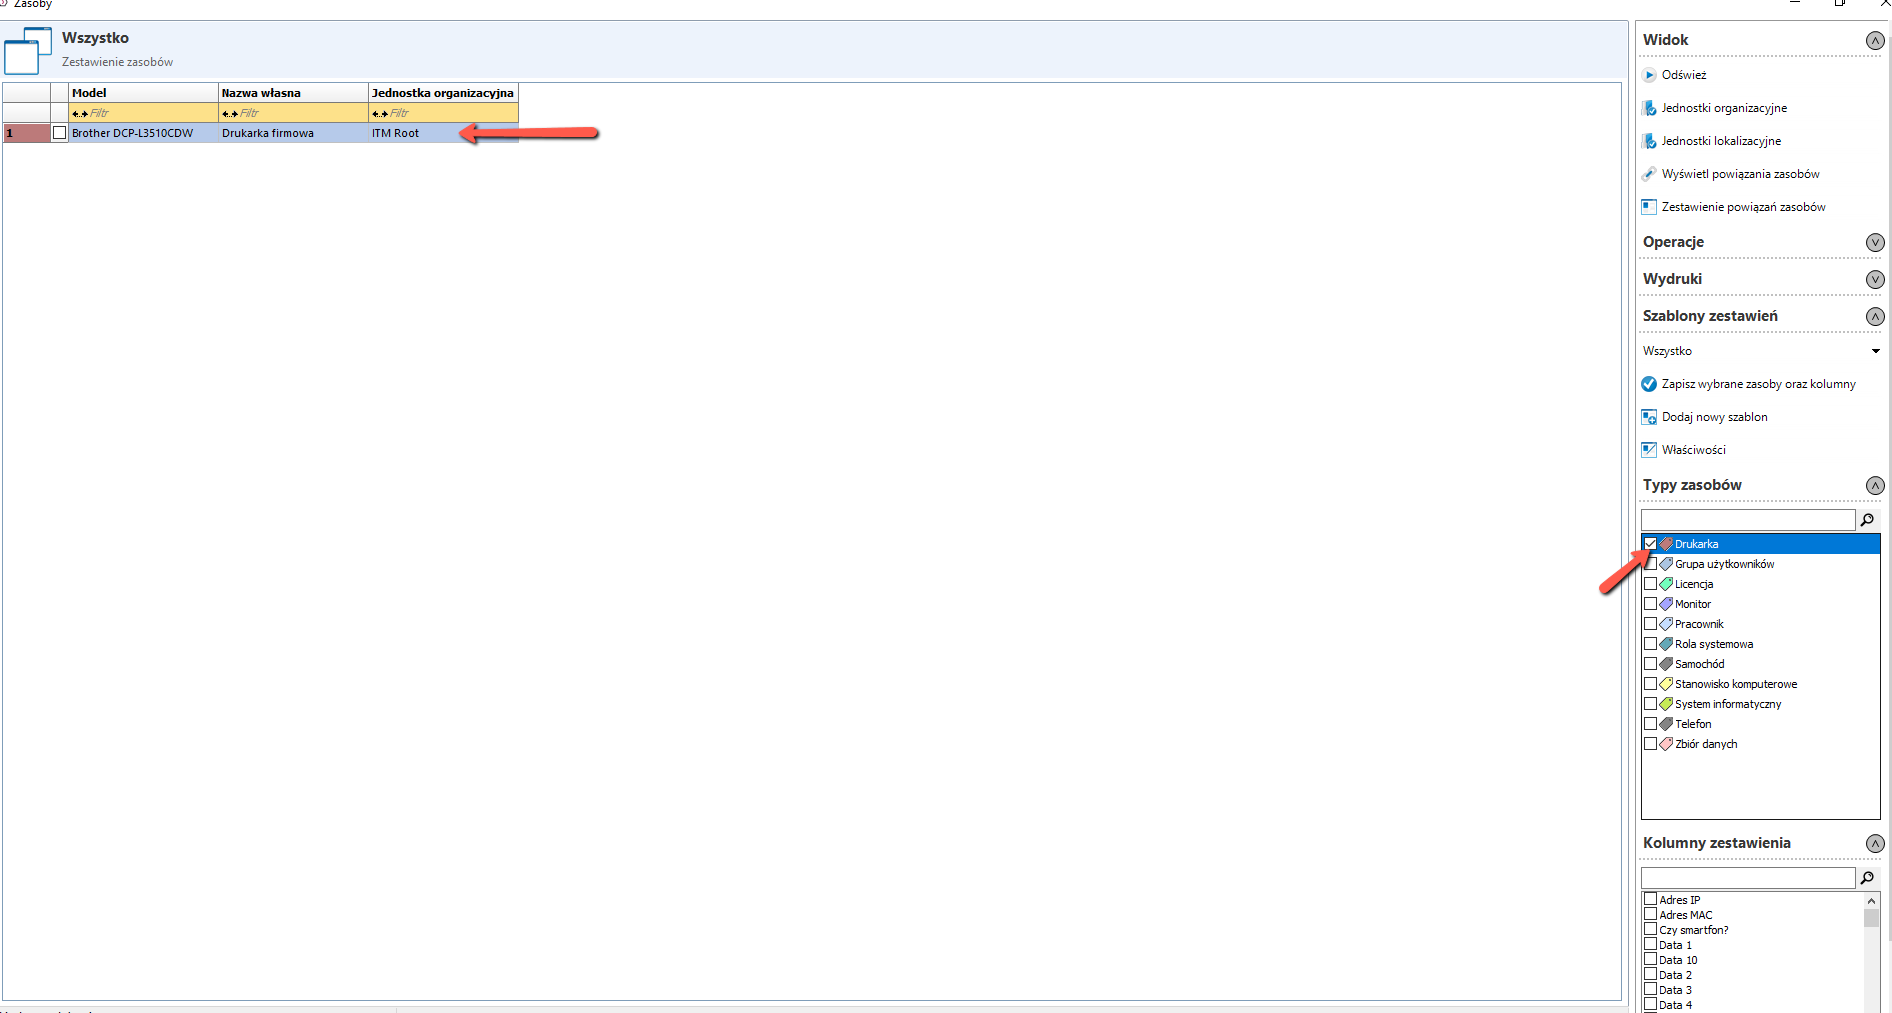
Licences
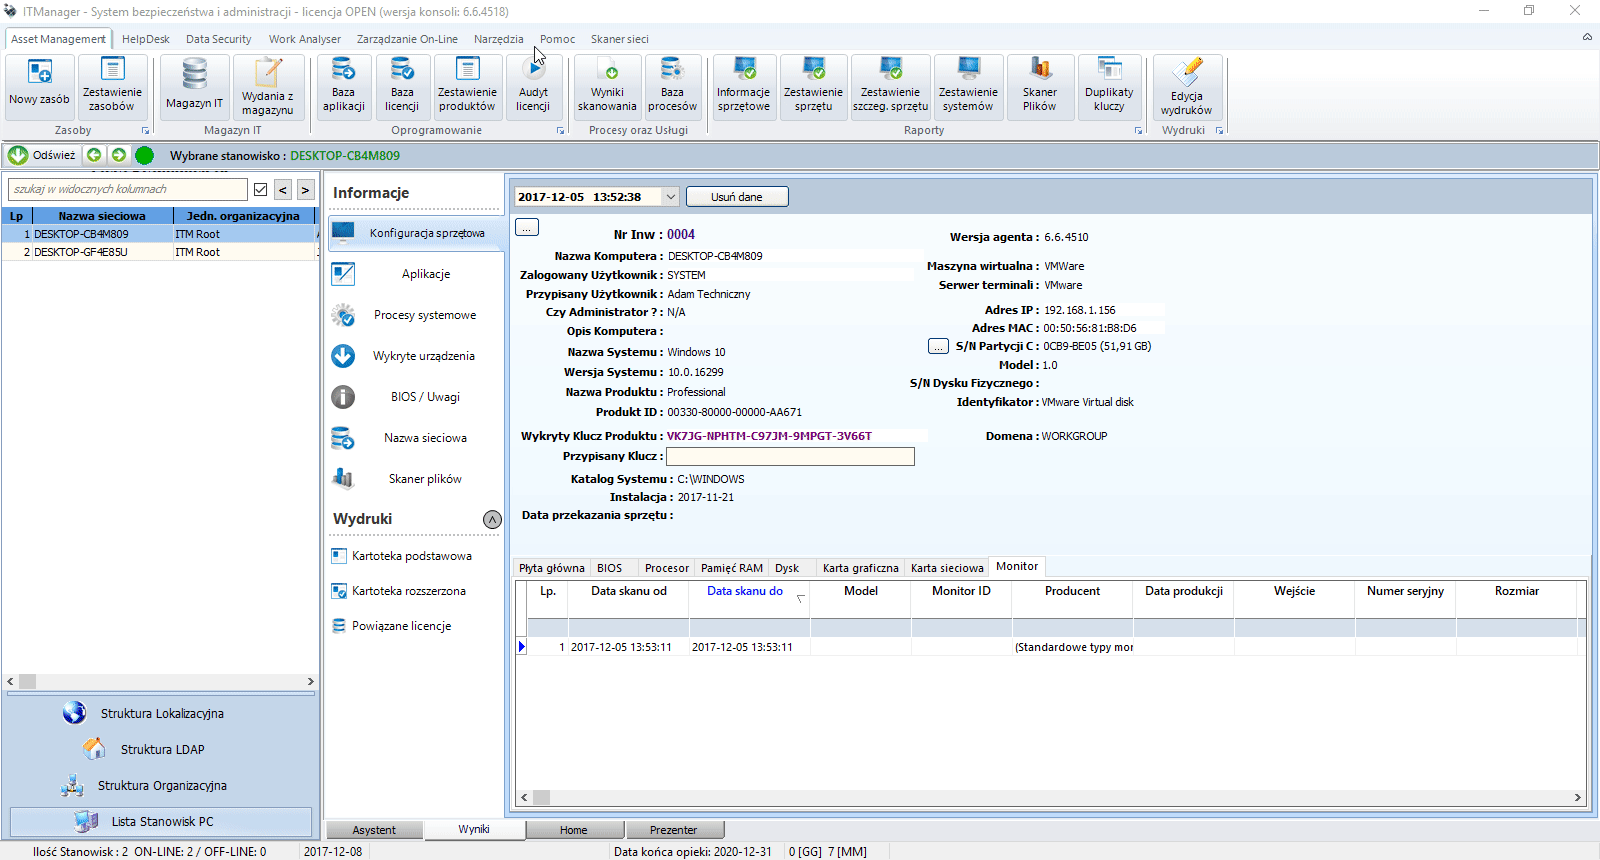
After installing the agents, all the scans available in the module ** IT infrastructure management** (hardware and application scans complement each other) must be performed, and of course the scans themselves will also be performed automatically after about 10 minutes.
The software will be identified at the stations.
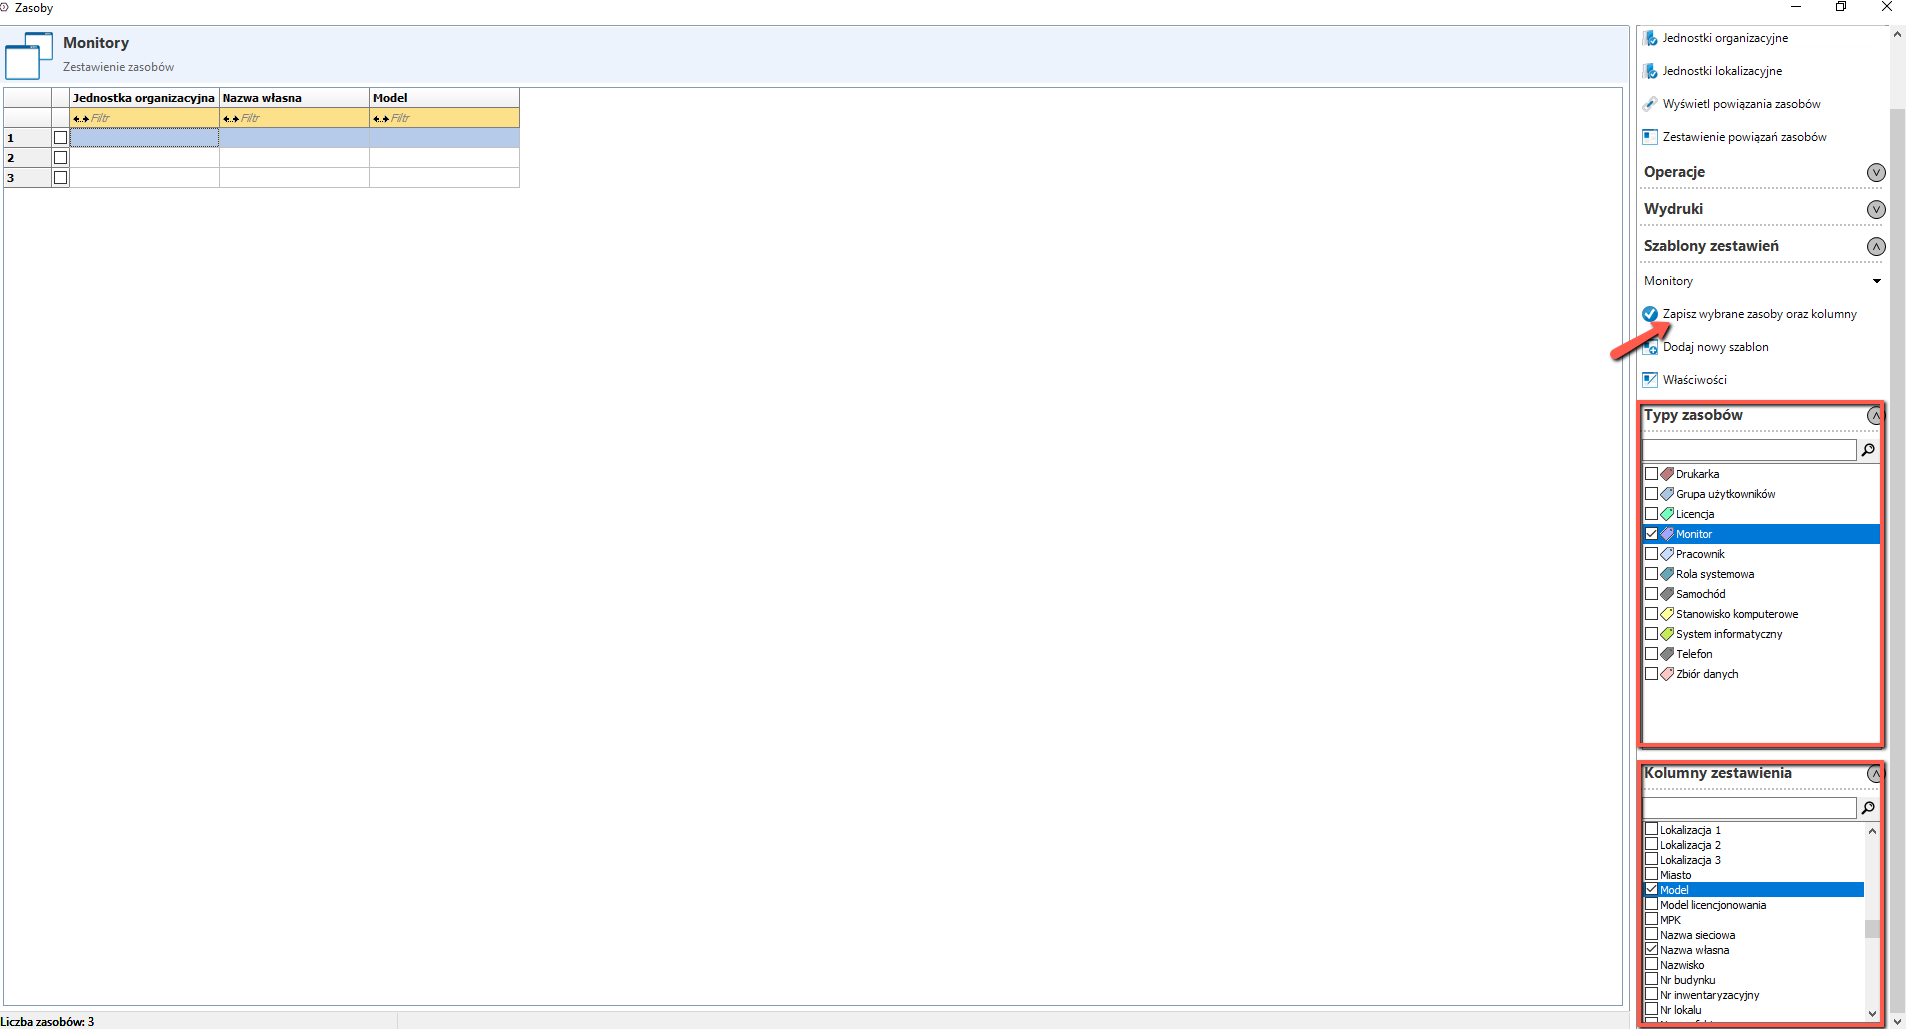
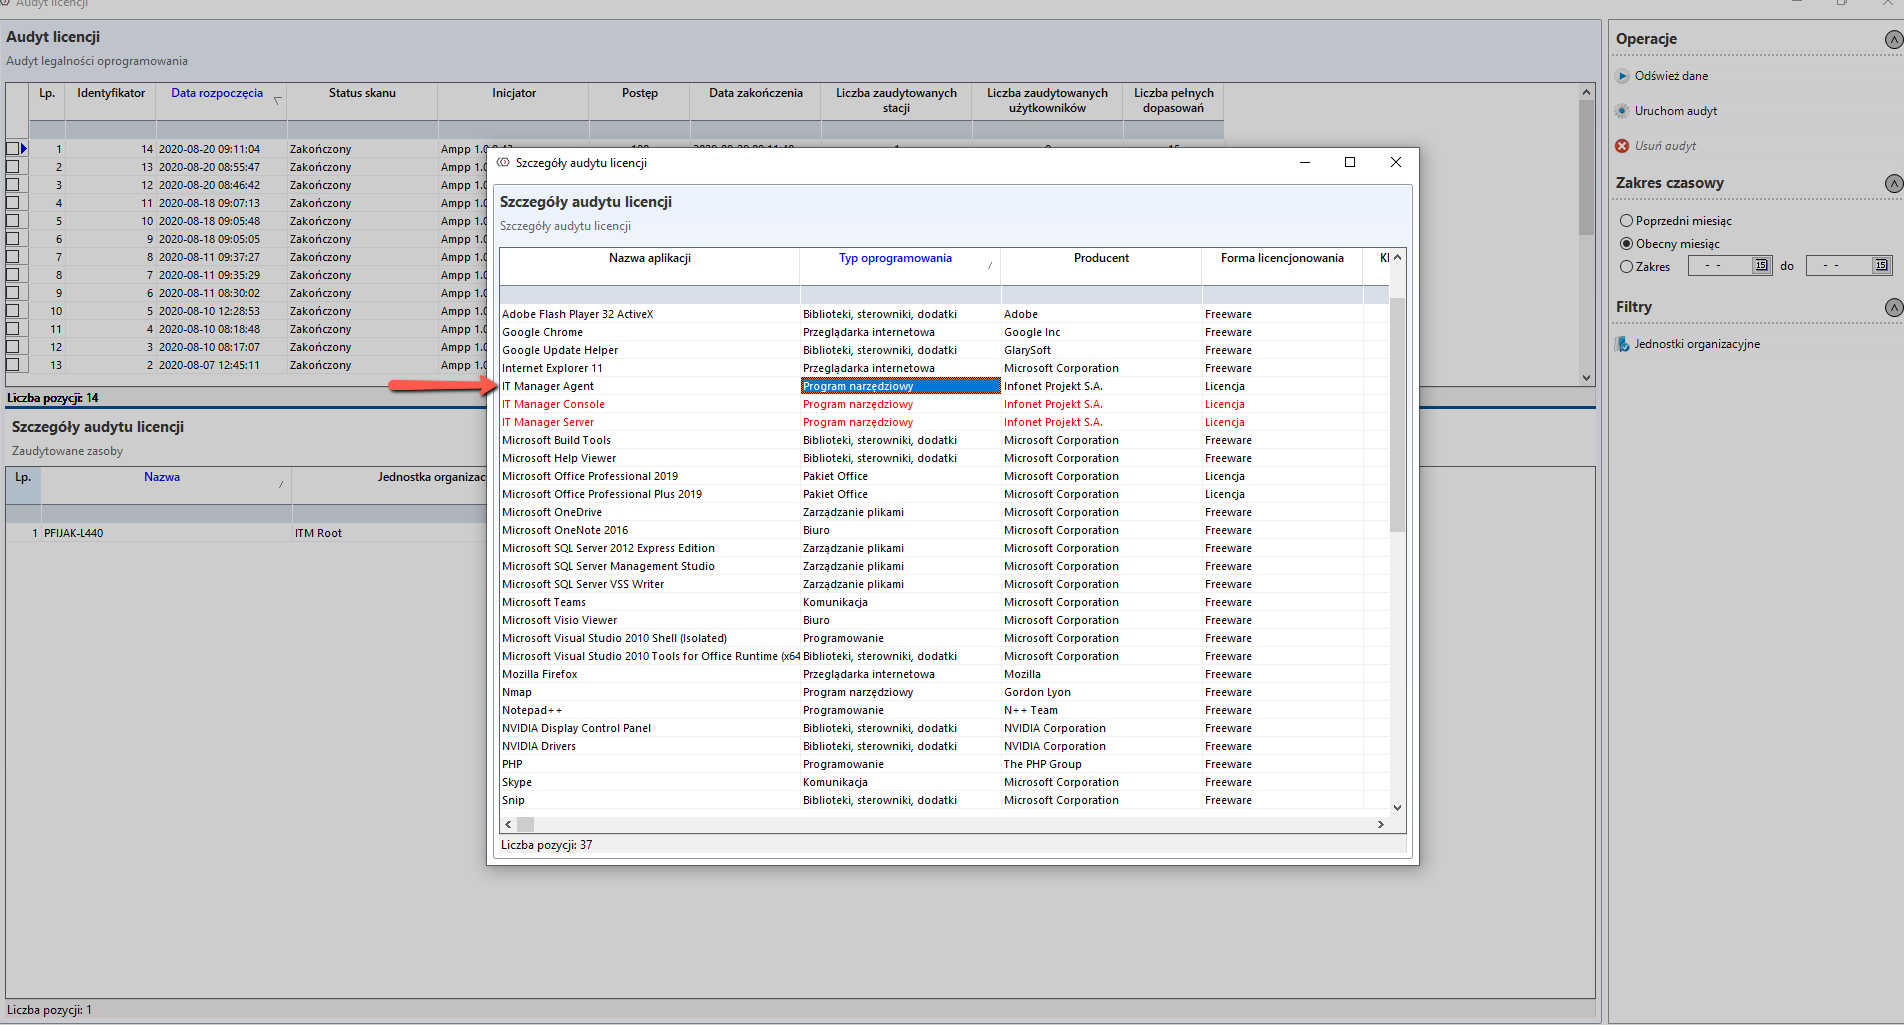
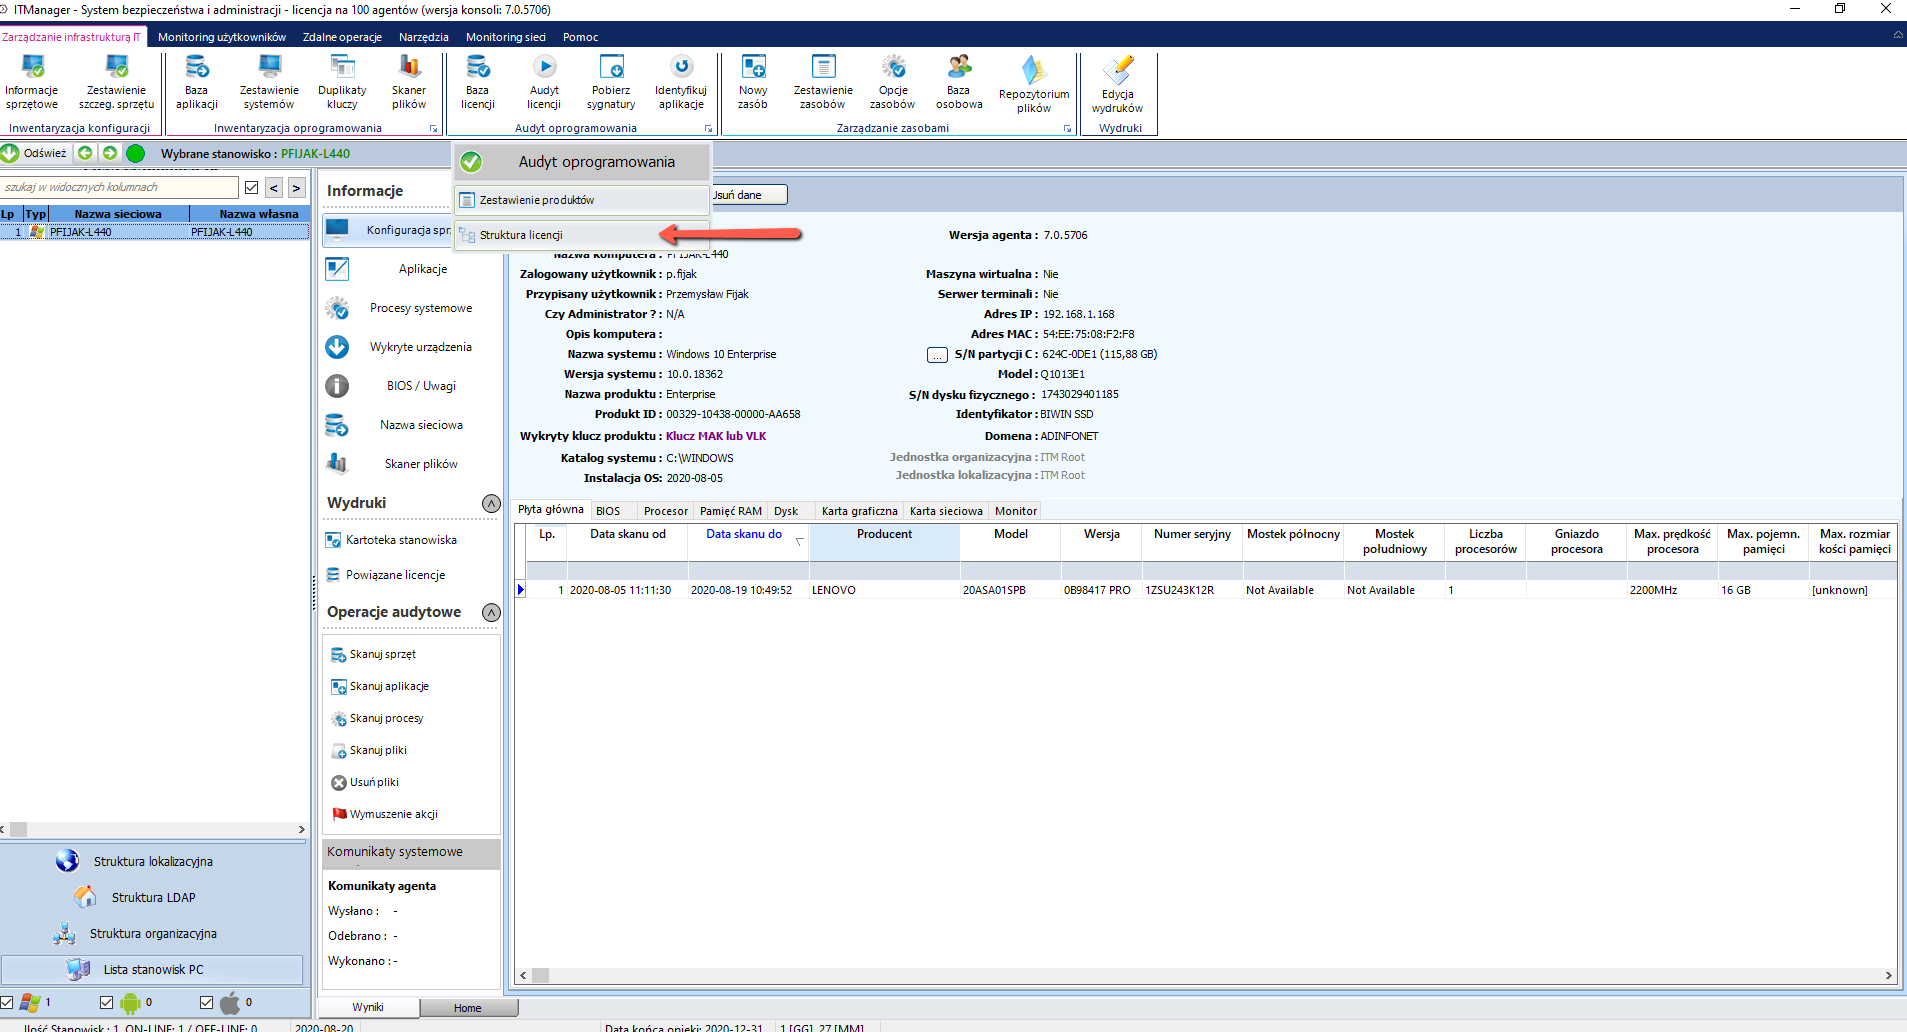
An audit of the licence should then be carried out. In the section IT infrastructure management, click on the button Licences Audit. Next, click on the button Execute audit. After a while, click Refresh data and then double-click on the audit results. Applications requiring a licence will be displayed in red.
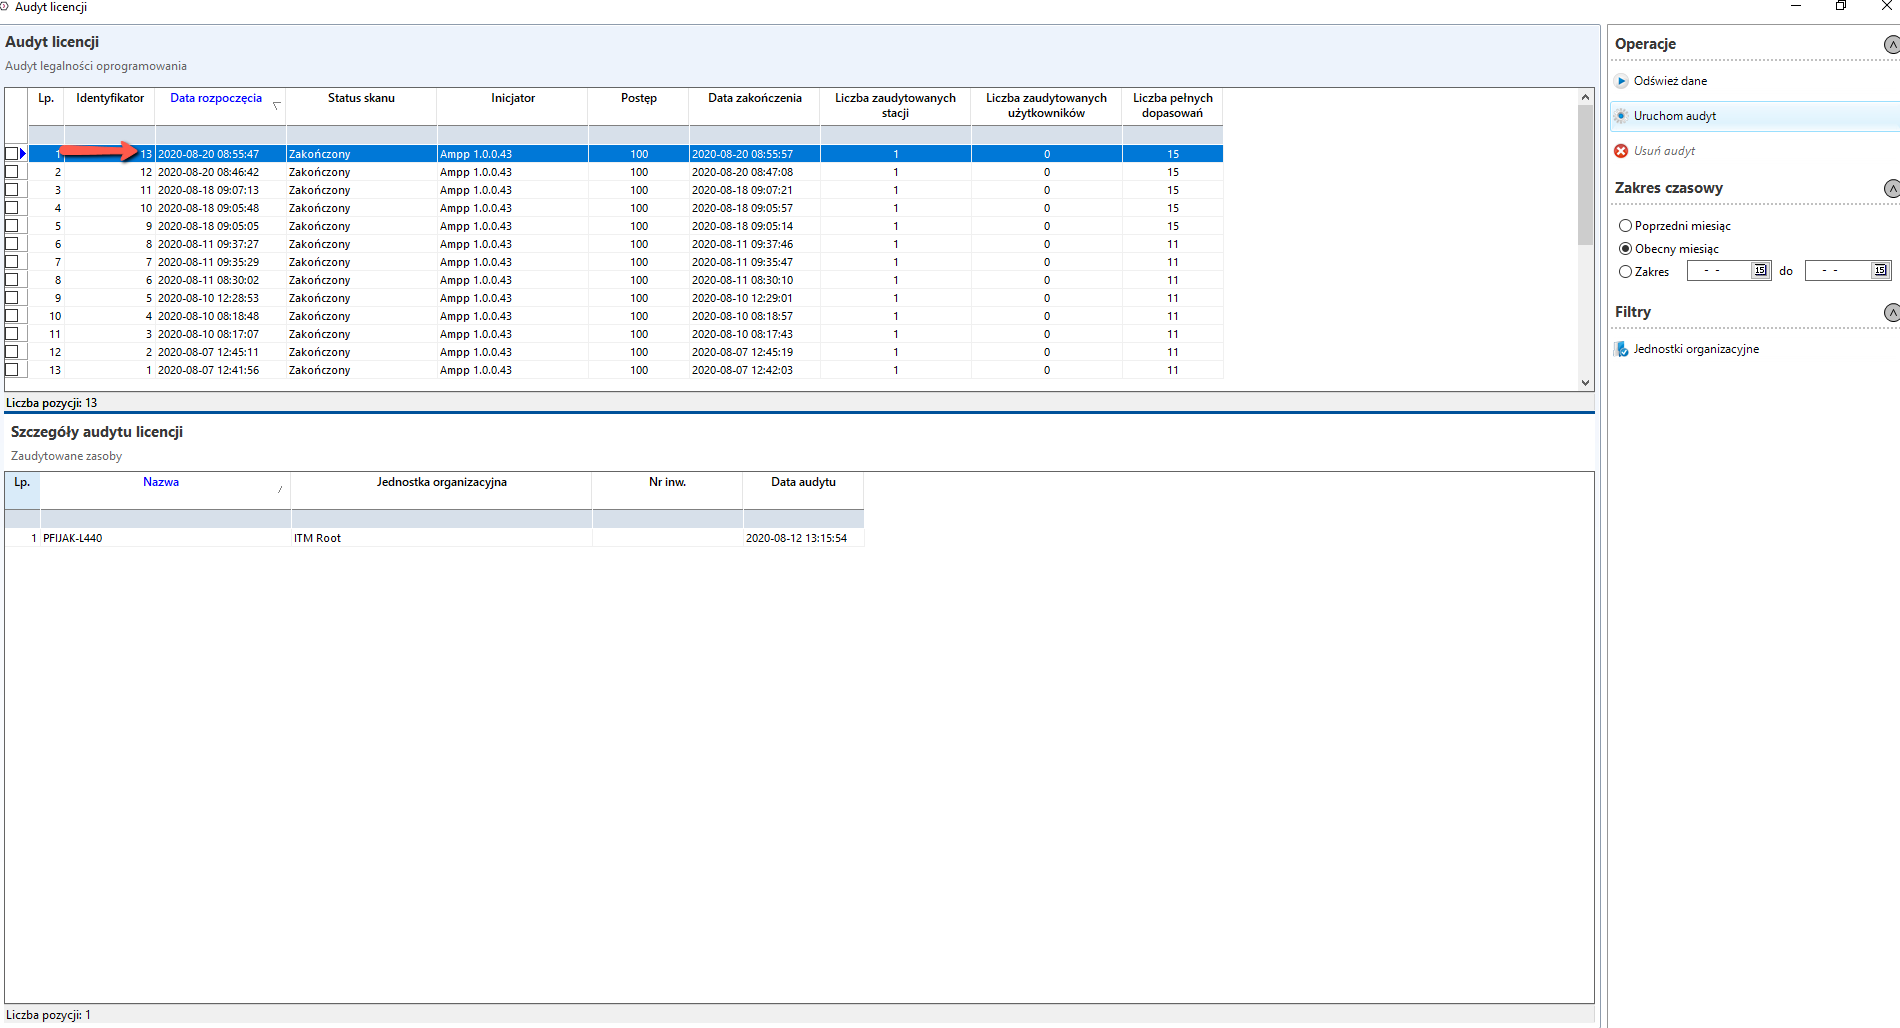

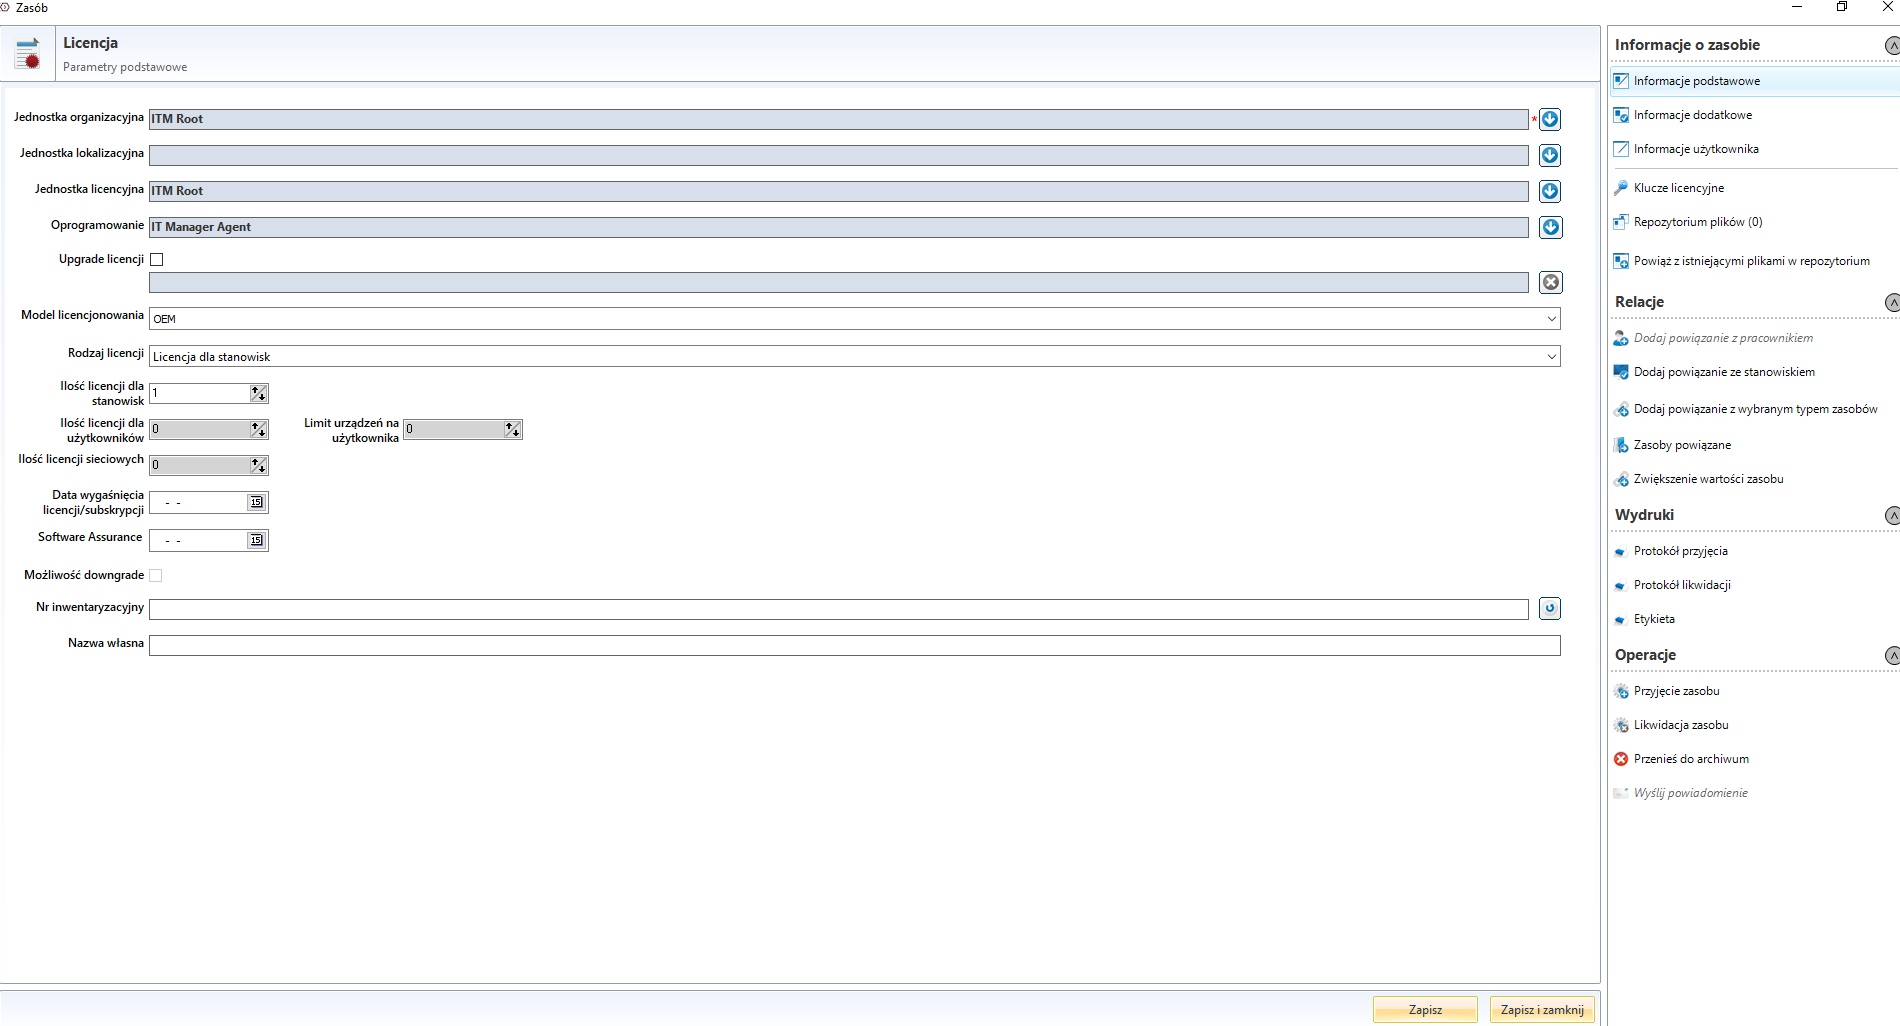
right-click on the red application and select Add License to software, a form for adding a license will appear. The menu with the option to add a license key or add a link will be unlocked when you click Save.
After saving and closing the licence form, the licence audit must be repeated. The application with the added license should now be black.
Adding a license key to the created license and linking it to the position.
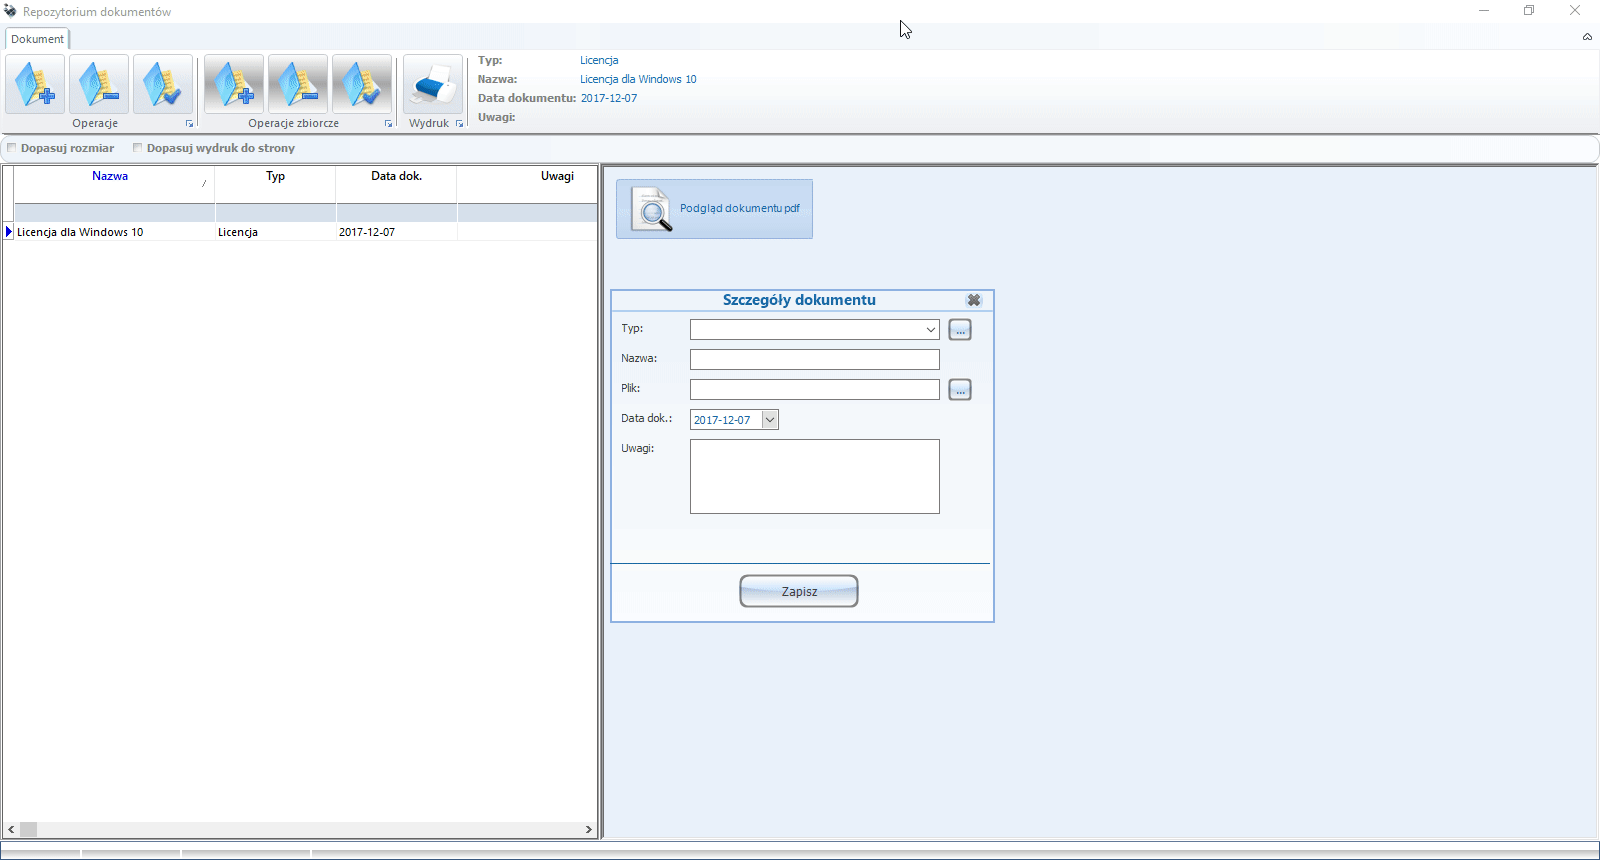
Adding a file to a document repository
If the selected document type is not listed, it must be added to the system constants
The license tree generated from the license audit is located under this button (will only be created if license structure is added).
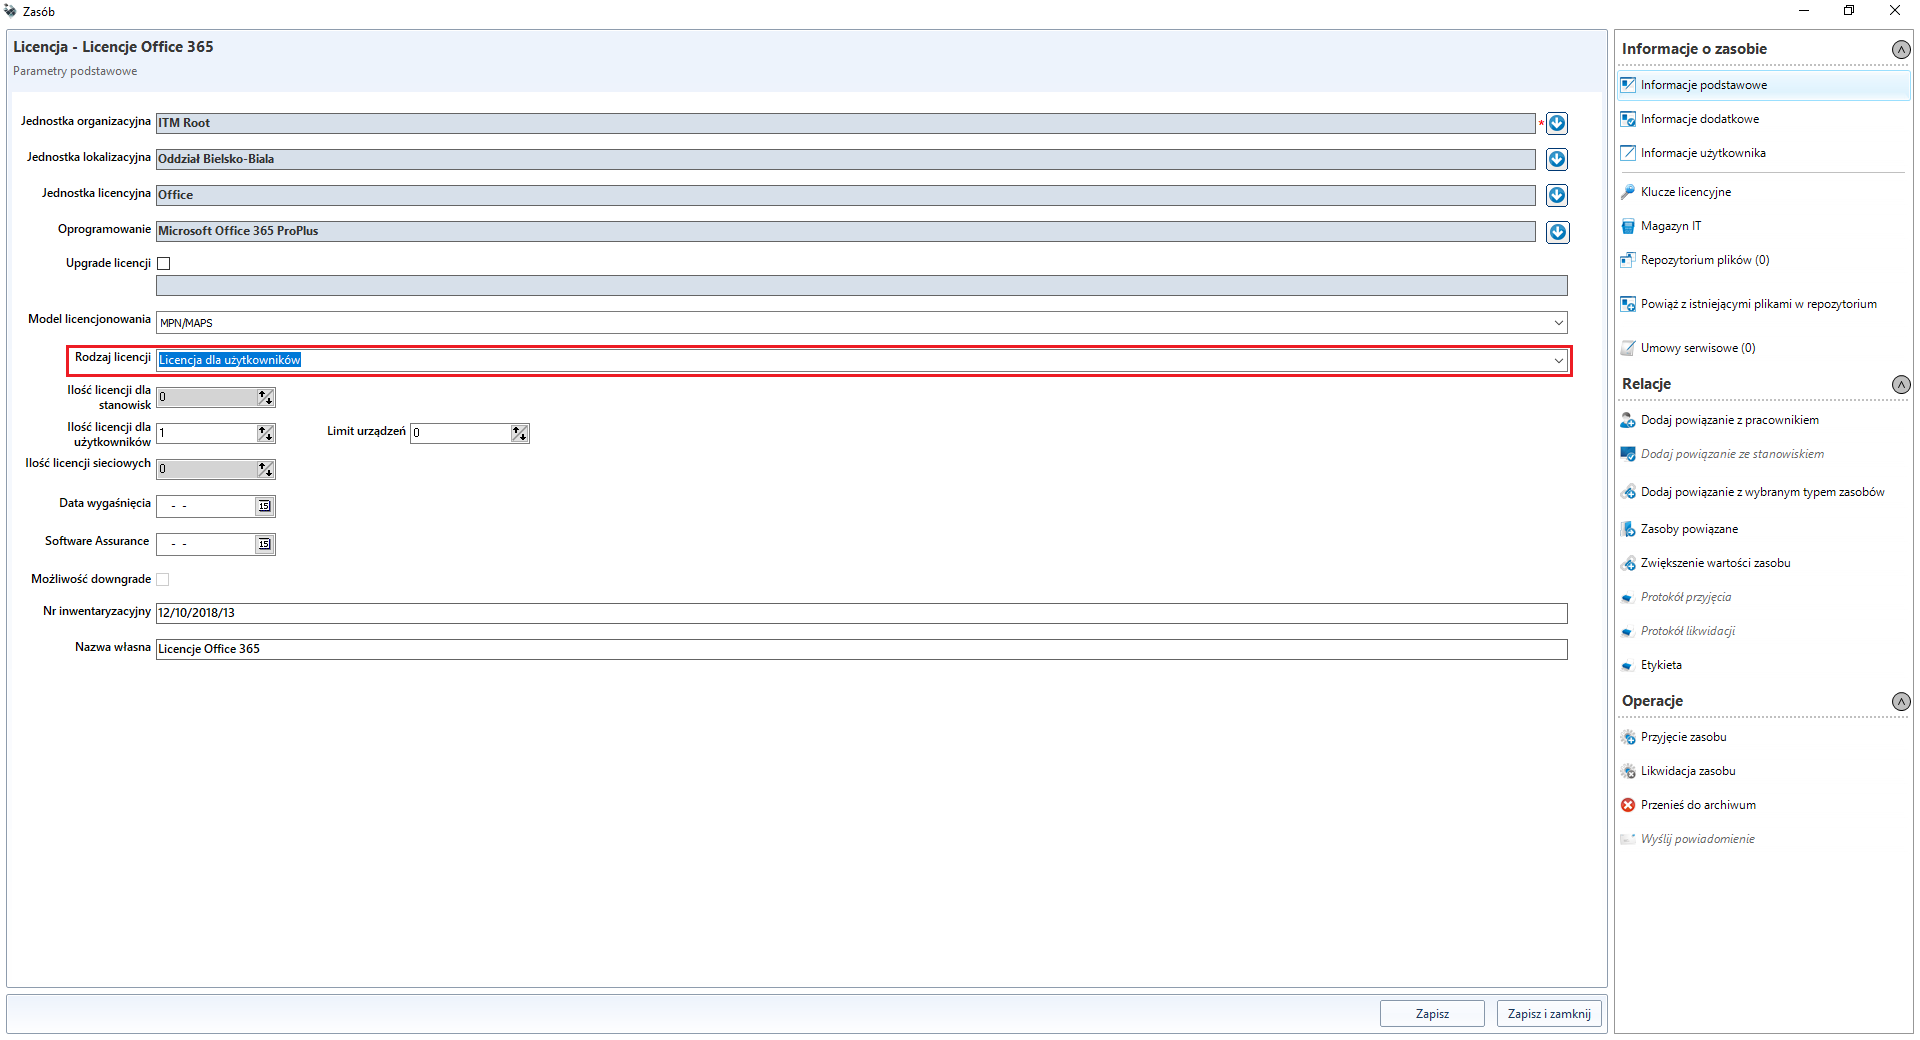
Licenses for Office 365
The creation of licenses for Microsoft Office 365 software is similar to that for ordinary licenses. However, in the case of Office 365 the license "wanders" together with the user, so the following steps need to be taken to reproduce it in an ITM environment.
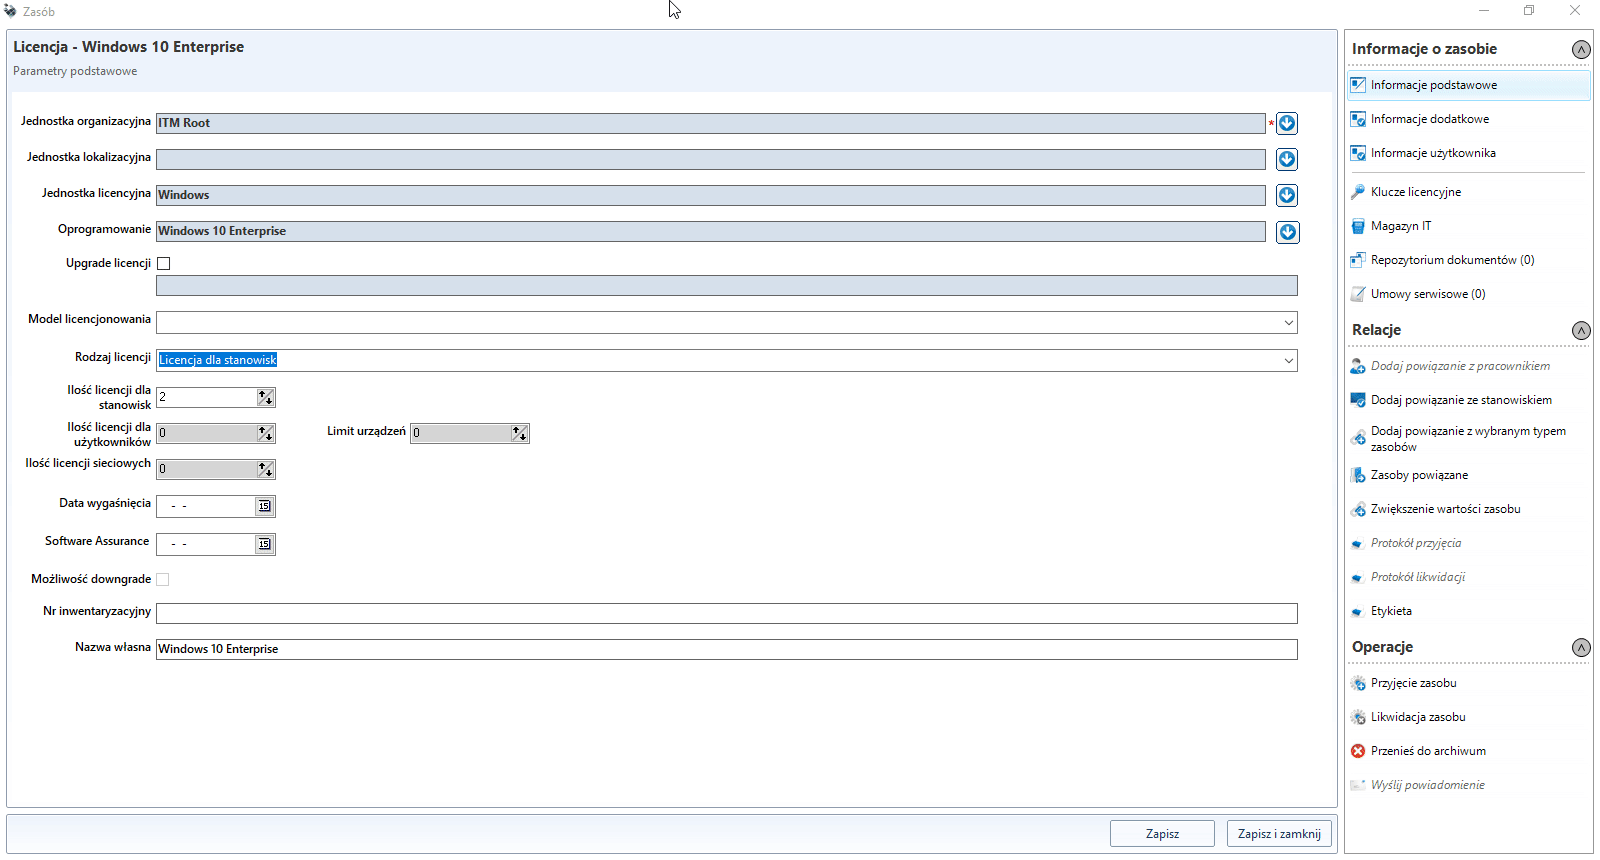
Create a license according to your version of Office
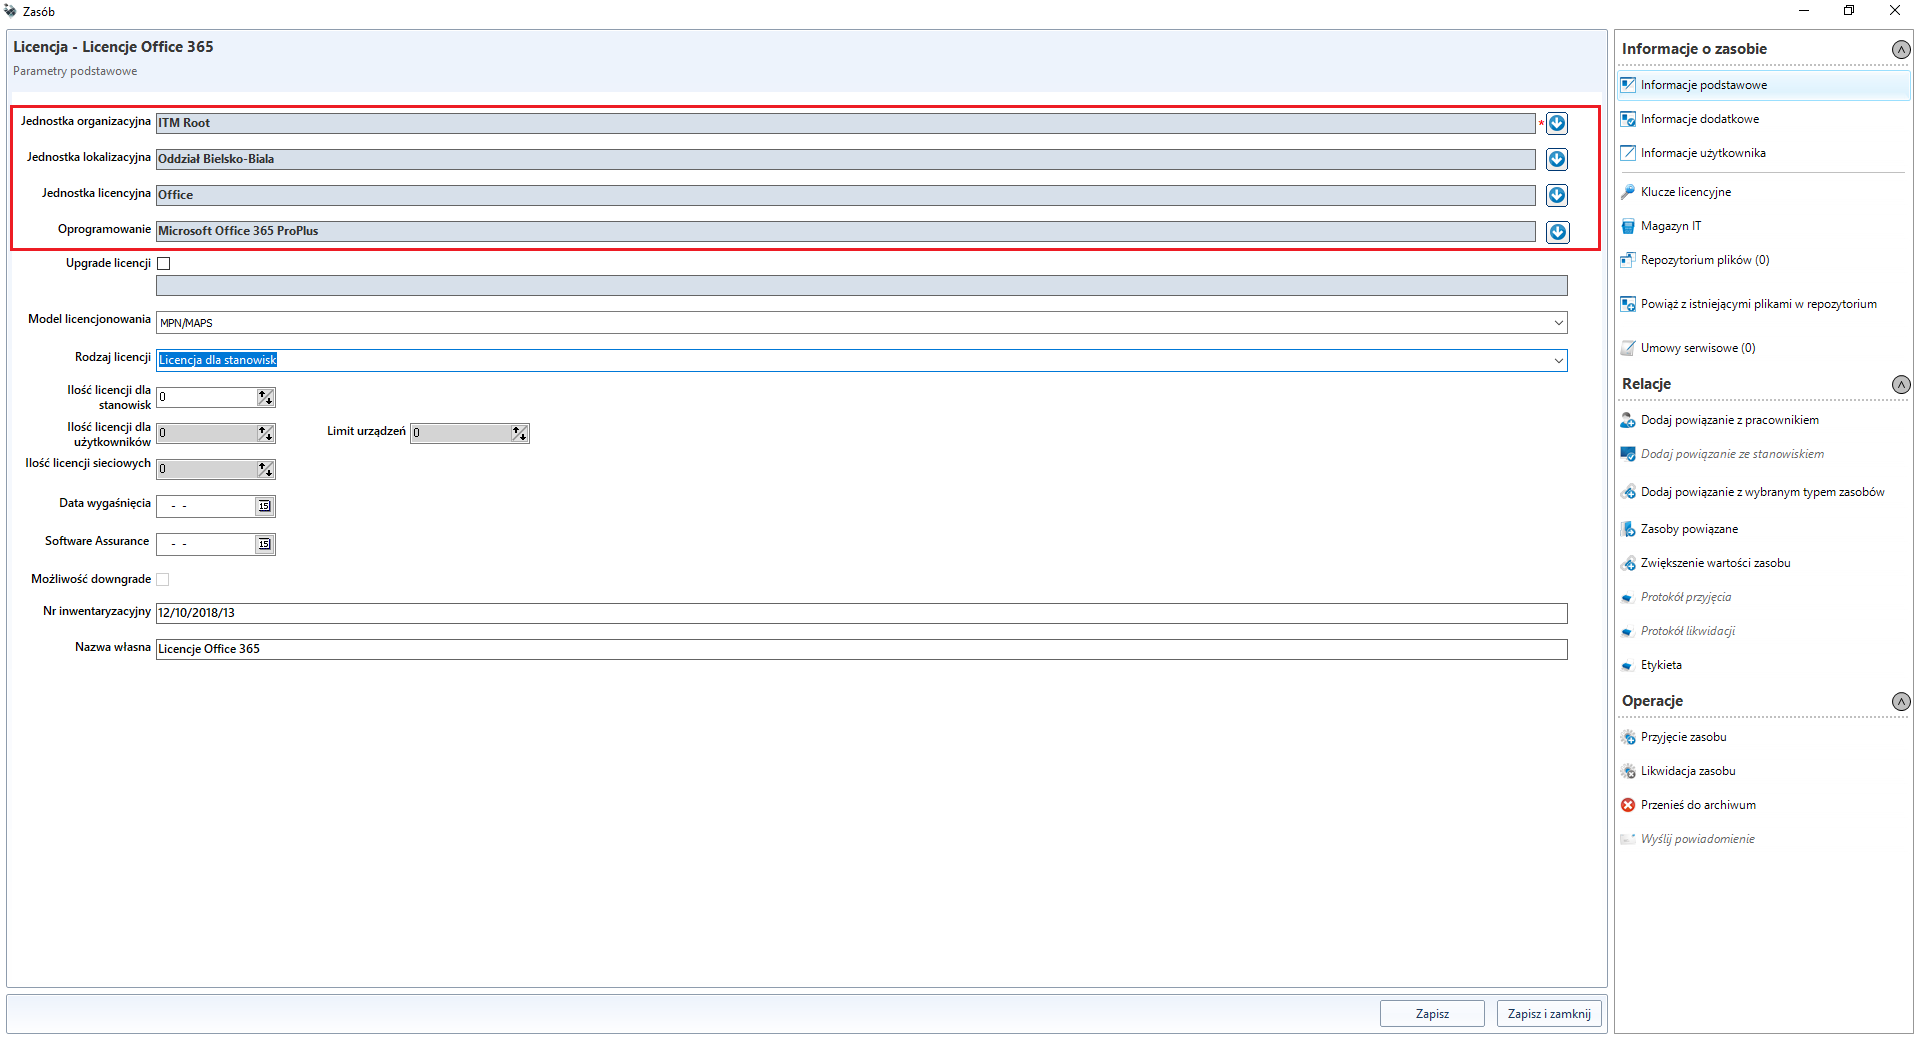
In the field License type, select the field User license
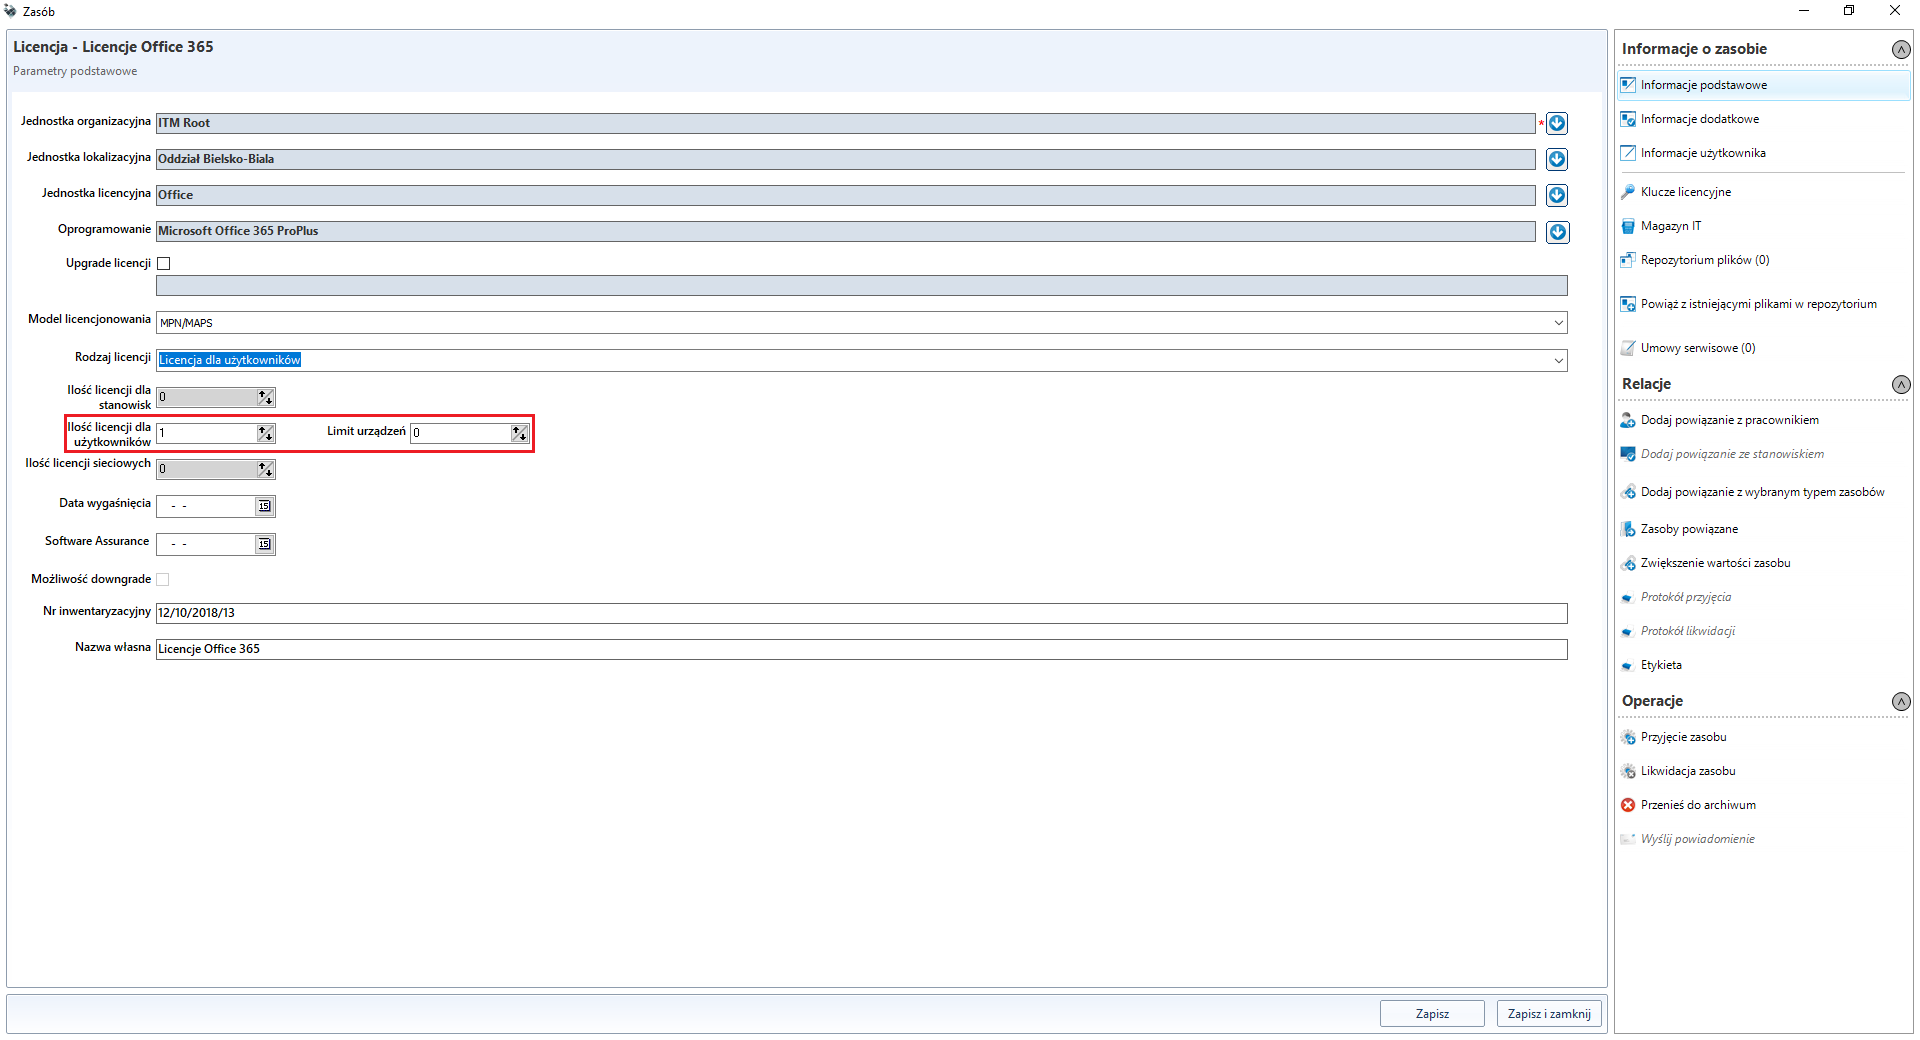
then select the number of licenses you have and the maximum number of devices, if any, on which you can install the software under one license
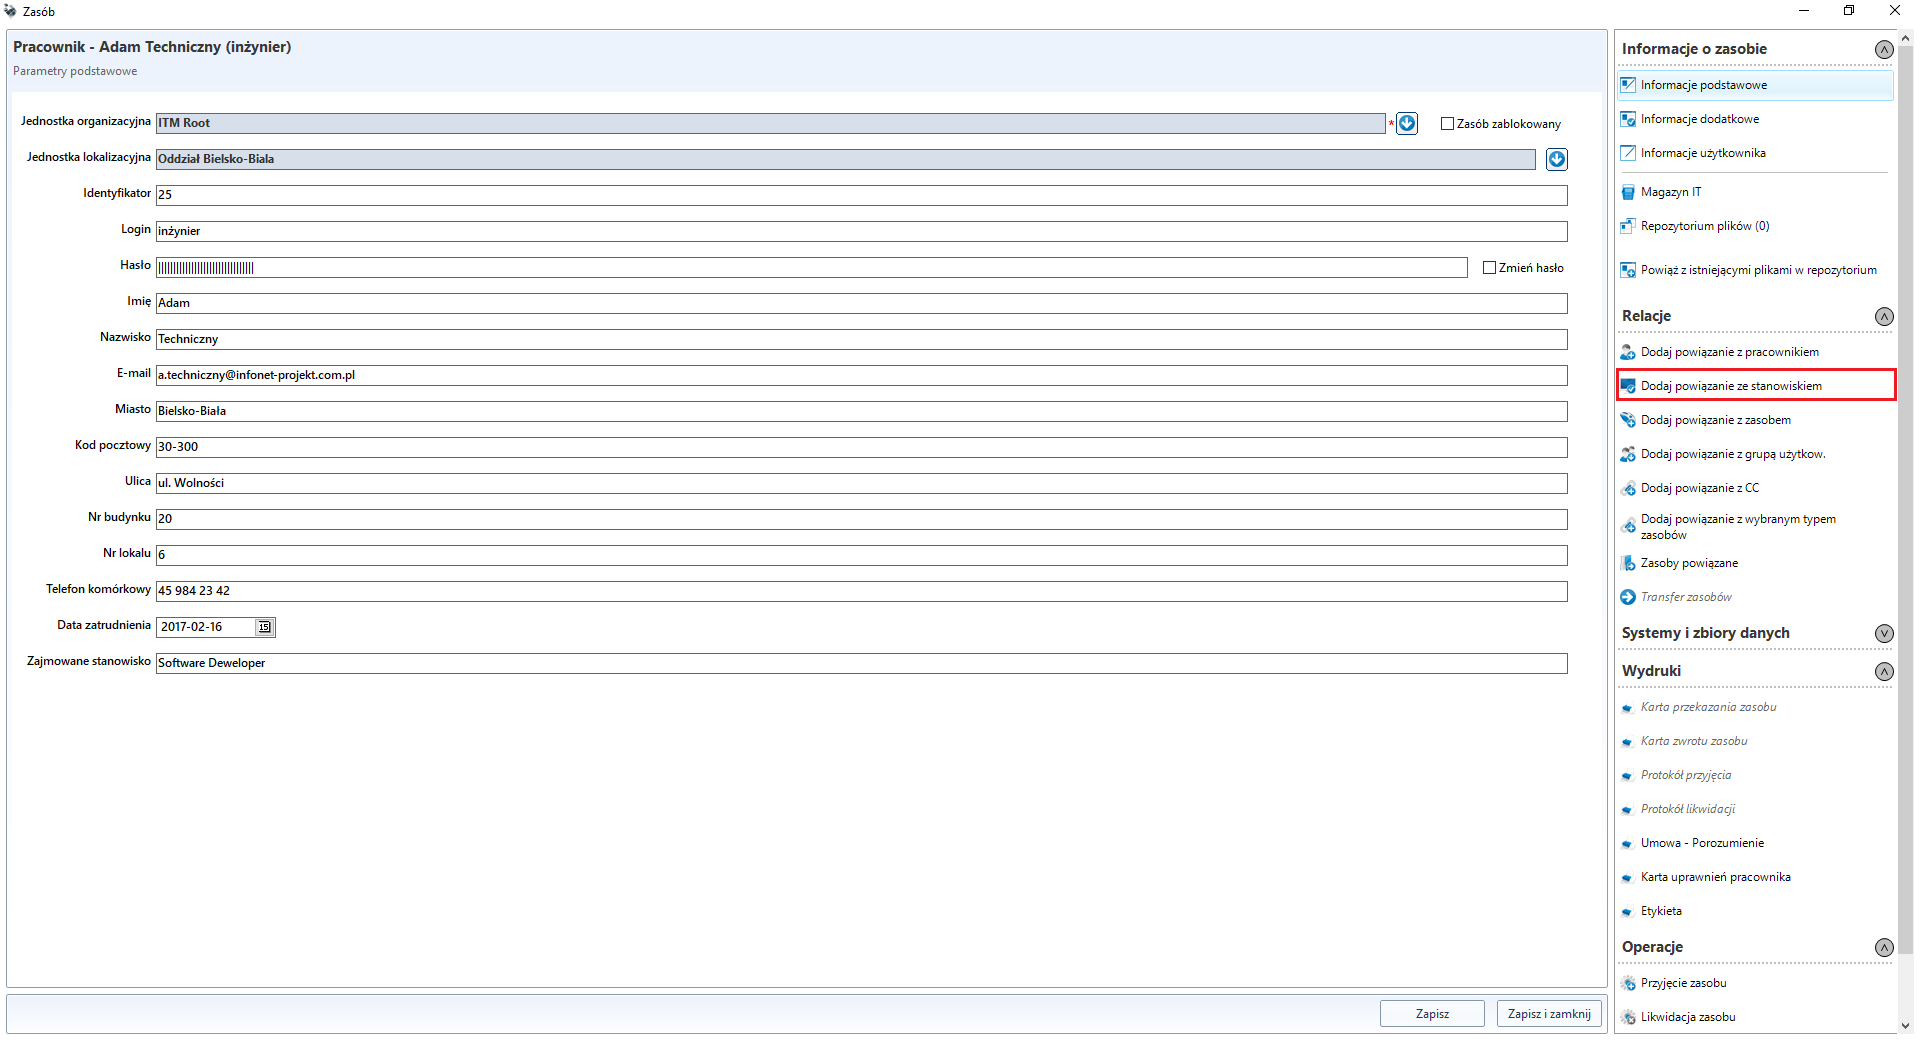
The next step is to assign users to the newly created license using the Add relation with user link (if the field is grayed out, click Save before)

After assigning the user to the employee himself, computer stations should be assigned. This can be done by double-clicking the selected user.
The result will be an Audit Report which will settle the licenses as presented below.

Offline signatures update
If it is not possible to synchronise the signatures via the ITManager consoles, please follow the steps below:
copy it to the console directory
At the end of the procedure, it is best to remove it!
Start the cmd console and enter
cd "C:\Program Files (x86)\IT Manager\Console".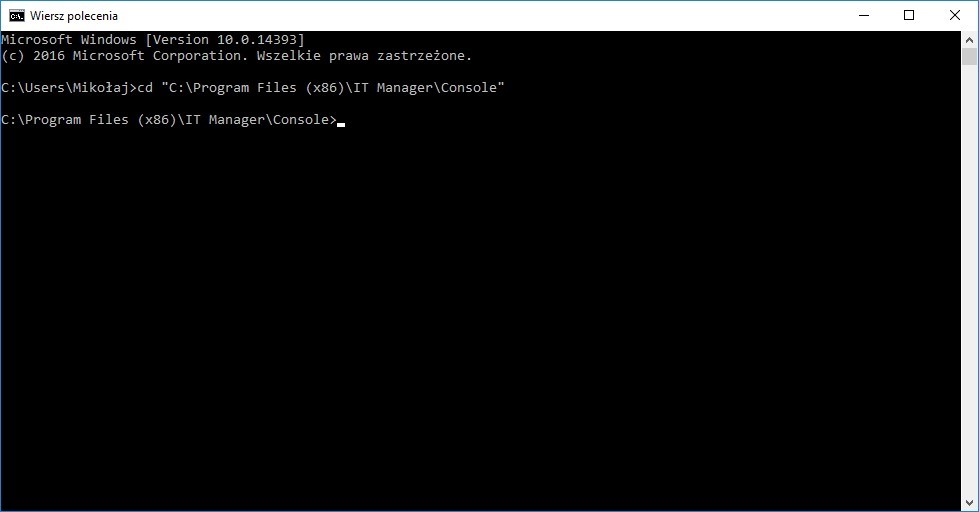
Then enter
"SignaturesExchange\Infonet.SignaturesExchangeClient.exe Import signatures.zxml".the process will start in the background. A message will be displayed after completion.
Generation of documents
The ITManager system also enables the generation of reports and documents for resources received by the company, user and their submission. Below is an example of a resource circulation path in the organisation.
Acceptance of the resource to the warehouse (the role of the warehouse may be played by an organisational unit)
Once a resource is linked to a user, it is possible to generate
Resource handover card (the user accepts the resource from the person handing over the resource, in this case the person logged into the ITM console)
Resource return card (the user returns the resource to the recipient, in this case the person logged into the ITM console)
If the resource is to be transferred for liquidation, the following steps must be taken
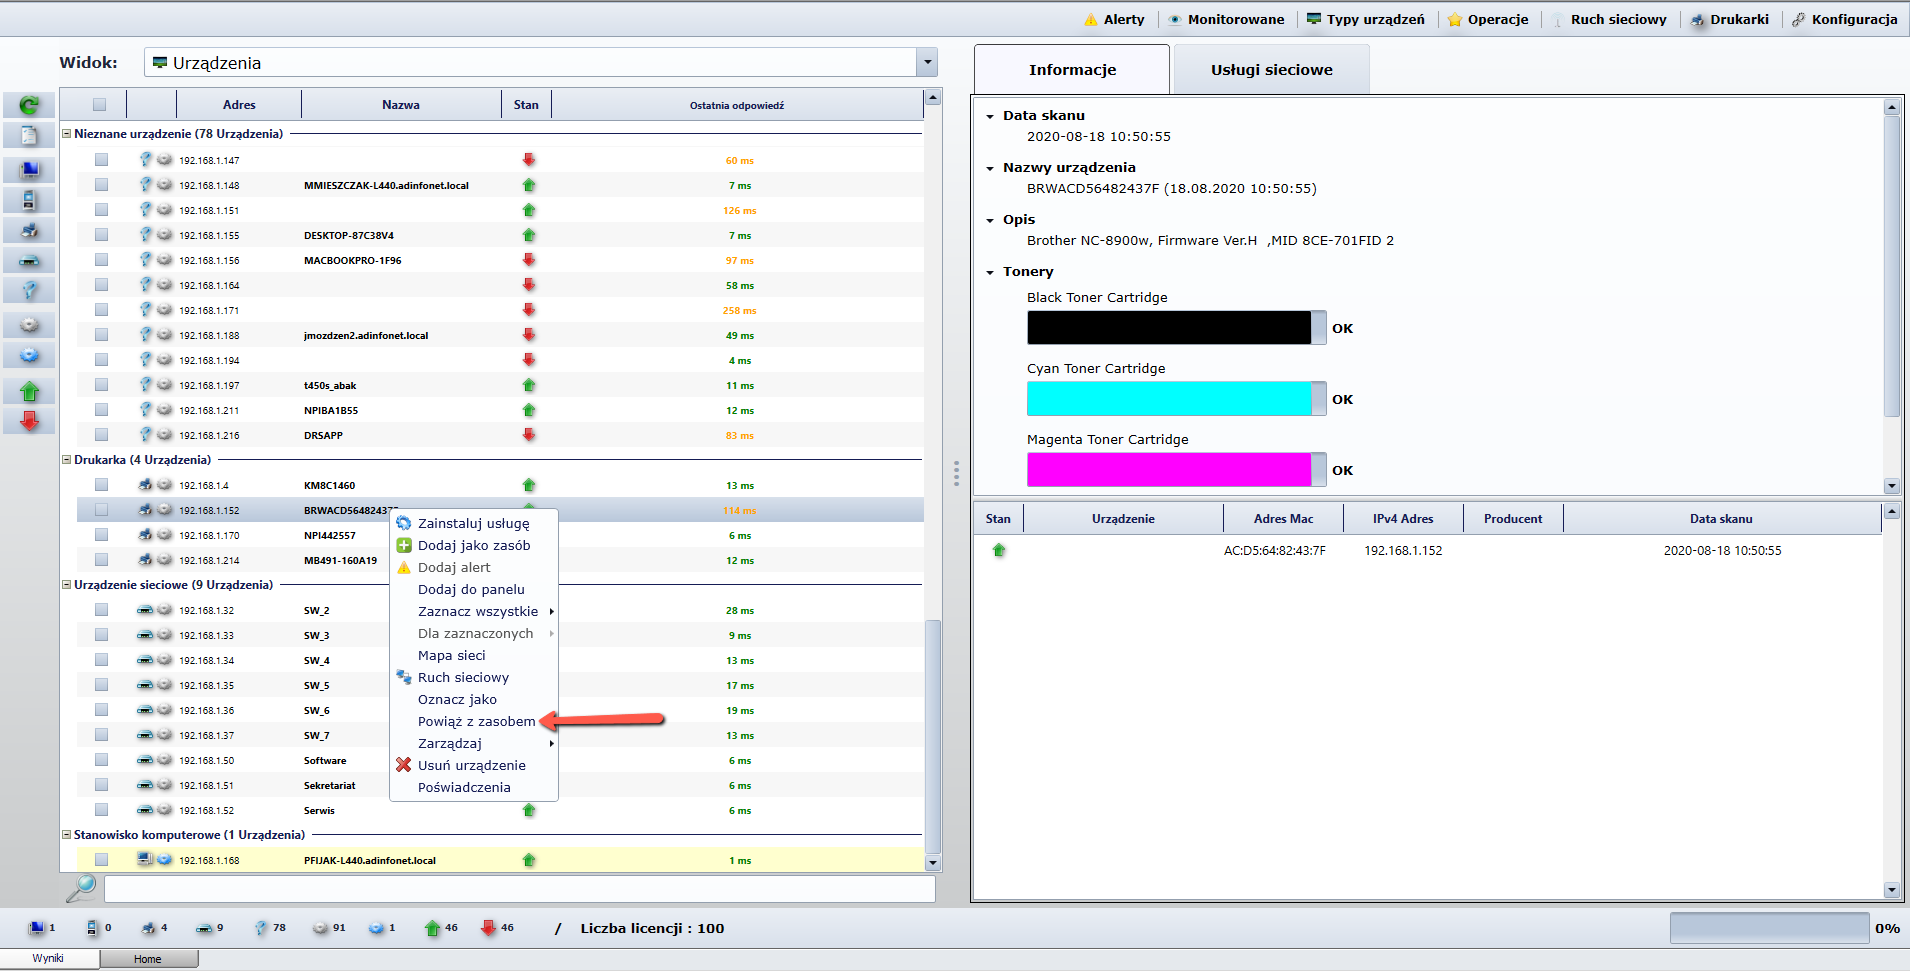
Resources and Network Scanner
In order to make full use of the IT infrastructure management and Network Scanner modules, resources detected by the Scanner can be added. This can be done in two ways.
If resources have already been imported or created in the IT infrastructure management module, they can be linked to hardware detected by the Network Scanner.
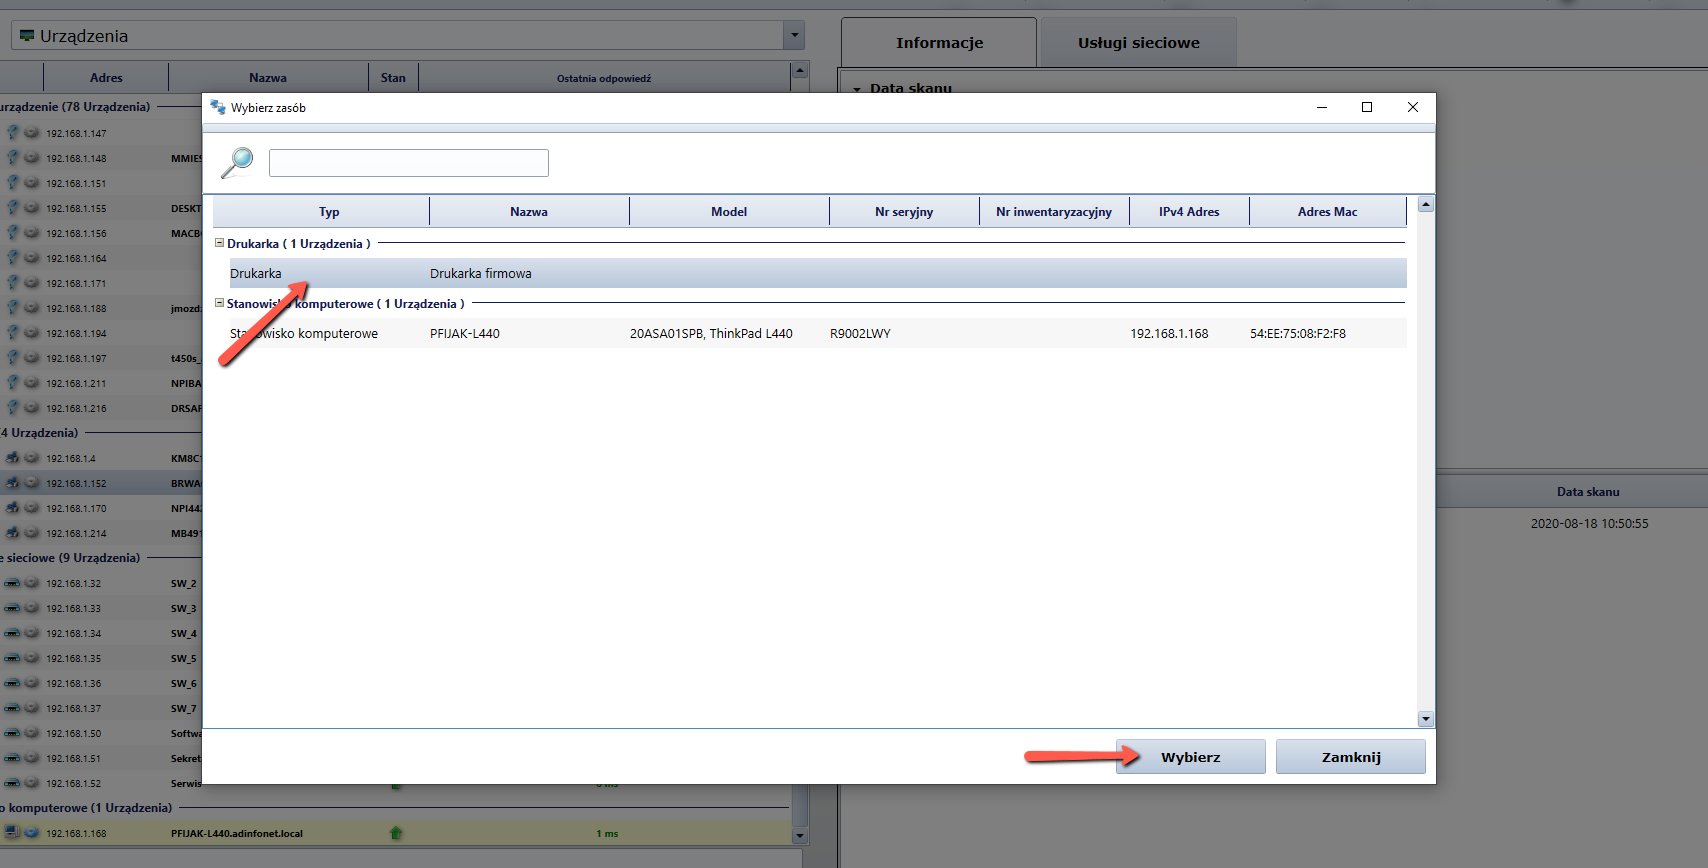
The data of the related resource will be automatically updated.
If the resource does not exist, it can be added directly from the Scanner.

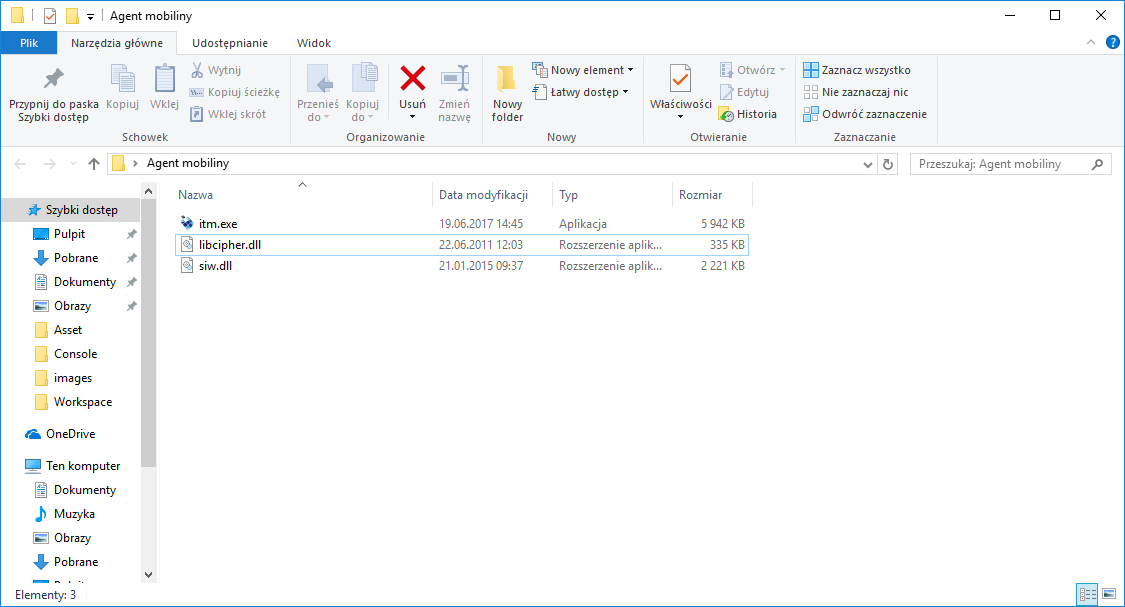
Offline scanner
The mobile version of an agent requires three files: itm.exe, libcipher.dll and siw.dll. They can be copied from the computer on which it was installed locally or downloaded from our website and installed.
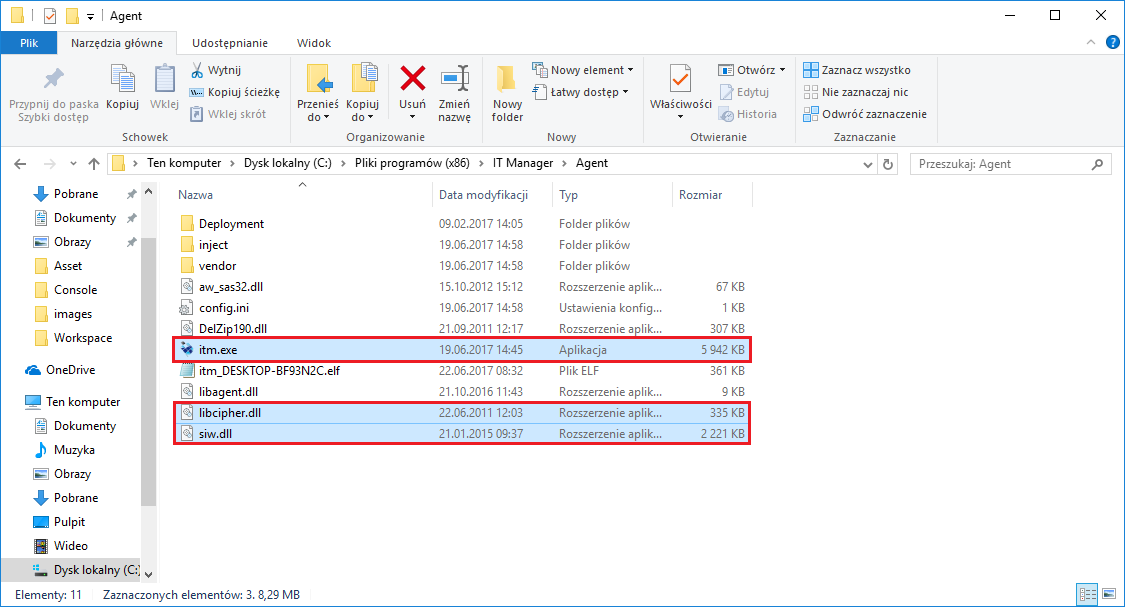
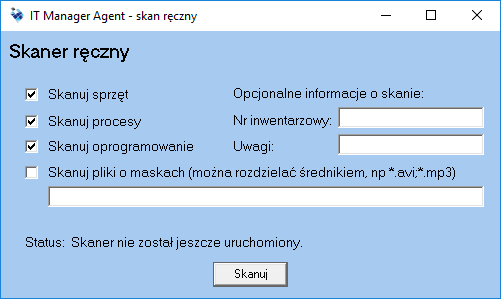
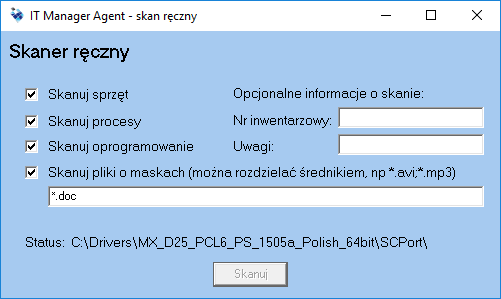
Agent starts with itm.exe file with administrator credentials (right click on itm.exe and select Start as administrator). After starting itm.exe, the following window appears. Select the selected options from the following: Scan hardware, scan processes, scan software. You can also define file extensions that will be scanned.
If on many computers we have to perform a scan of files with the same extensions, it is worth copying additionally the
config.inifile to the mobile agent's folder in point 1.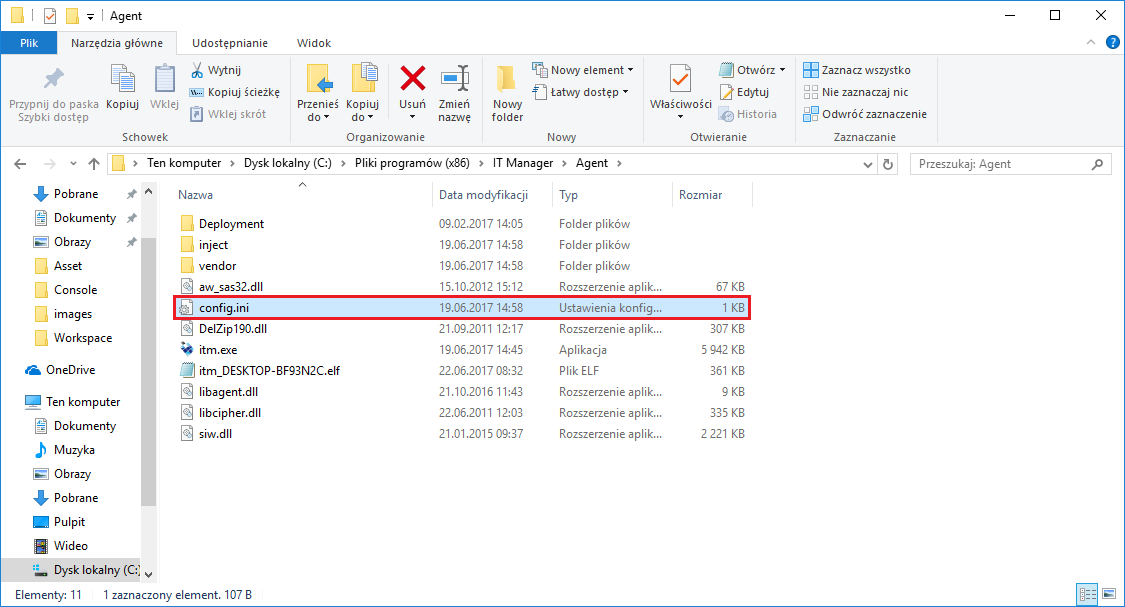
Then edit it in Notepad.
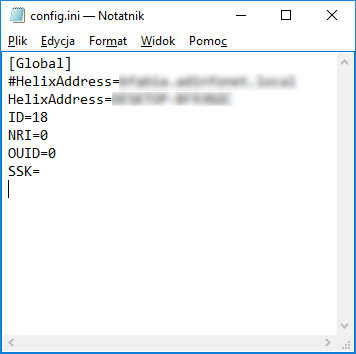
Create sections
[Audit]and enter the parameterFileMask.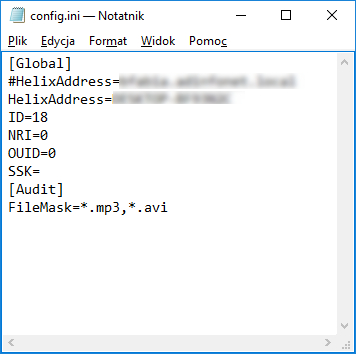
In case the
config.inifile does not exist, you should create it yourself.Start the scan by clicking on the Scan button. In section Status there is information about the scanning process.
The status section informs about the completion of the scanning process. Additionally, this section contains the name and the location of the file containing the scan summary.
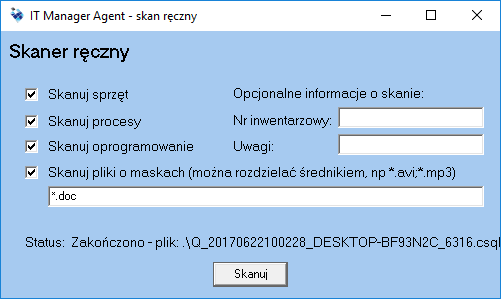
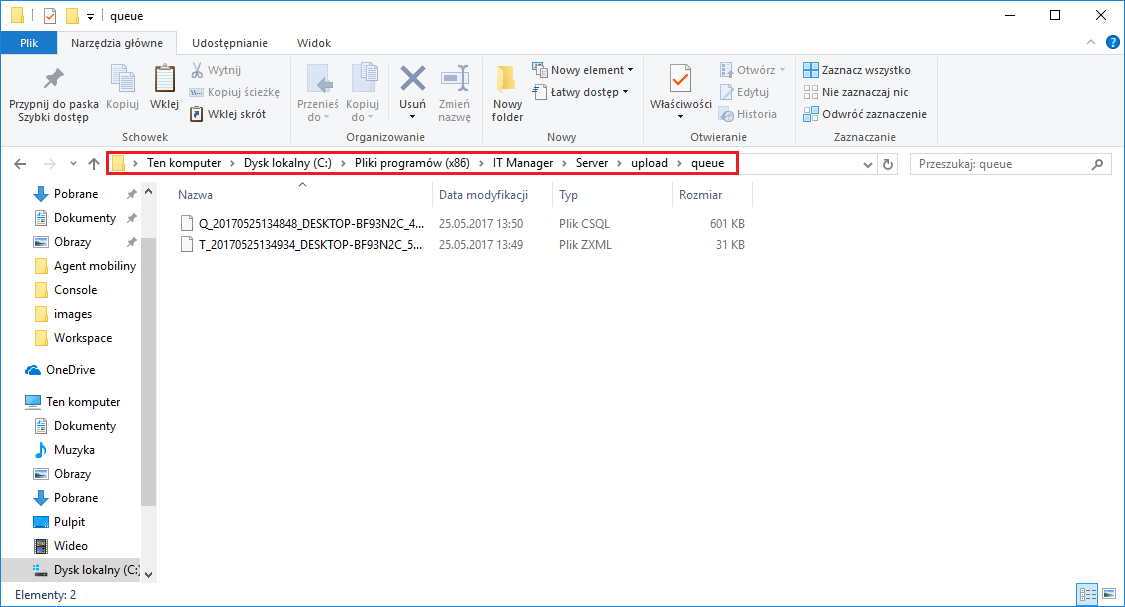
The result of the scan will be generated in the same folder where the Agent files are located. These are files with extensions *.zxml and *.csql.
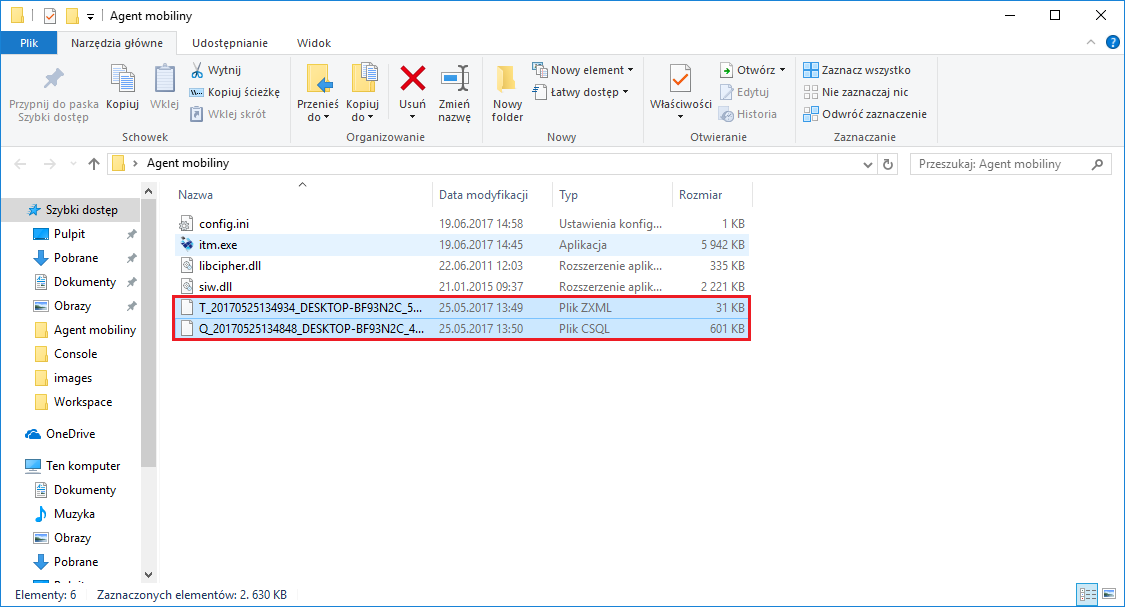
these files should then be copied to the Helix server queue directory.
it is also possible to call up the agent's work in silent mode. To run it in this mode you have to run itm.exe with the switch
/sp. The program window will not show up and the scan will start and finish creating 2 files in current directory.
You can also change the file saving location (parameter
/outputpath).