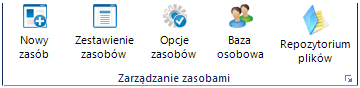
Resource management
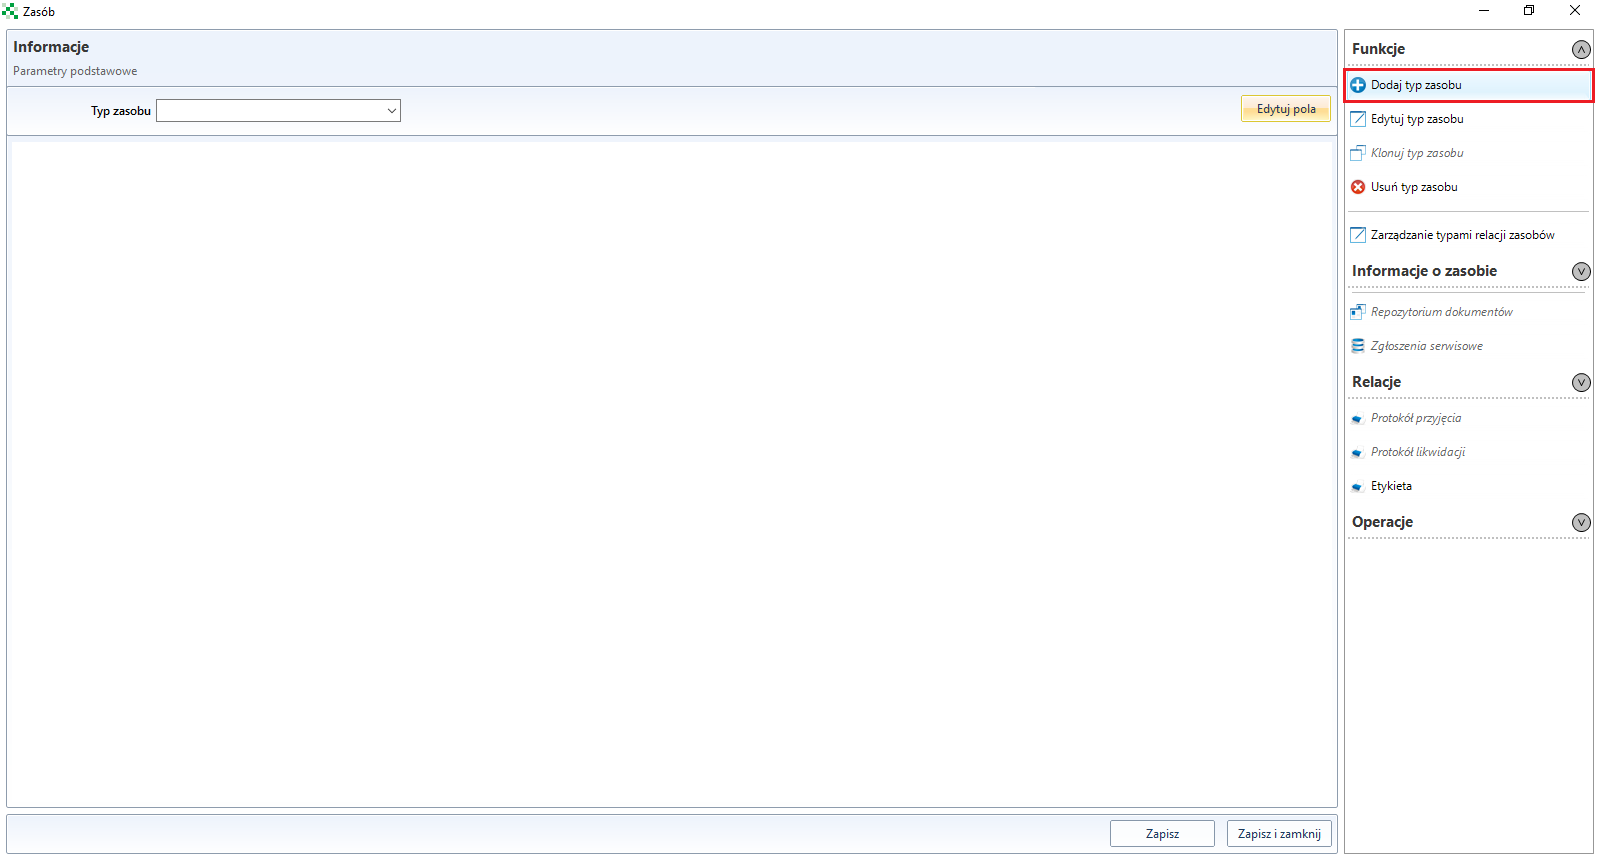
Add resource
The Add resource button allows you to add a new resource. In the new window you should specify its type and fill in basic information.
To unlock the following grey options, you must first name the new resource, select an organizational unit and click Save.
Resource informations
In the information section it is possible to add additional documents to the resource using a repository or service contracts, as well as there is a possibility of suspicious reports related to the resource.
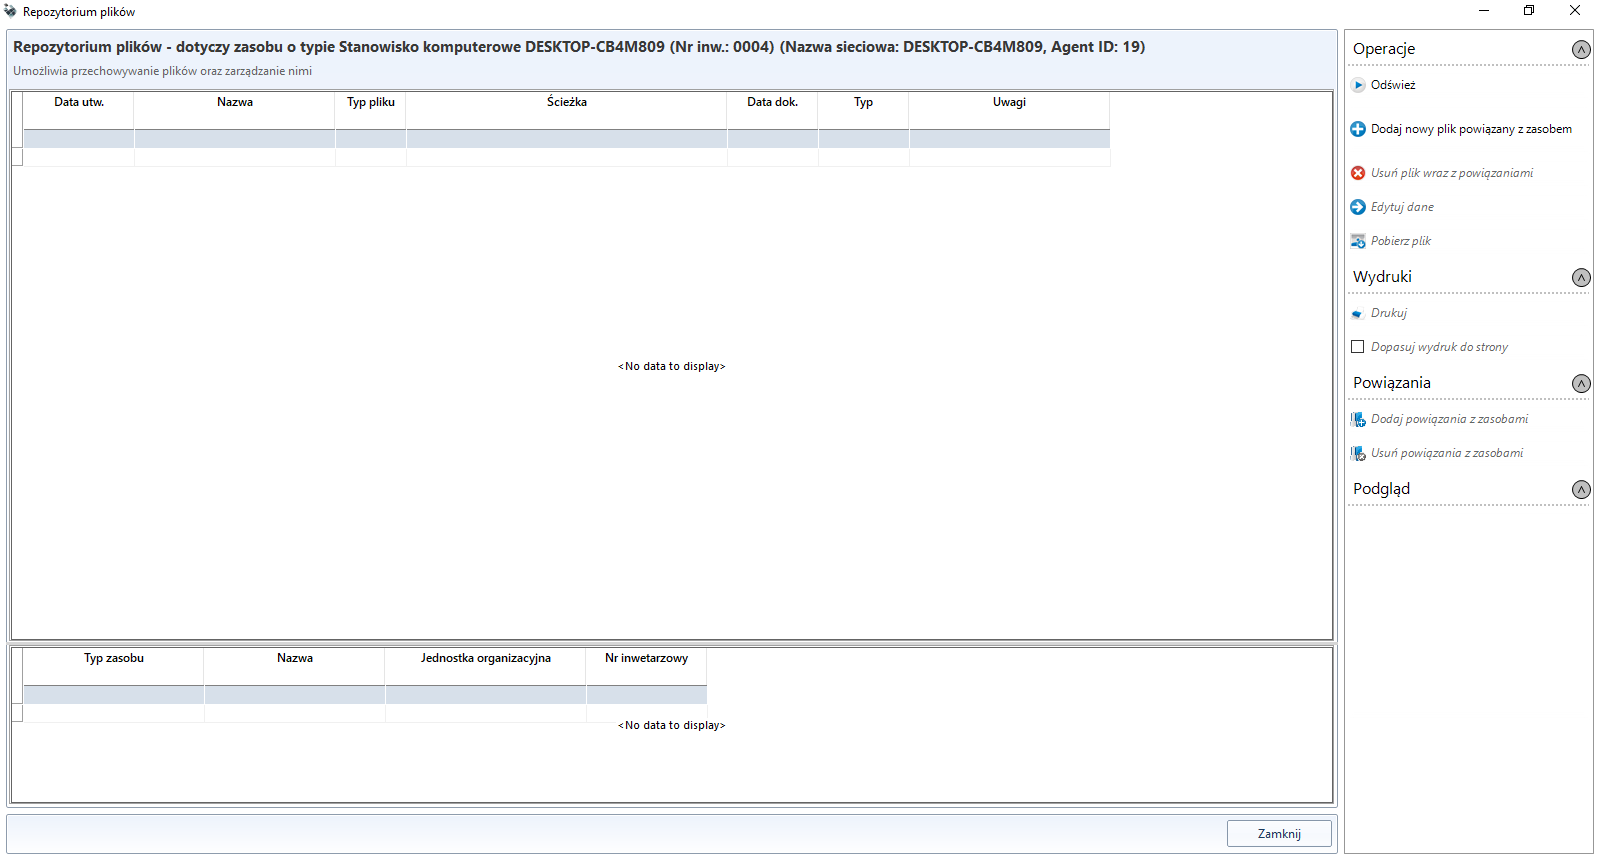
File repository
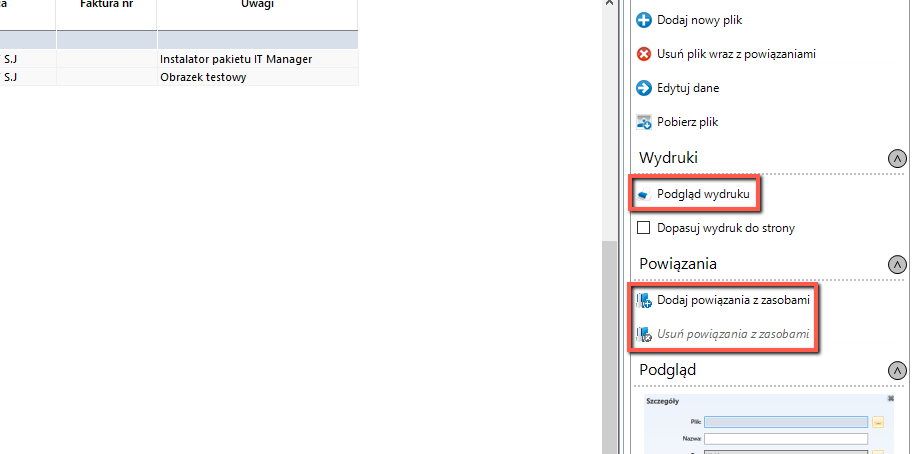
With this option it is possible to bind specific files.
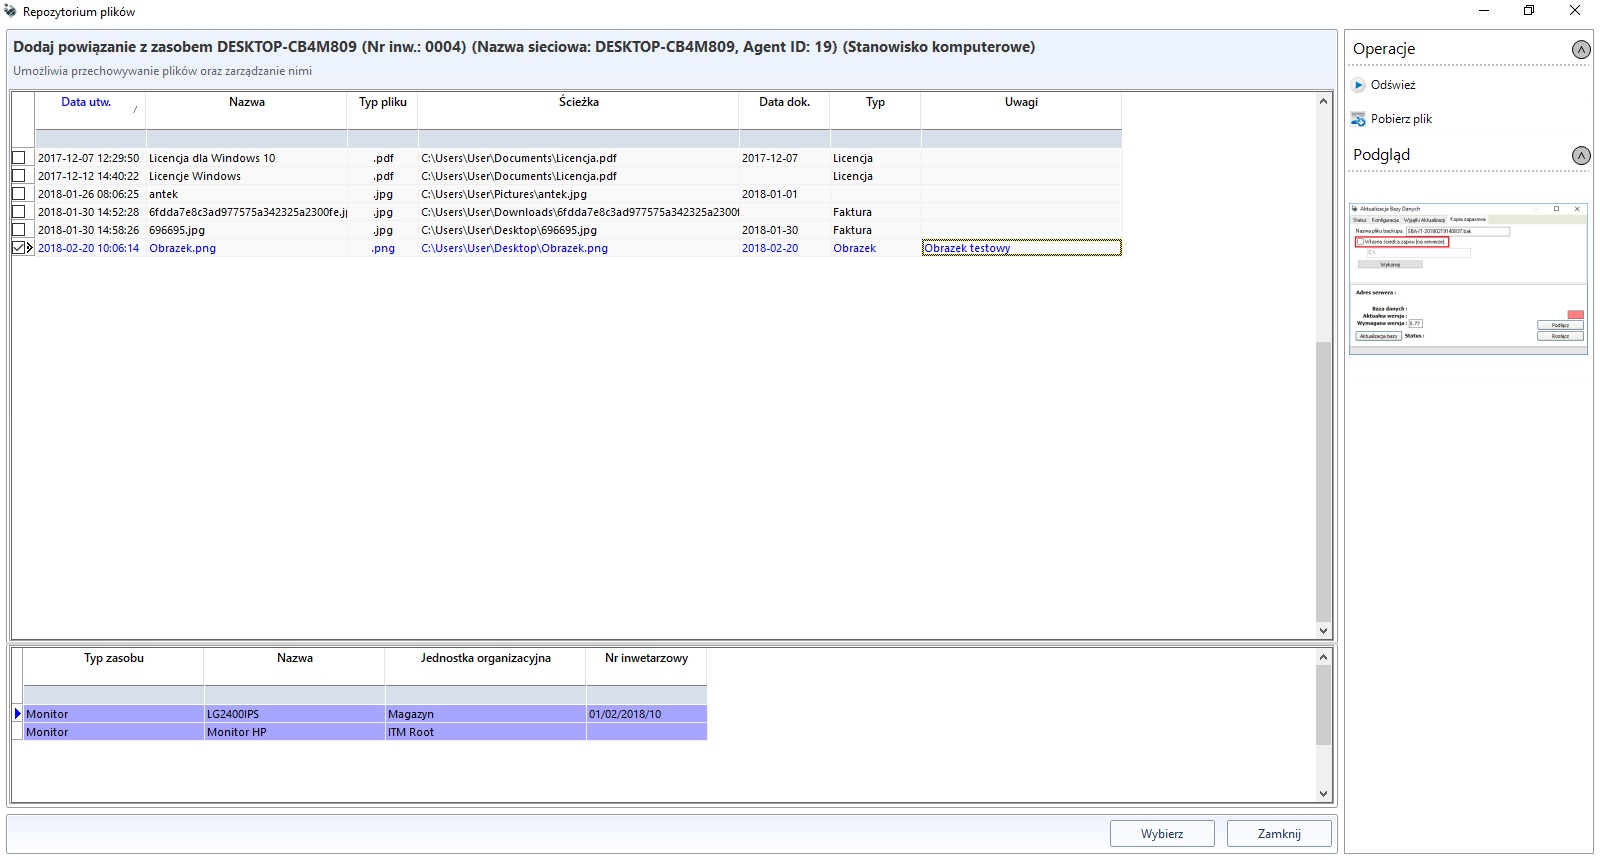
Assign to existing files in the repository
The option Assign to existing files in the repository allows you to bind the resource to files already added.
Service contracts
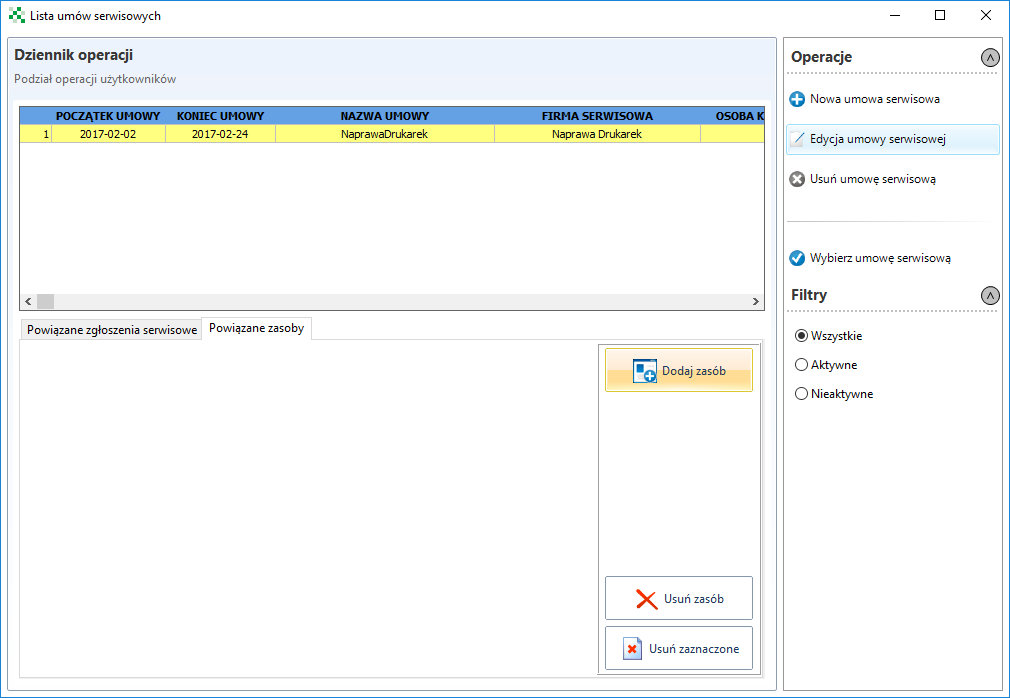
After clicking the button Service contracts in a new window it is possible to add a new agreement, preview the terms of the agreement or edit it.
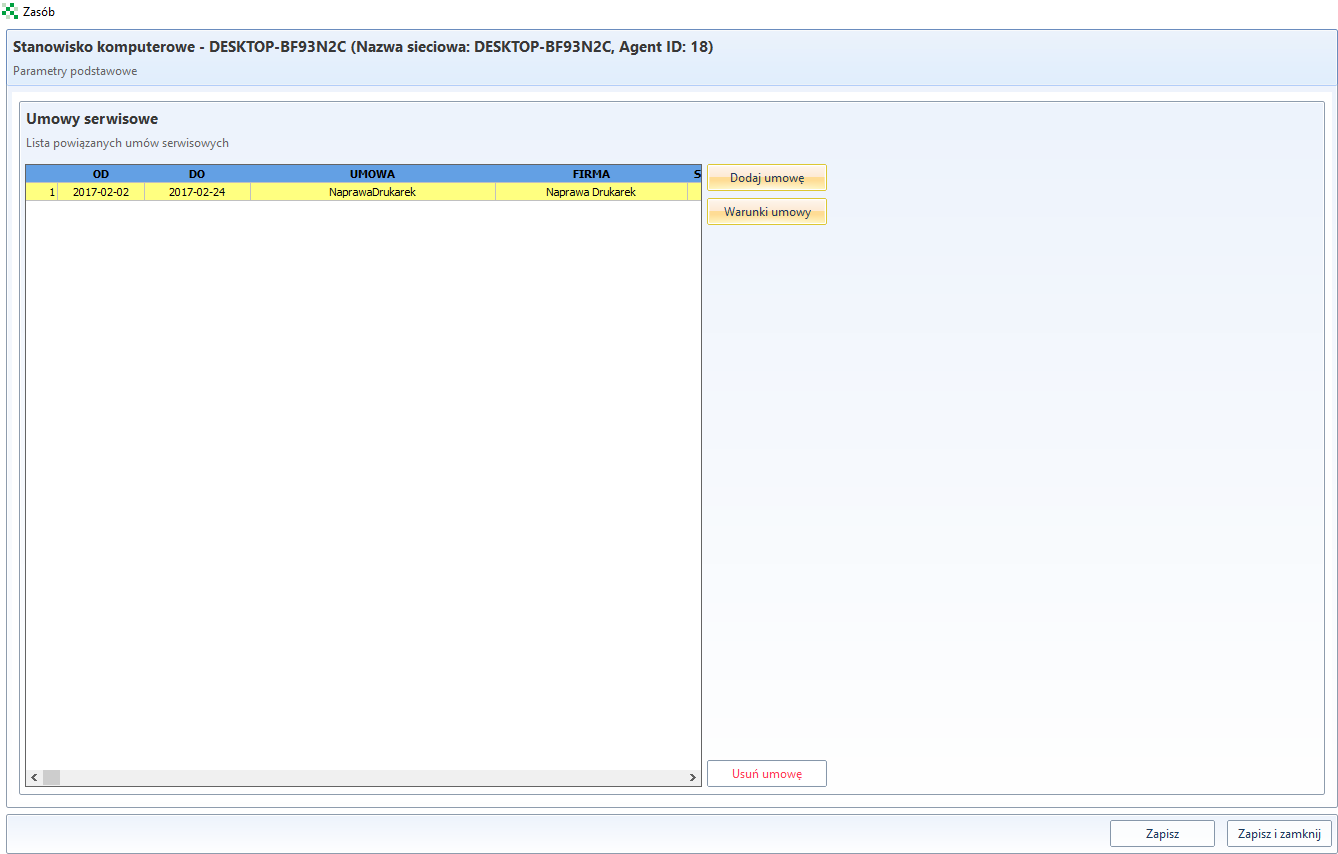
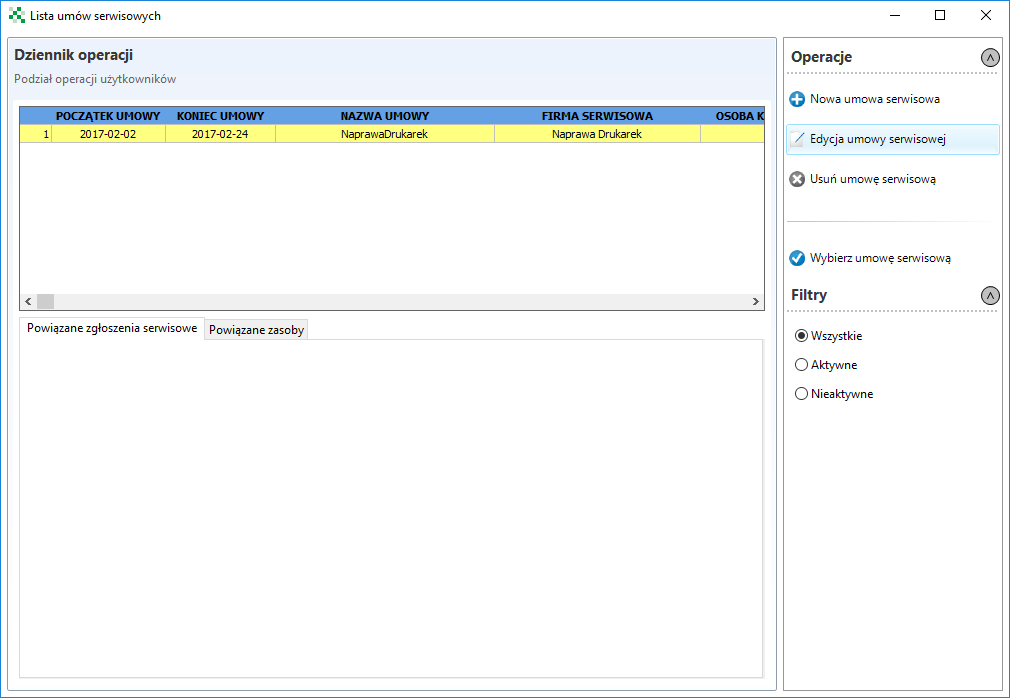
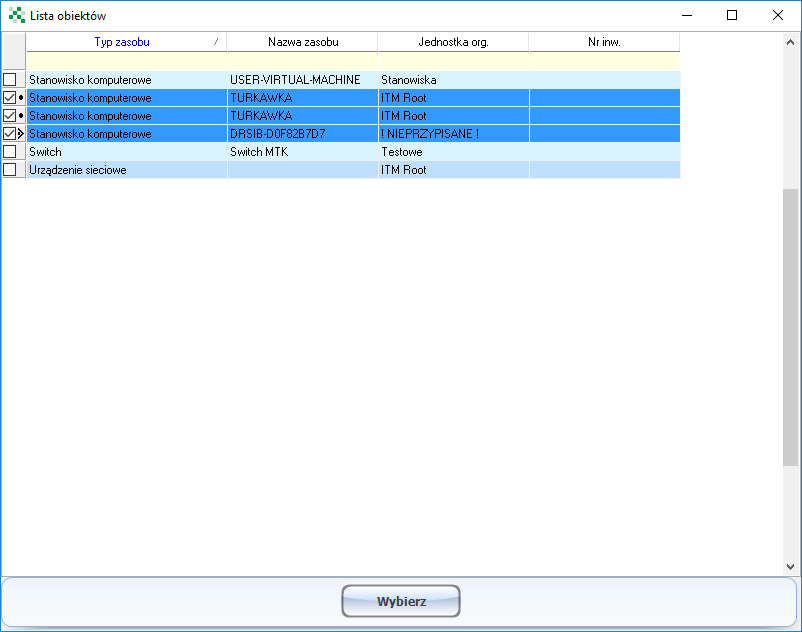
After clicking Add a contract, we can also add the contract to other resources via the Bound resources tab.
Service tickets
The Service Contracts tab gives access to job-related applications.

Relations
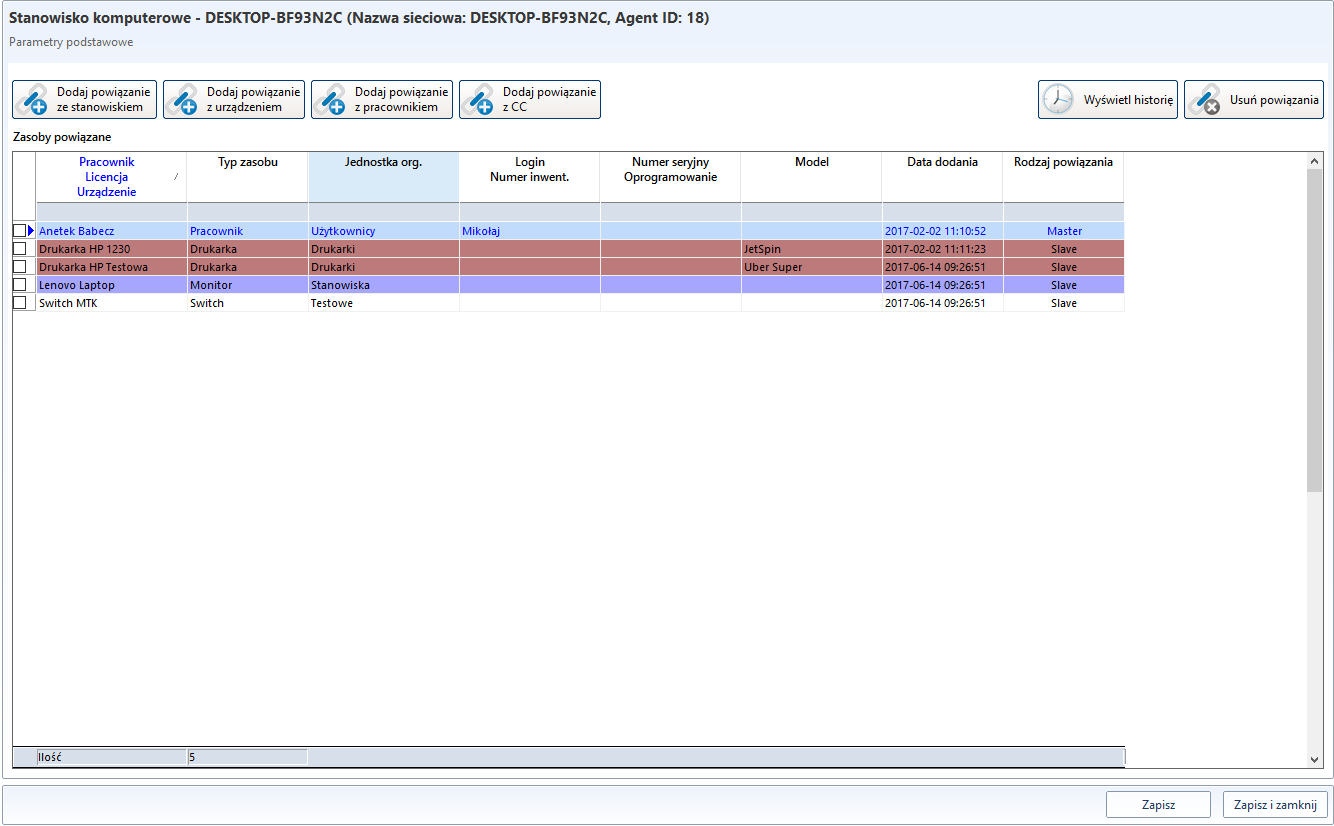
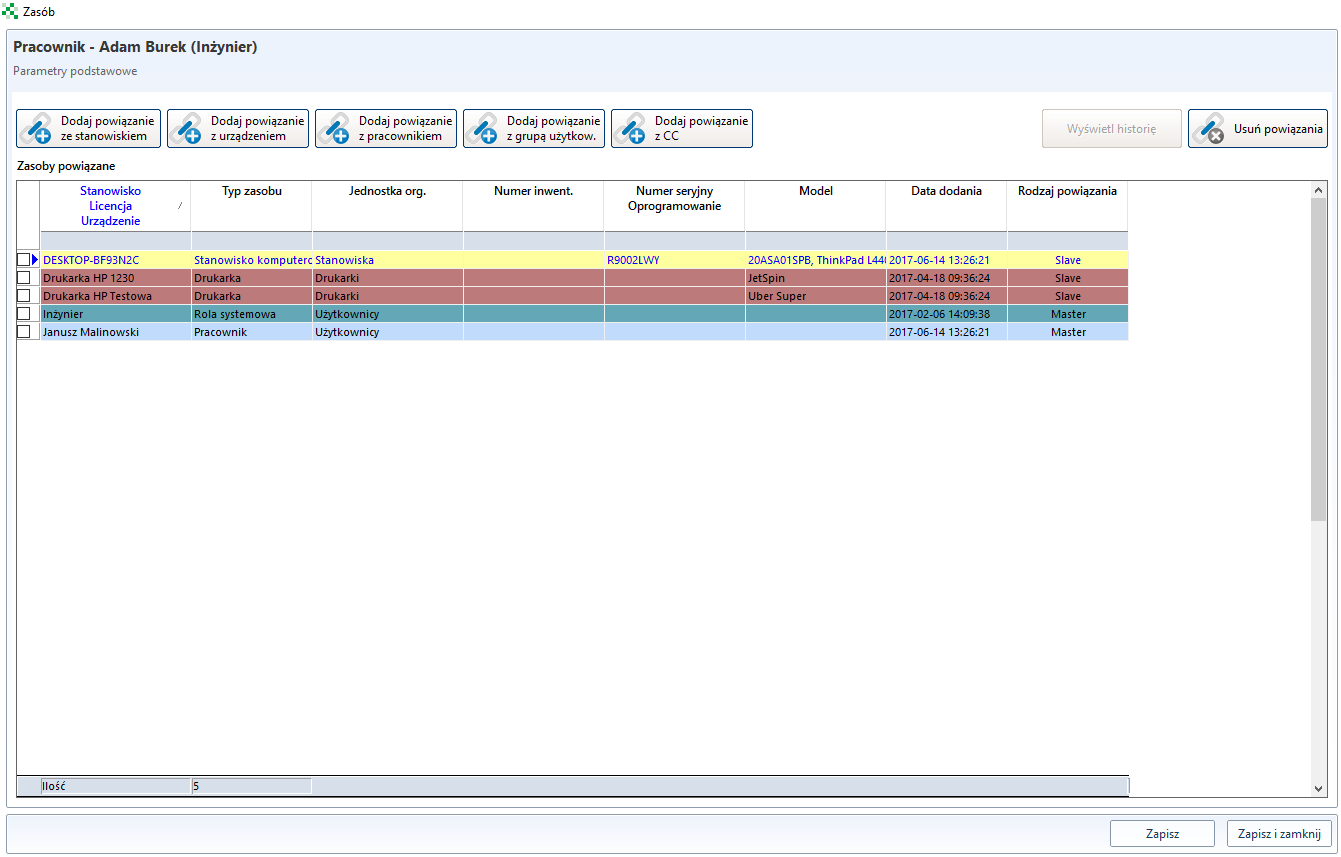
Once a resource has been added, it is possible to create a relation for it with other resources, e.g. linking the employee to the computer workstation it uses. To create a relationship, select the appropriate option from the side menu:
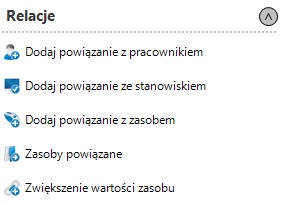
Then select the appropriate equipment/employee and confirm the selection by clicking the blue button.

Once selected resources are accepted, they will be linked.
Transfer of resources
For a resource of Employee type, the option to transfer the assigned resources is available. In order to transfer selected resources to another employee, from the menu on the right-hand side, select the option Affiliated resources. As long as you do not select at least one resource in the list, the option Resource transfer, shown in the menu on the right, will be inactive.
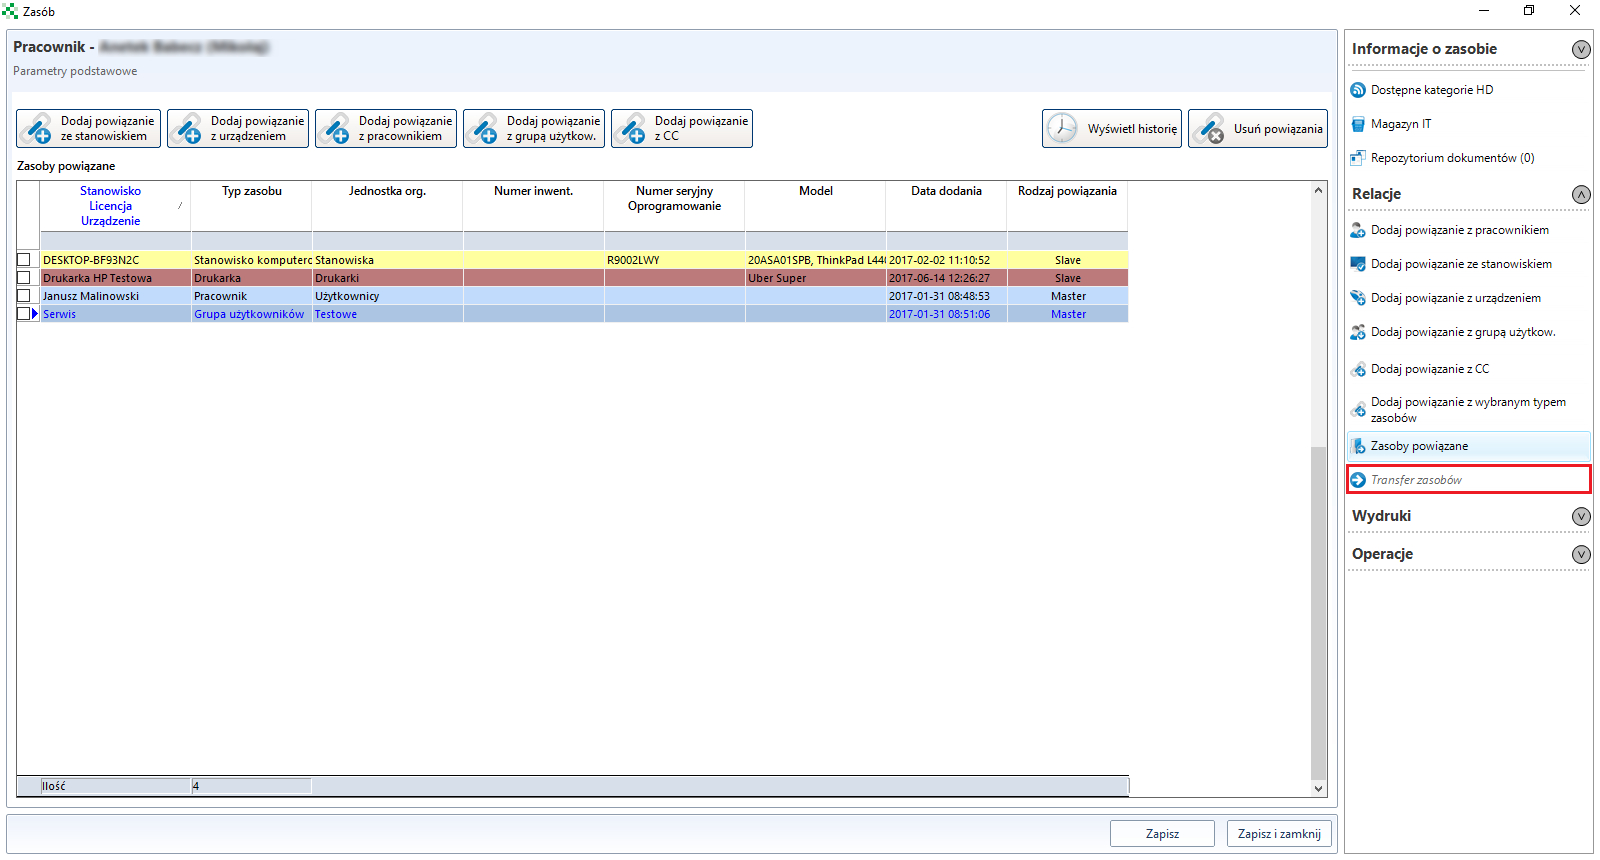
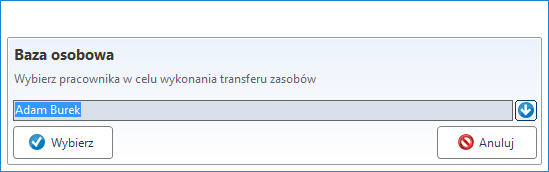
After selecting the resources to be transferred and clicking on the option Transfer of resources, a window will appear on the screen allowing you to select the employee from Personal database to which the resources are to be assigned.
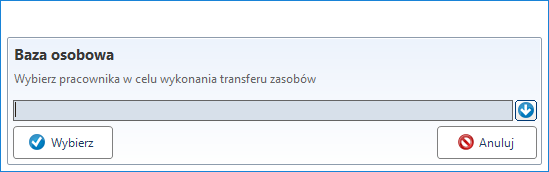
When you click on the button with the arrow symbol, the list of employees will be expanded, from which the target employee should be selected. Then click Select to continue the transfer or Cancel to cancel the transfer.
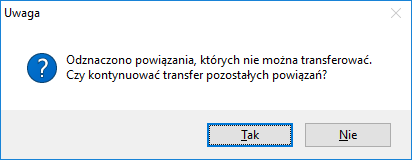
Clicking the Choose button will start the verification procedure for the selected resources to be transferred. Types of resources such as System role or User group** are not transferable. If a Employee->Employee type relationship is selected for transfer, where both the source and the target employee are the same person, such relationship will also be considered to be prohibited.
Links to resources considered as not allowed for transfer will automatically be unchecked in the list and a message will appear on the screen informing about this situation. The message also asks whether the transfer of the remaining resources is to be continued.
Confirmation of the message will transfer resources related to the current employee to the target person.
For the above example, the view of the Related resources of the source employee will currently only show the resources that have been considered non-transferable.

And the view of the Related resources of the target employee will now represent the resources transferred.
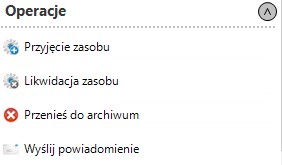
Operations
In the operations section, there is a possibility to liquidate the resource or to archive it.
Resource liquidation
Important
For computer workstations, the ITM agent must be uninstalled before decommissioning the resource.
The option Resource liquidation is created for stocks that are intended for scrapping. The decommissioning process will be presented on the example of a resource of the Workstation type. In order to liquidate the aforementioned resource, you must go to its edition (e.g. double-click on a computer stand).
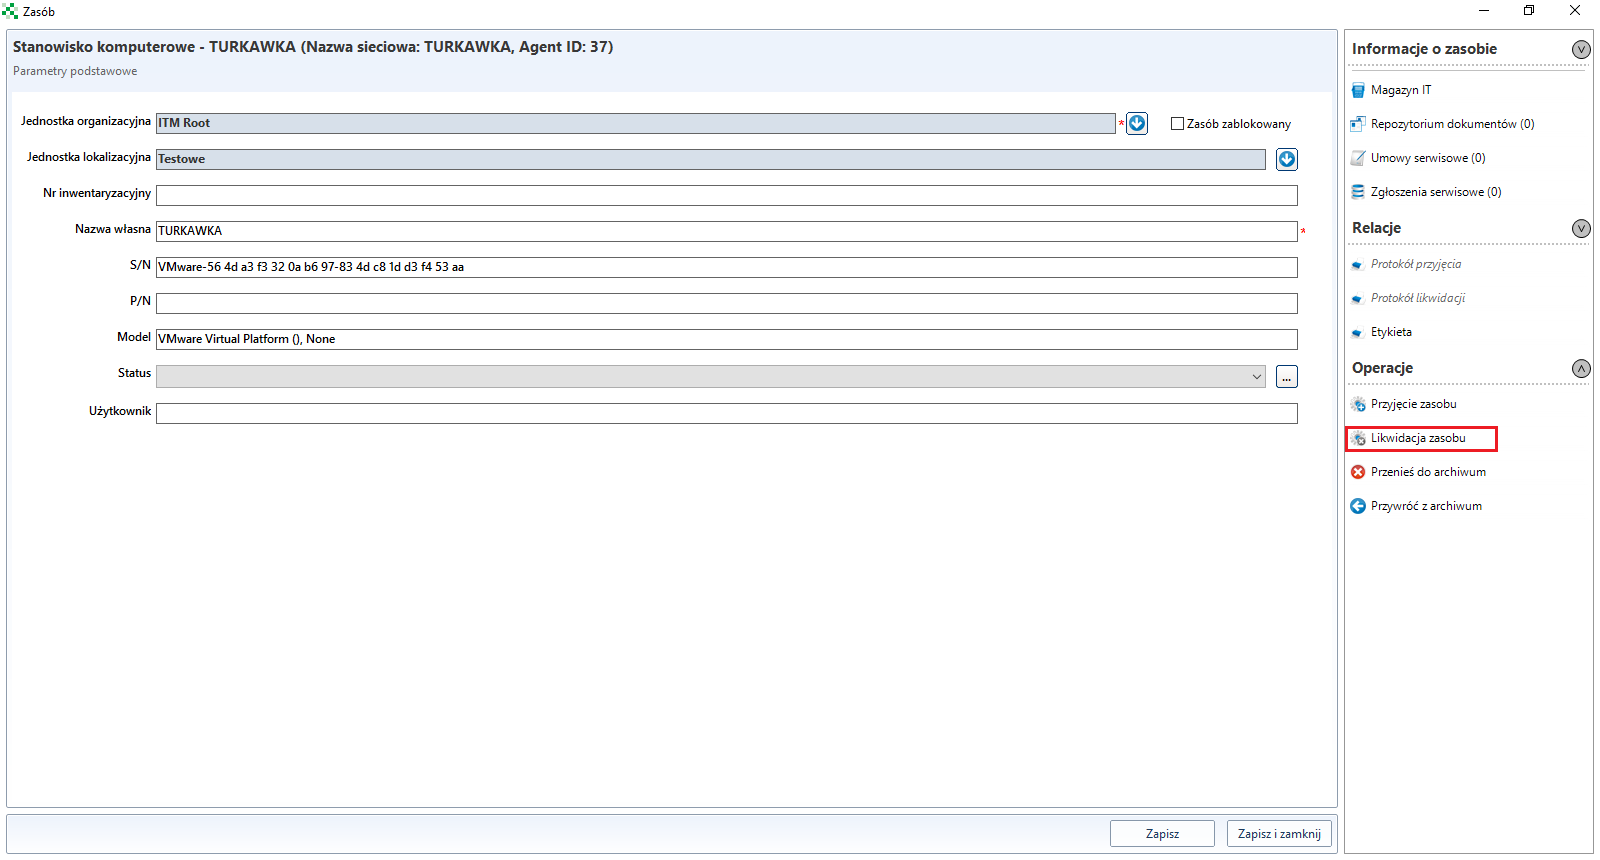
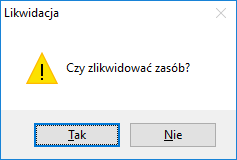
When the above window appears, select Liquidate resource and then in the message window, select Yes.
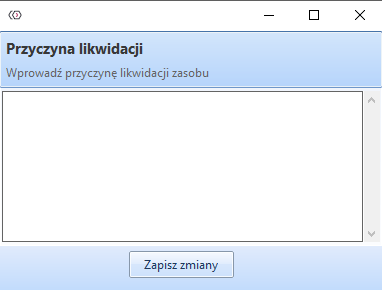
In the next traffic jam, the reason for liquidation must be stated.
The liquidation of the resource will be confirmed by a message, as shown in the screenshot below. In addition, in the lower left corner of the window, the words Resource liquidated will appear, and the buttons Save and Save and close will become inactive.

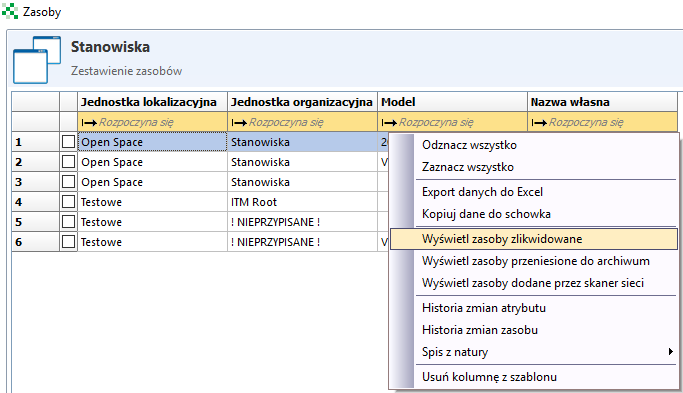
It is possible to view the positions that have been closed down. To do this, go to the Tools** tab and select Only liquidated workstations from the System context menu.

The list of posts will include all the posts that have been eliminated.
The remaining liquidated resources can also be displayed. To do this, select the tab IT infrastructure management-> Resource list from the console. Right-click anywhere in the table. From the context menu, select ** Show liquidated resources**. All liquidated resources will appear in the resource list.
Moving to the archive
Important
In the case of computer workstations, the ITM agent service must be stopped before the resource is transferred to the archive.
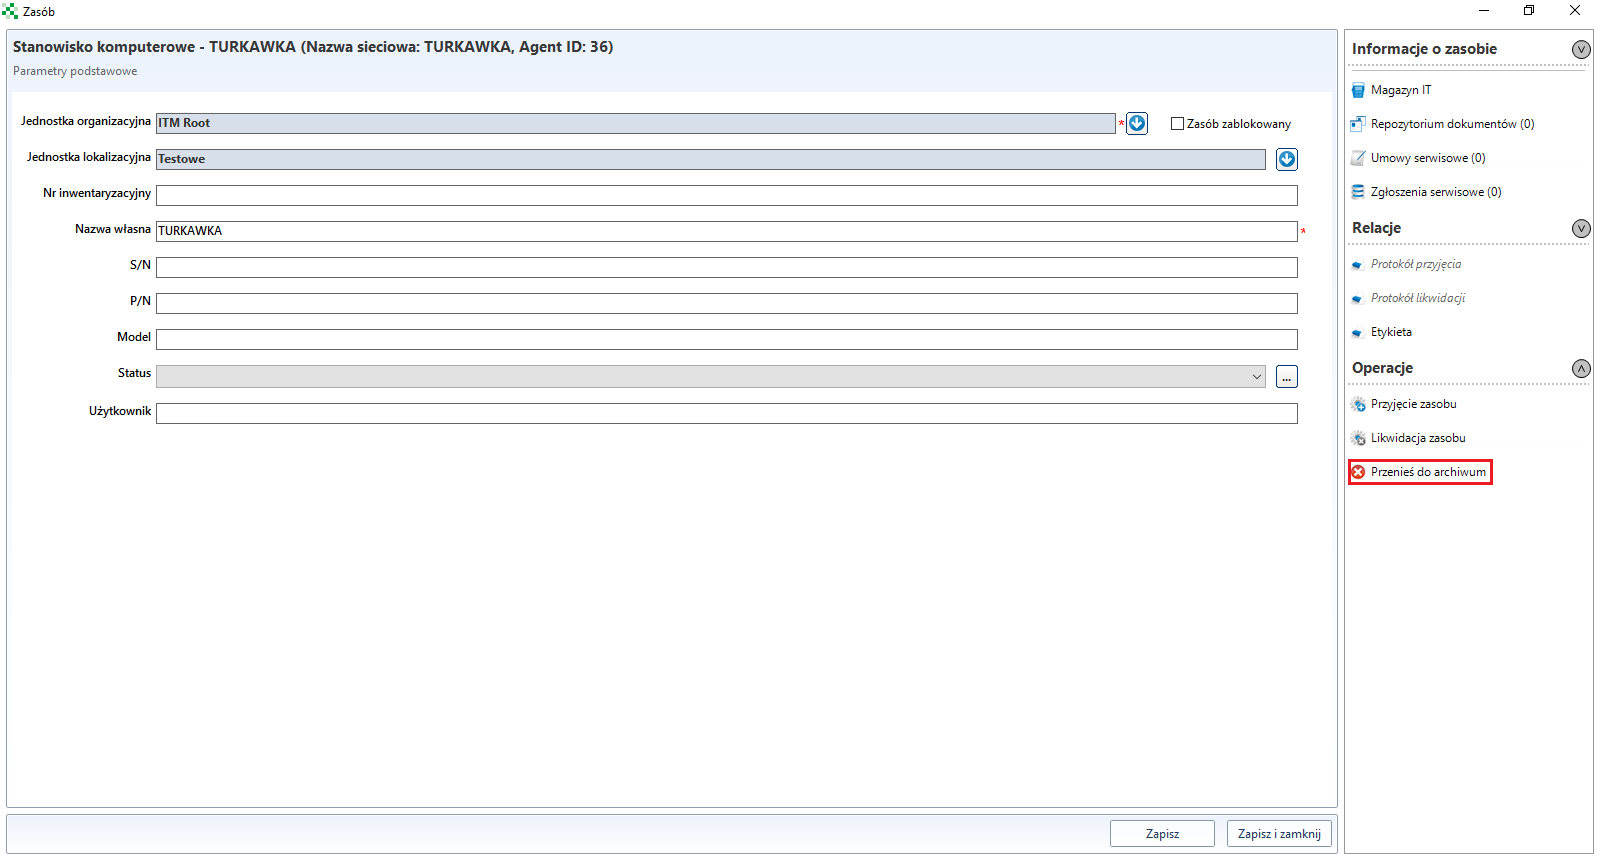
The option Move to the archive is created for resources that for some reason are not currently used, but are planned to be reused in the future. The process of performing this operation will be described on the example of a resource of the ** Workstation** type. In order to transfer this type of resource to the archive, you should first uninstall the agent on the selected workstation, then go to edit the given resource (e.g. double click on the computer workstation).
When the following window appears, select the option Move to the archive.
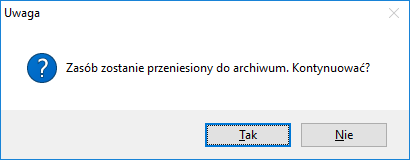
Select Yes in the message below.
The transfer to the archive will be confirmed by a message as shown in the screenshot below. In addition, in the lower left corner of the window, the words Resource archived will appear, and the Save and Save and close buttons will become inactive.

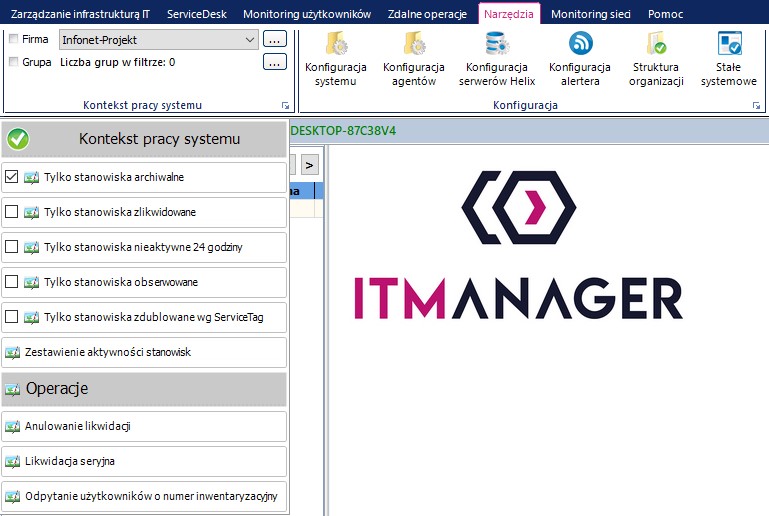
It is possible to view archived positions. To do so, go to the tab Tools and select from the menu Context of system operation Only archived workstations.
All archived positions will appear in the job list. In order to restore a ** Computer Workstation** from the archive, you need to go to the edition of the given resource (double-click on a computer workstation in the List of computer workstations).
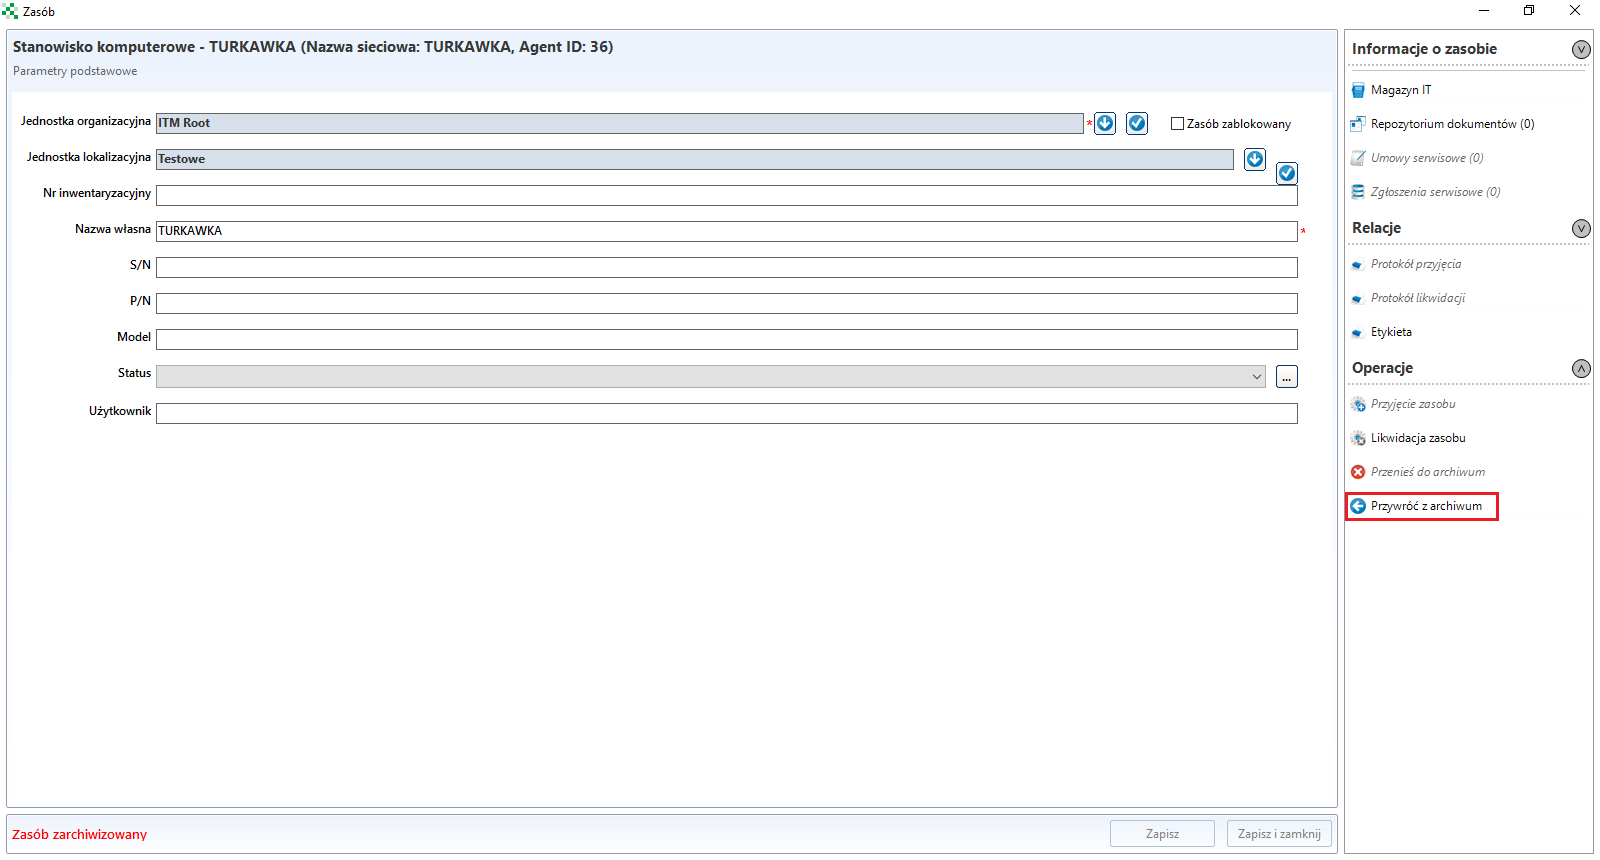
In the above window, select the option Restore from archive. When the message appears, select Yes.

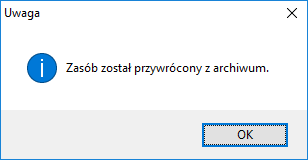
Restoration from the archive will be confirmed by a message, as shown in the screenshot below.
The remaining archived resources can also be displayed and restored. To do this, select the tab Resources from the console. Click anywhere in the table with the right mouse button and from the context menu select the option Show resources moved to the archive.
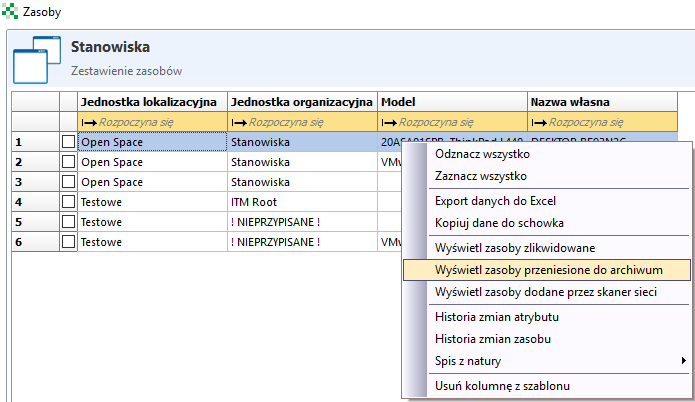
All archived resources will appear on the resource list. In order to restore an archive resource, you must follow the same procedure as for a computer station.
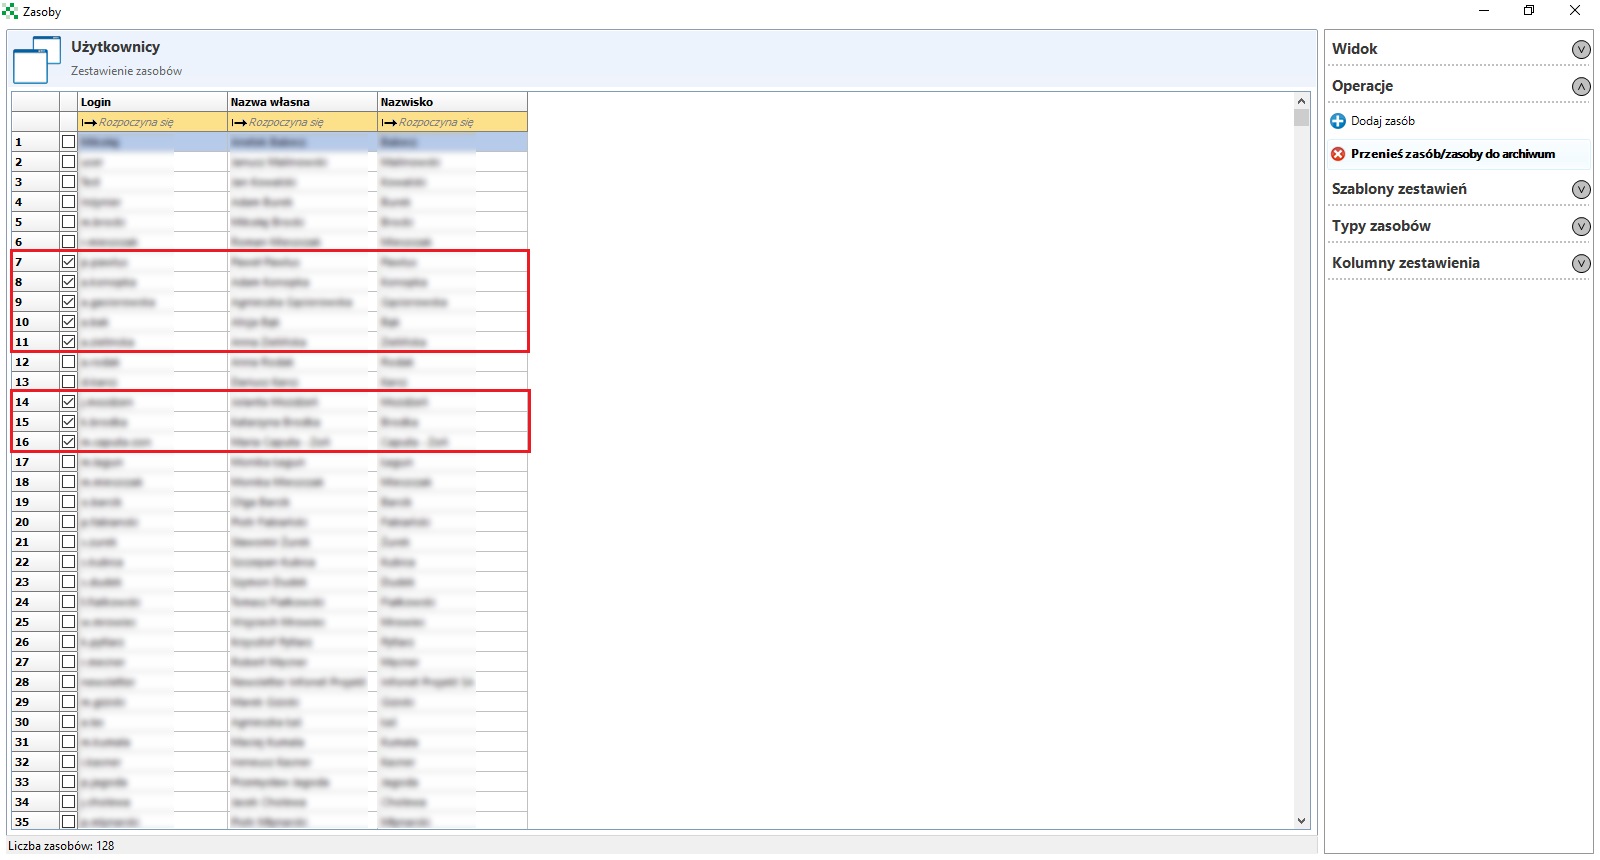
Resource list
When you select Resource list, a table with the saved resources is displayed.
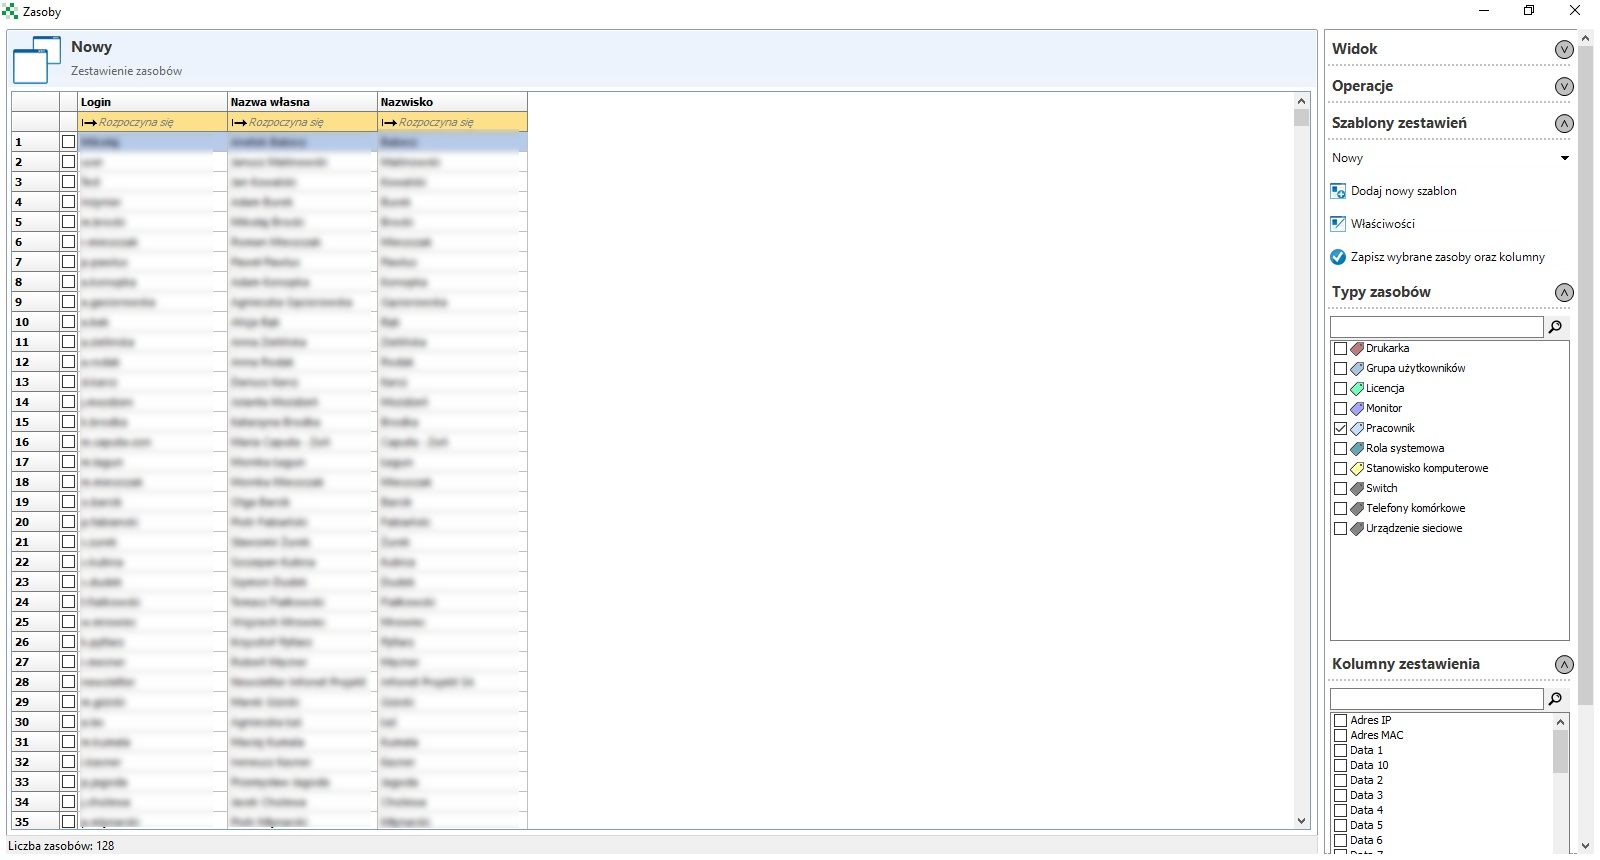
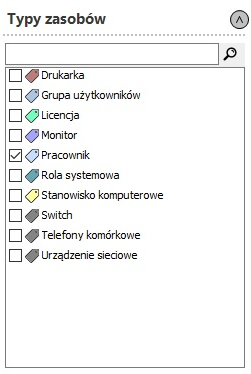
From the Resource types list you can select which types of resources are to be displayed.
The Report Columns list allows you to specify which columns are to be displayed.
Report templates
You can create template to facilitate resource navigation. With this solution, you can precisely define the displayed Resource type and Columns.
The ITManager console has built-in templates. In order to create a new template, from the menu Report templates click the button Add new template.
it shall then be named

and save. After creating a new template, you can select from the list Resource types and Report columns what exactly the newly created template should display. After selecting appropriate columns and resources, save the template by clicking Save selected resources and columns.
Operations on resources
Menu Operations further on, you can move resources to the archive in groups using the option Move resource/resources to the archive.
View
Menu View offers the possibility of filtering resources after Organizational Units and Location Units.
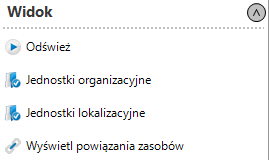
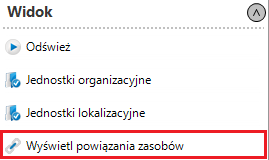
From the View menu, you can also display additional columns to check if the selected resource is linked to another resource, to do so click the Show resource relations button.
In the new window, select the links to be displayed.
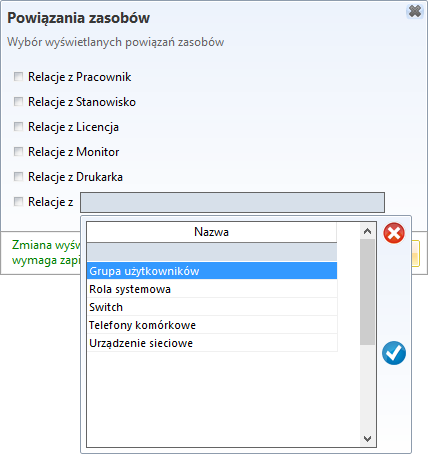
After selecting the relationship, click Display. Save the relationship with the resource to a template (Save selected resources and columns) and refresh the view.
Resource options
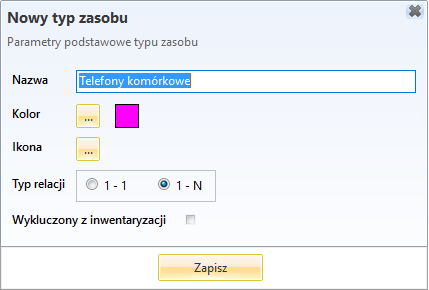
To add your own resource type, click Add a resource type
A window will then appear in which you must enter the name and optional colour, the new resource icon and the relationship type:
Adding fields to resources
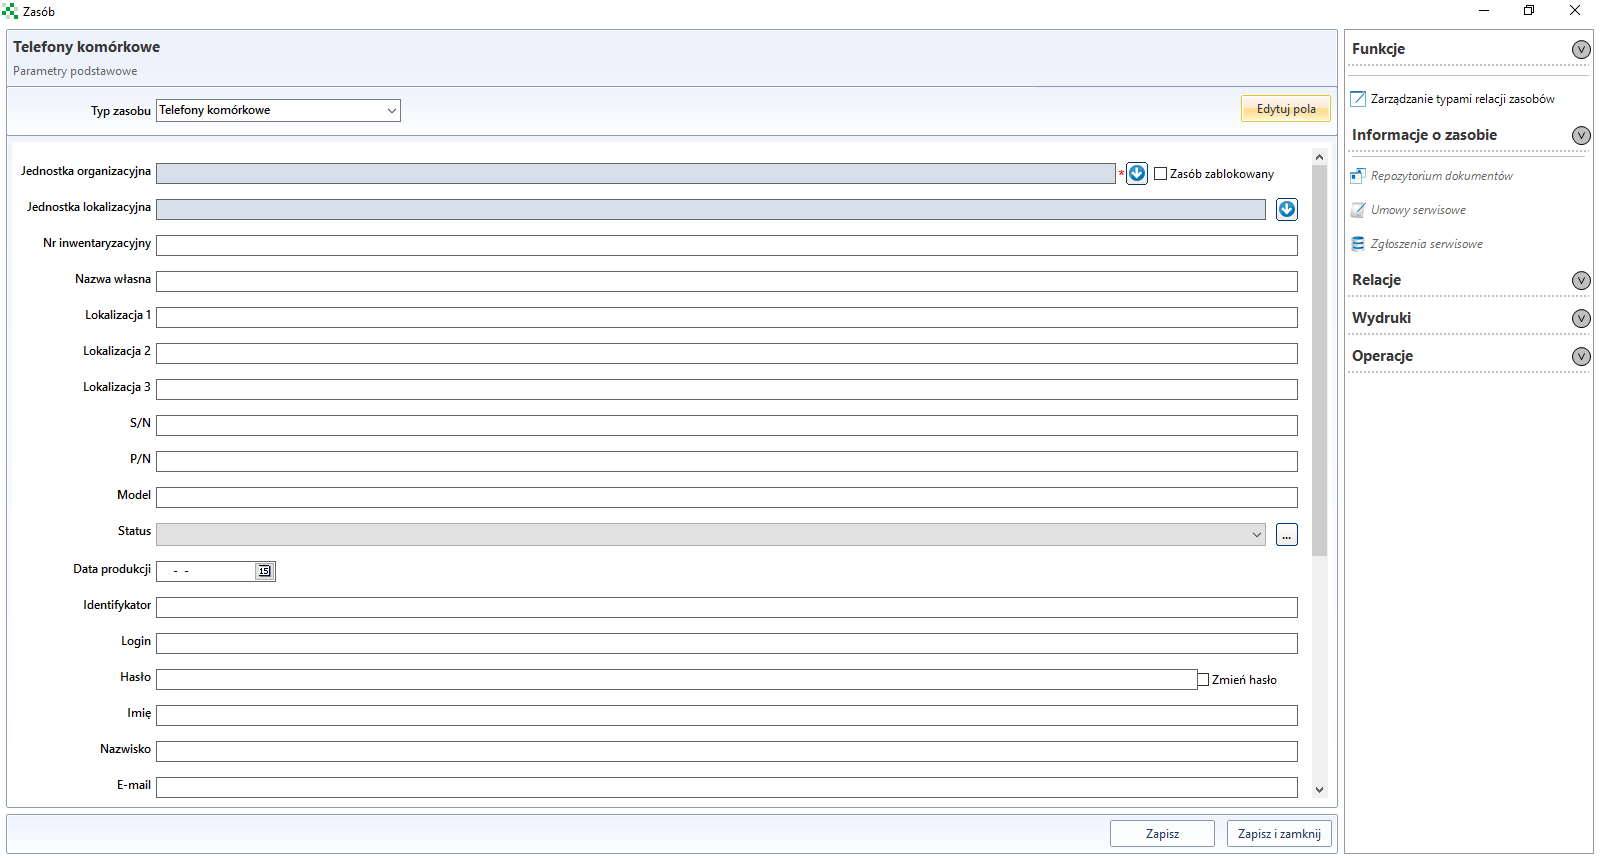
In order to add new fields for the selected resource, e.g. for a Mobile phones type of resource, go to the ** IT infrastructure management** section in the console, click Resource Options and from the drop-down list called Resource Type select Mobile phones. Then click Edit fields.
In the table of available fields, select Visible yes/no for the selected fields.
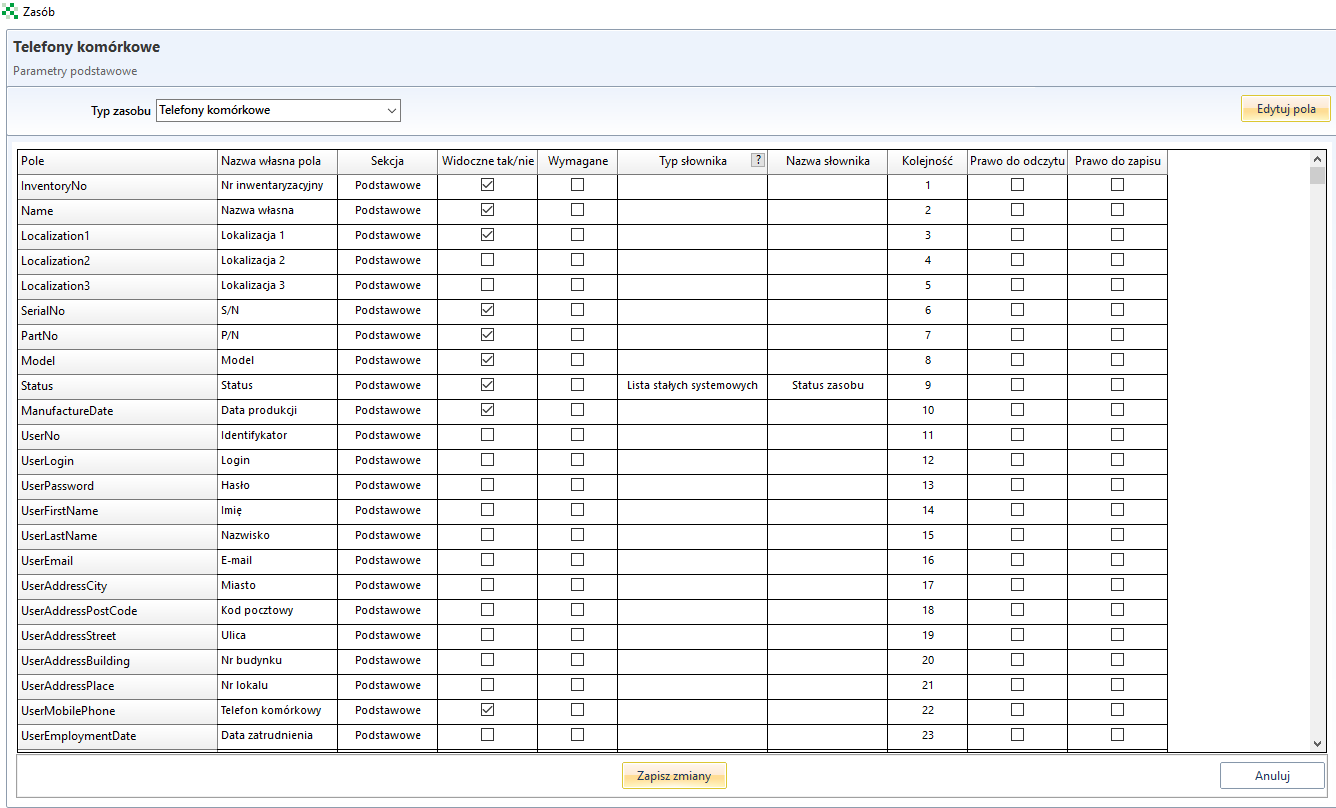
The order of the fields in the format can be set by dragging up/down the individual rows in the table above or by entering the appropriate number in the Order field. After the changes have been made, save them by clicking Save changes.
If in the window of resource data edition a field is required, which is not defined by the manufacturer in the Field column, use the fields prepared for editing by users. These are the fields respectively:
B01-B10 - field of logical type Yes/No,
D01-D10 - date field,
F01-F10 - field for the insertion of real numbers,
I01-I010 - field for integers,
S01-S10 - text box.
After selecting a specific field type, enter the desired self-explanatory name in the Field name column.
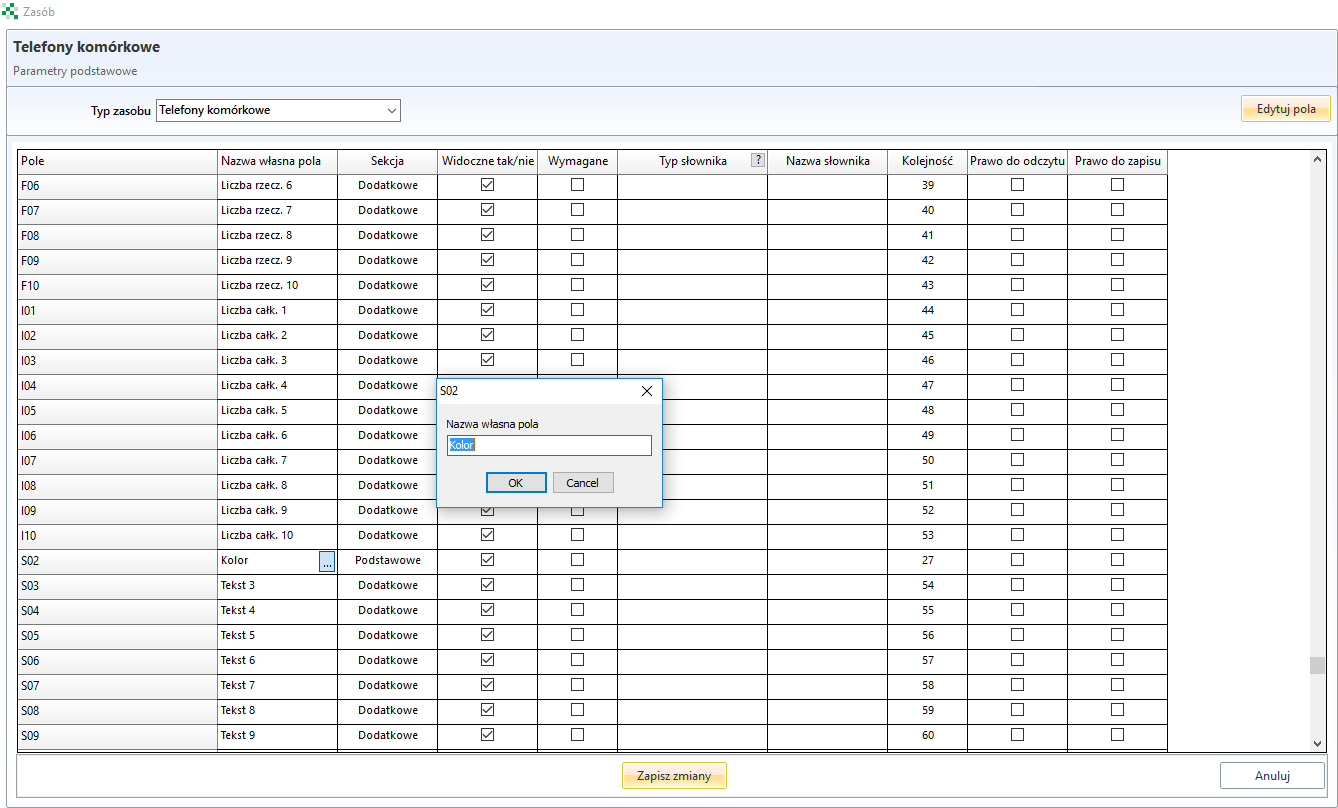
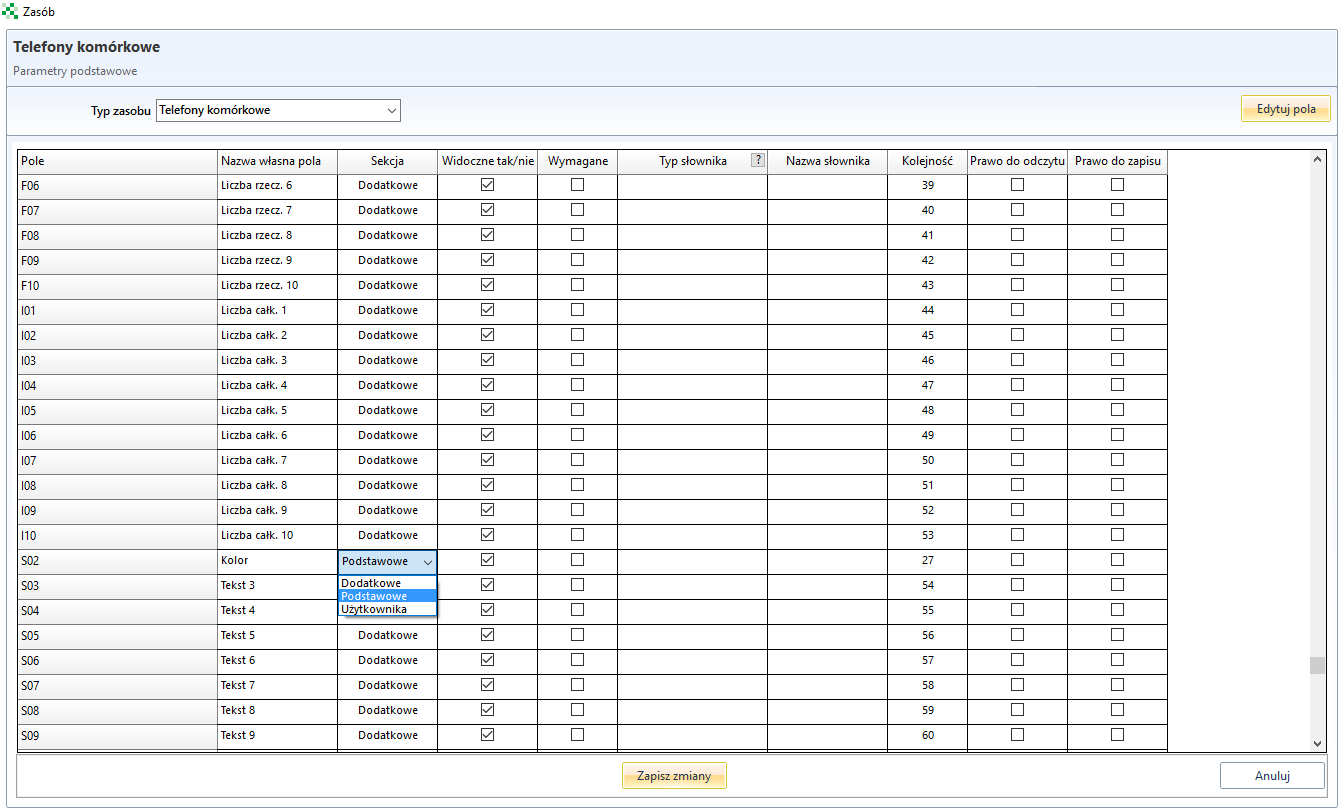
If the field is to be displayed in the section Basic information, select the Basic item from the drop-down menu in the section column.
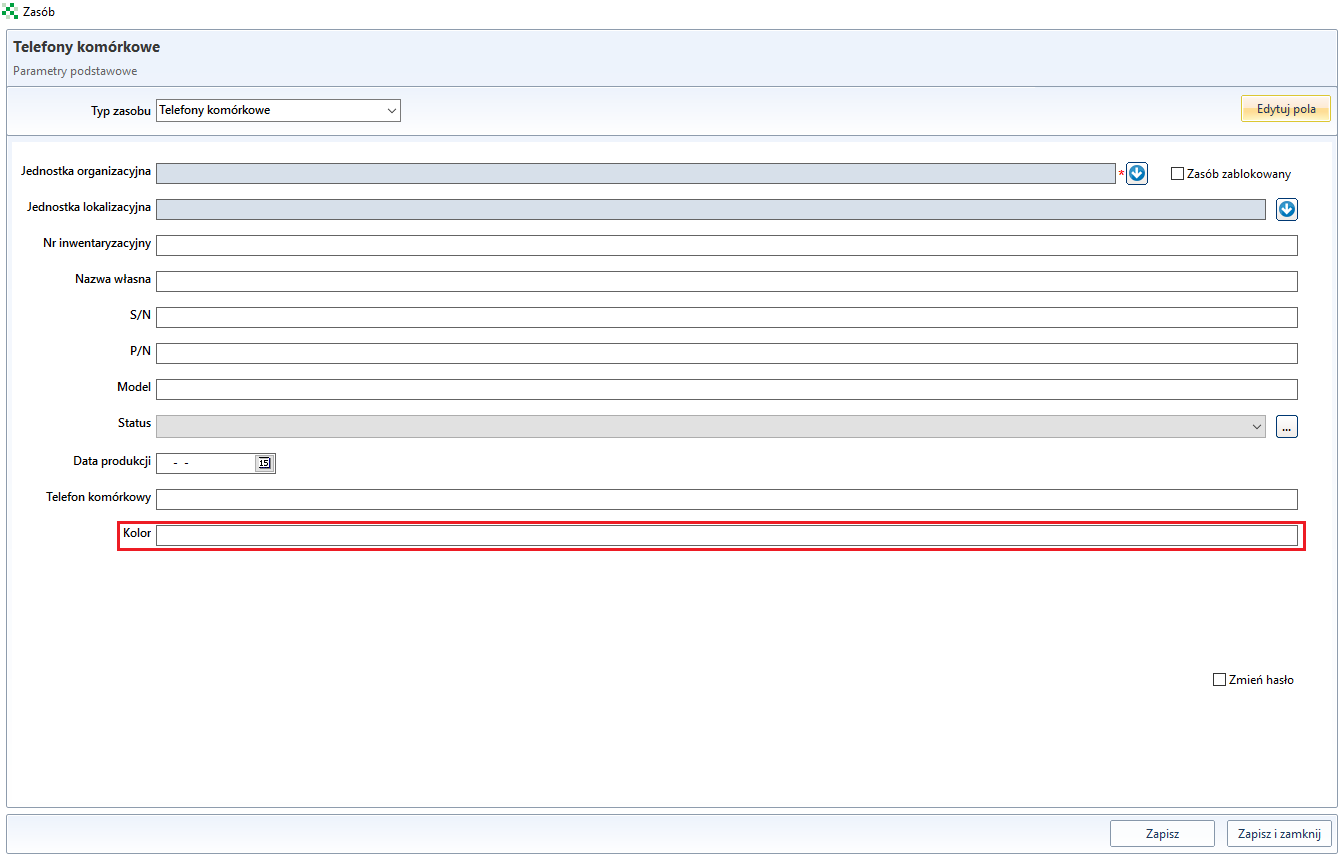
After clicking Save changes and selecting the appropriate resource type, an additional field will appear in the resource data edit box.
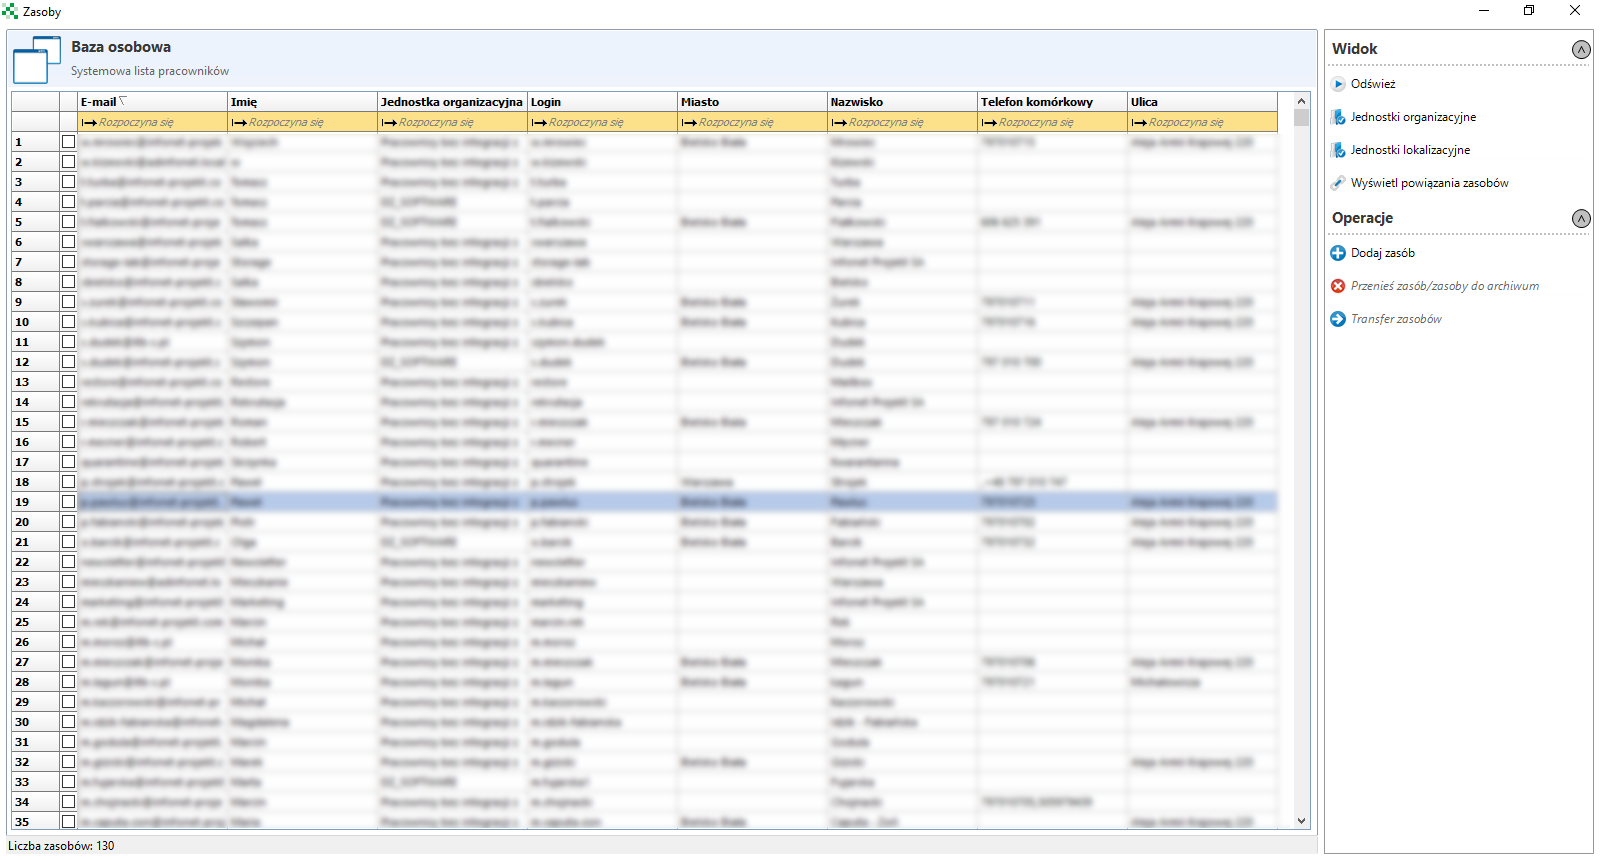
User database
The personal database contains a list of all users in the system.
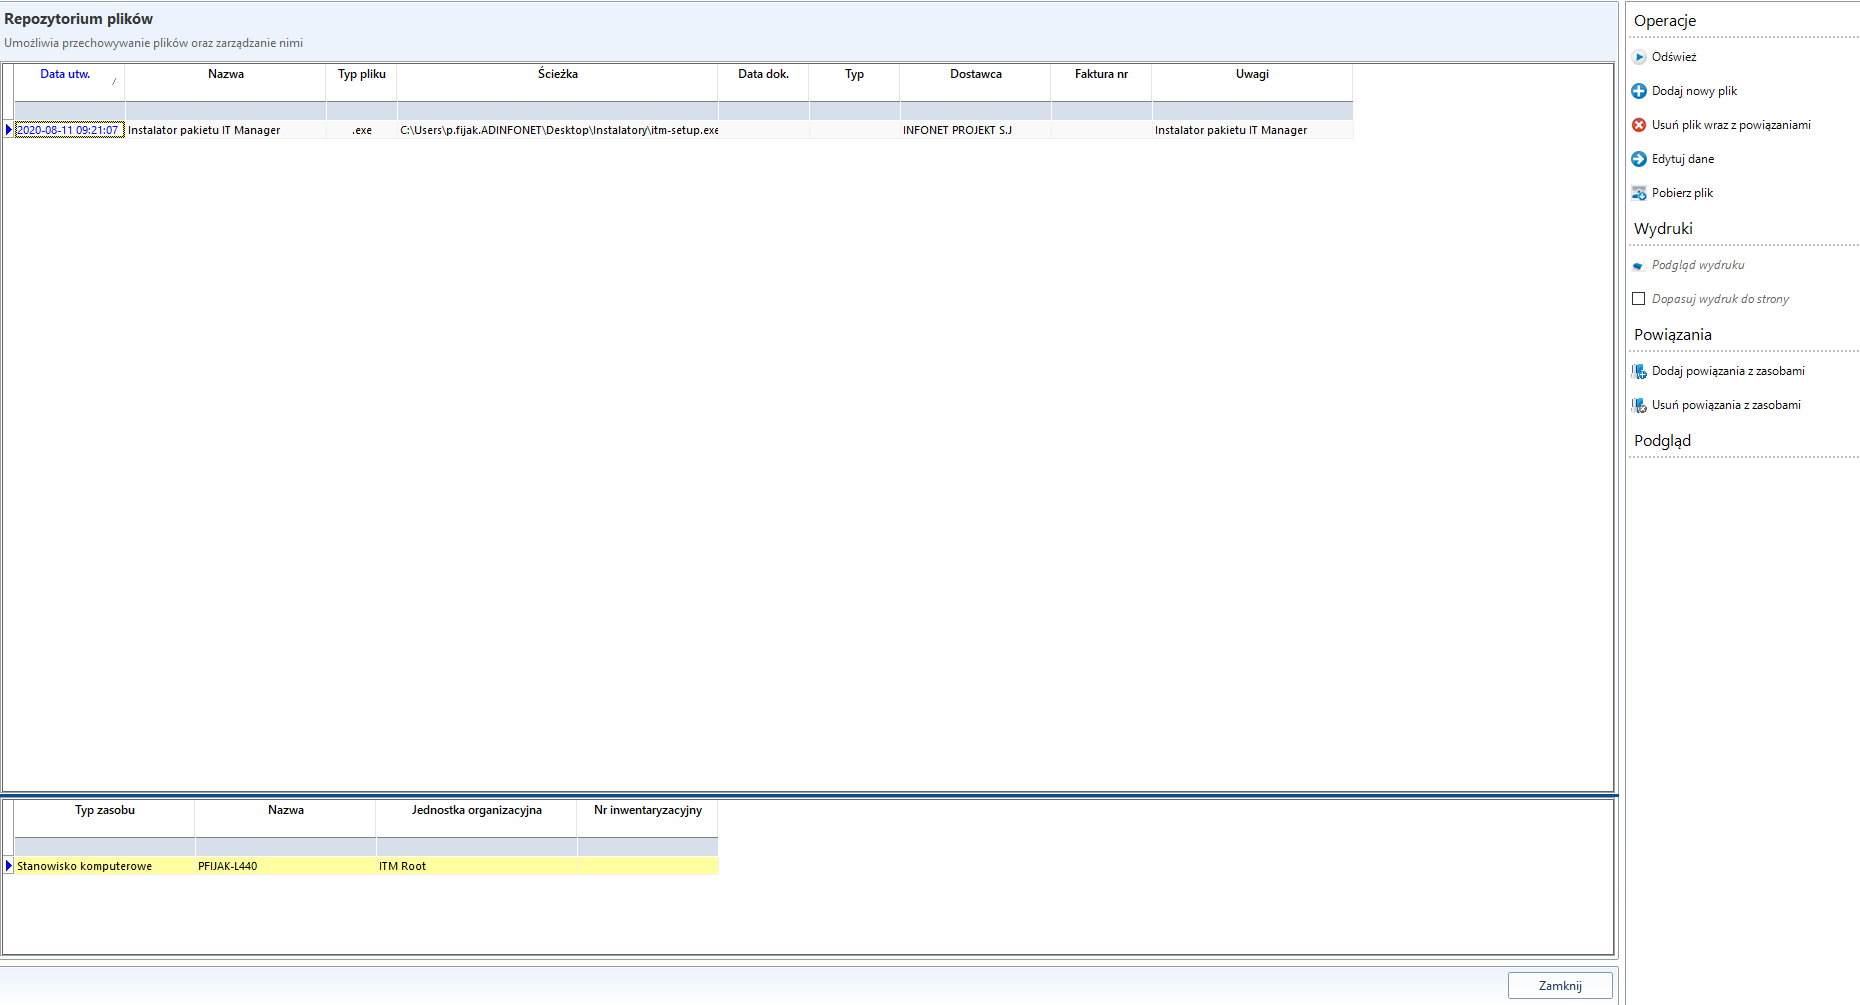
File repository
The file repository is used to add files and bind them to appropriate resources in the system (e.g. invoices for purchasing computer workstations or software licenses).
When you choose to add a new file (Add a new file...) a new window will open. After filling in all necessary information and selecting the resources to which the files are to be assigned (Select resources button), click Save.
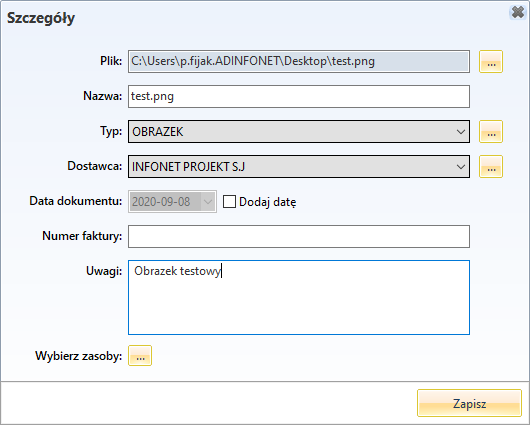
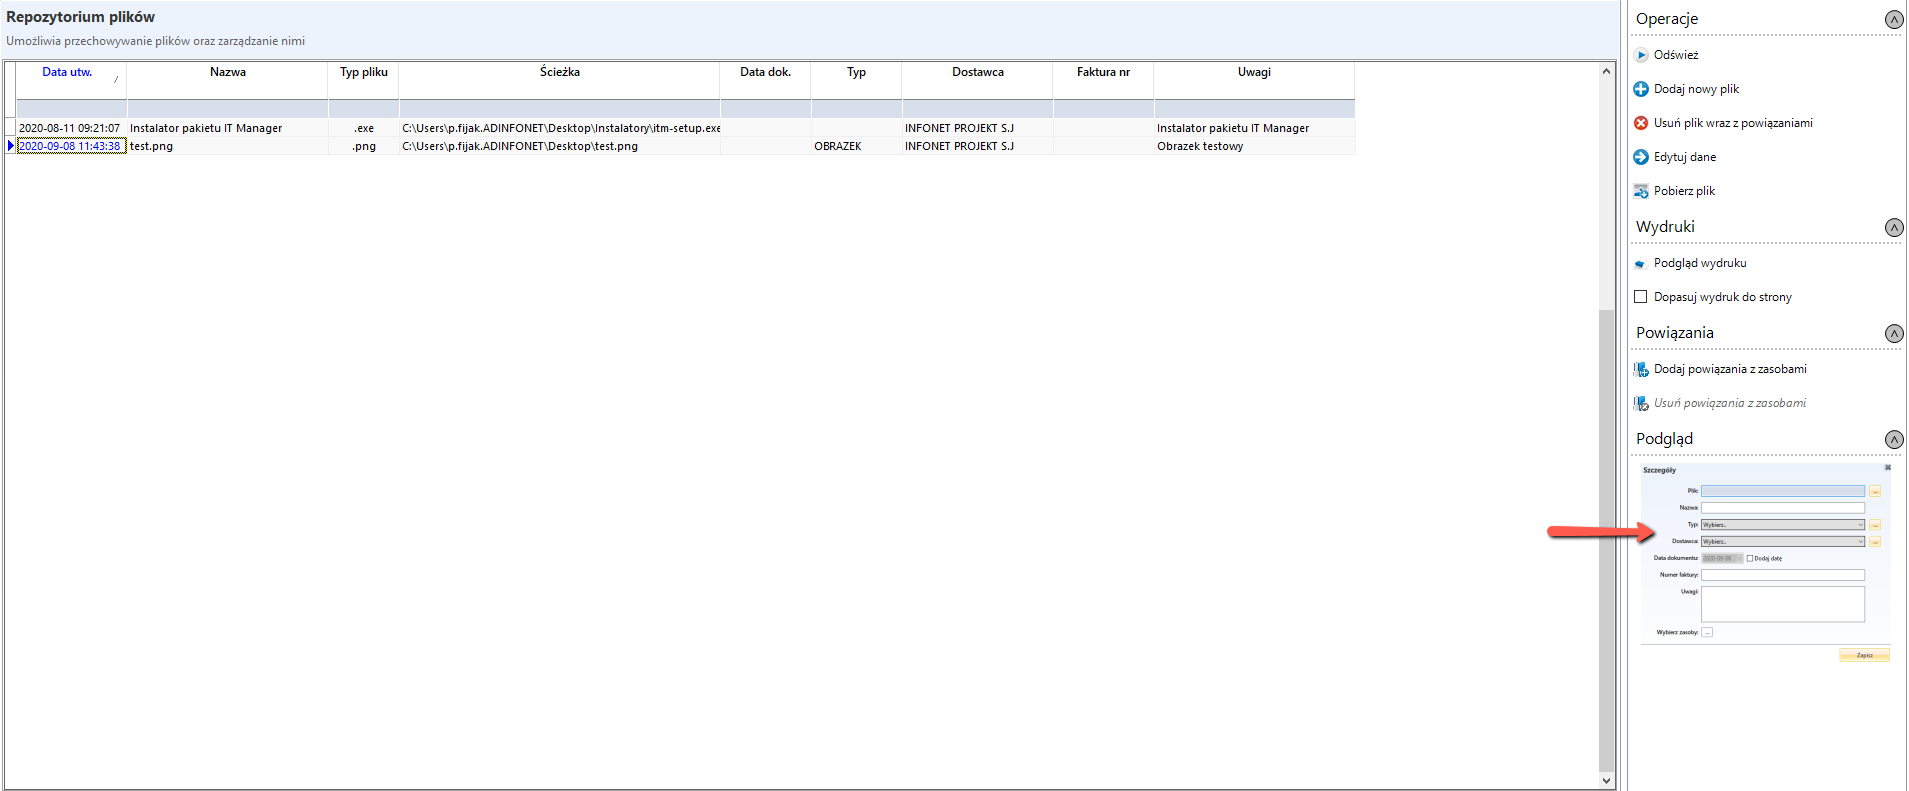
Once approved, a message will appear to confirm that the document has been added. The added file can be viewed as a thumbnail (right panel)
You can also download the file locally to your computer and add or remove related resources.